Selecting the Right Outdoor Site
Sunlight and shade patterns
You should pick a site that gets at least six hours of direct sun each day. In early morning the light stays gentle but powerful enough to fuel growth, and in the afternoon the rays will help your plants develop robust buds. Moreover, you want to notice shade pockets created by trees or buildings. These patterns shift throughout the season, so you should walk the area at different times to track sun angles and shadows.
You also need to prioritize sites with afternoon shade during extreme heat. Cannabis leaves can scorch under midday sun in regions with very high temperatures. Therefore, you should look for spaces near fences or small structures that offer relief without blocking morning rays. Additionally, a spot with some wind exposure helps strengthen stems and reduces humidity around foliage. This balance of light and airflow supports strong outdoor growth.
Soil testing basics
You must test your soil before planting. A simple kit or lab service gives you data on pH levels, nutrient content, and soil texture. Cannabis thrives in slightly acidic soil with a pH between 6.0 and 7.0. If your soil shows imbalances, you can add organic amendments like compost or perlite to improve drainage and nutrient availability. Furthermore, testing reveals whether your soil contains toxins or heavy metals that can harm plant development.
Next, you want to sample soil from different spots within your chosen plot. Dig small holes about six inches deep and collect a handful from each. Mix these samples together to get an average profile. After that, send your sample off or use a home kit immediately. When you receive results, analyze nutrient ratios and pH data. Then you can tailor fertilizers or natural supplements to support vigorous growth and rich bud formation.
Privacy and security considerations
You should evaluate how visible your site is from neighboring properties or public pathways. Privacy plays a key part in outdoor cannabis projects because you want to keep your plants away from unwanted attention. To enhance security, consider installing low-profile fencing or planting hedges that blend with other landscaping. Moreover, you can use trellises or natural screens like bamboo to create a discreet barrier. These measures discourage trespassers while maintaining a neat garden appearance.
In addition, you should plan access control to prevent accidental damage. Place a locked gate or use simple padlocks on garden sheds where you store tools and supplies. Also, installing motion-activated lights can deter curious visitors without drawing constant attention. Meanwhile, be mindful of local regulations about fencing heights and visibility. Always follow community guidelines. By prioritizing discretion and safety, you protect your cannabis from theft and reduce stress throughout the growing season.
Choosing Seeds and Germination
Feminized vs. regular seeds
You have two main seed types: feminized and regular. Feminized seeds produce female plants almost exclusively, which means you avoid male plants that can pollinate and reduce yields. Regular seeds include a mix of male and female genetics and can produce stable offspring for breeders. If you plan to optimize bud production, feminized seeds offer a more predictable harvest. On the other hand, if you want to develop custom strains, regular seeds give you genetic diversity.
When you select white cannabis seeds from a reputable brand, you gain consistent genetics that support reliable yields. Feminized seeds reduce the risk of accidental pollination in your outdoor patch, which boosts overall bud quality. Regular seeds appeal to growers aiming to breed custom strains by combining male and female traits. If you’re searching for high-quality options, cannabis seeds mn offer excellent choices for both beginners and experienced growers. Always align seed type with your goals, and source from trusted suppliers. This approach helps ensure high germination rates and strong plant health.
Germination methods
You can start germination using the paper towel method for quick results. Place seeds between two damp paper towels, keep them in a warm spot, and check them daily. Within two to seven days, you should see small white taproots emerge. As soon as roots reach a quarter inch, carefully transfer seedlings to starter plugs or soil. This method offers a clear view of progress and helps you spot nonviable seeds early.
Alternatively, you may use direct planting by placing seeds one quarter inch deep in pre-moistened soil. This approach reduces handling stress and disturbance to fragile sprouts. However, you should ensure consistent moisture and warmth, ideally between 20 and 25 degrees Celsius. You can also try the glass of water method by soaking seeds for up to 24 hours. After the seed coat softens, move seeds into the soil or paper towel setup to complete germination.
Transplant timing
You should transplant seedlings outdoors when they develop two to three true leaves and strong root systems. At that stage, plants can handle outdoor conditions and stress from moving. Too early, and young shoots may wilt under sun and wind. Too late, and they may suffer from slowed development while they stretch to catch up. For strains like White Rusian Fem, aim to transplant around two to three weeks after germination, depending on growth speed in your climate.
Also, consider daily temperature trends when scheduling transplant day. Choose overcast or mild days to reduce transplant shock. If you have greenhouse space, you can harden off seedlings by moving them outdoors for a few hours each day over a week. This practice strengthens tissues and readies them for full sun exposure. In contrast, abrupt transfer from indoors to full sun can cause leaf burn and stunted growth, which delays your cultivation timeline.
Transplanting and Early Care
Hardening off seedlings
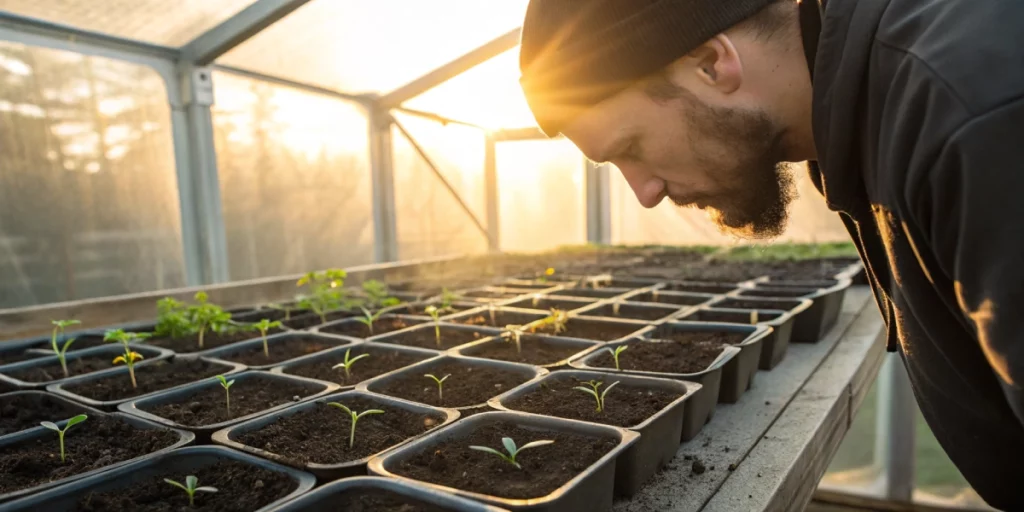
You should introduce seedlings to outdoor conditions gradually. Start by placing them in a sheltered spot with indirect light for a few hours on day one. Each day, extend time outdoors and expose plants to more direct sun and mild breeze. By the end of seven to ten days, seedlings will adjust to temperature swings and wind. This process reduces transplant shock, improves stem strength, and prepares your plants for life in the open.
Meanwhile, monitor seedlings for signs of stress such as wilting or leaf curling. If you notice stress, cut back exposure time and provide extra shade until recovery. Use a fine mist spray to maintain humidity around young foliage. Also, keep a close eye on overnight temperatures; bring containers indoors if a cold snap threatens. A careful approach at this stage leads to healthy, vigorous plants that can handle outdoor challenges.
Spacing and planting depth
You should space cannabis plants at least one meter apart to ensure proper airflow and light penetration. Crowded plants risk mold and mildew issues, which thrive in damp conditions. Additionally, roots need room to expand without competing for nutrients. When you dig a hole, make it deep enough to cover the root ball and a bit of stem. That technique promotes new root growth along the buried stem, strengthening the overall system.
Furthermore, you can adjust spacing based on plant size and training techniques. For compact varieties, reduce spacing slightly but keep enough room for air to circulate. Always plant at a depth that covers the root network without burying the main growing tip. After placing each seedling, firm soil gently around the base. Then water thoroughly to settle soil and eliminate air pockets that could dry out roots.
Watering schedule
You must establish a consistent watering routine in early stages. Young plants need moist, but not soggy, soil to develop roots. You can water deeply once daily in the morning to encourage roots to grow downward. In hotter climates, check soil moisture mid-day and add water if the top two centimeters feel dry. Avoid surface drenching, which can cause root rot and block oxygen.
As plants grow larger, increase water volume while reducing frequency to discourage shallow roots. Mature plants benefit from deep watering that reaches the lower root zone. You should also factor in rainfall. After heavy rain, skip one watering cycle to prevent overwatering. Moreover, install drip irrigation or soaker hoses to provide a steady, gentle water supply. These methods save time and deliver moisture directly to the root zone.
Vegetative to Flowering Transition
Nutrient adjustments
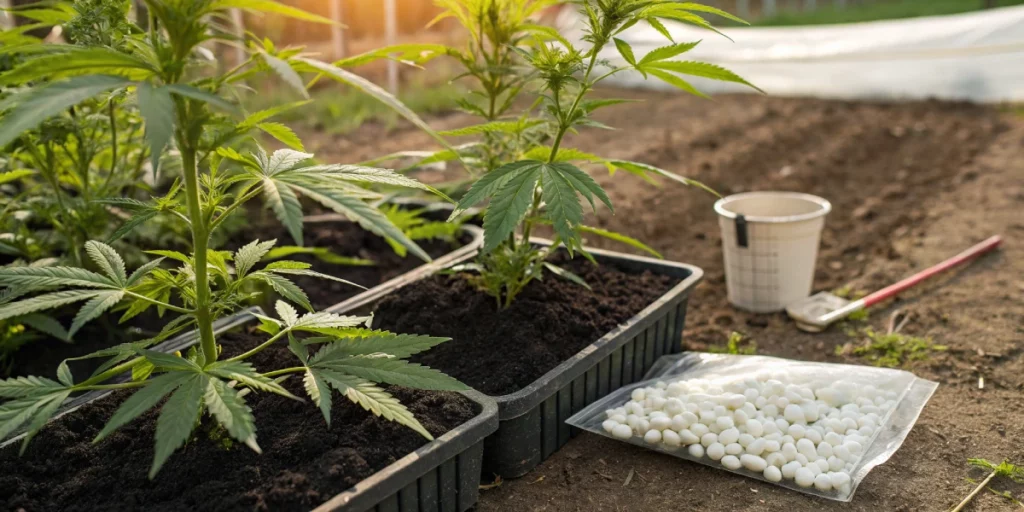
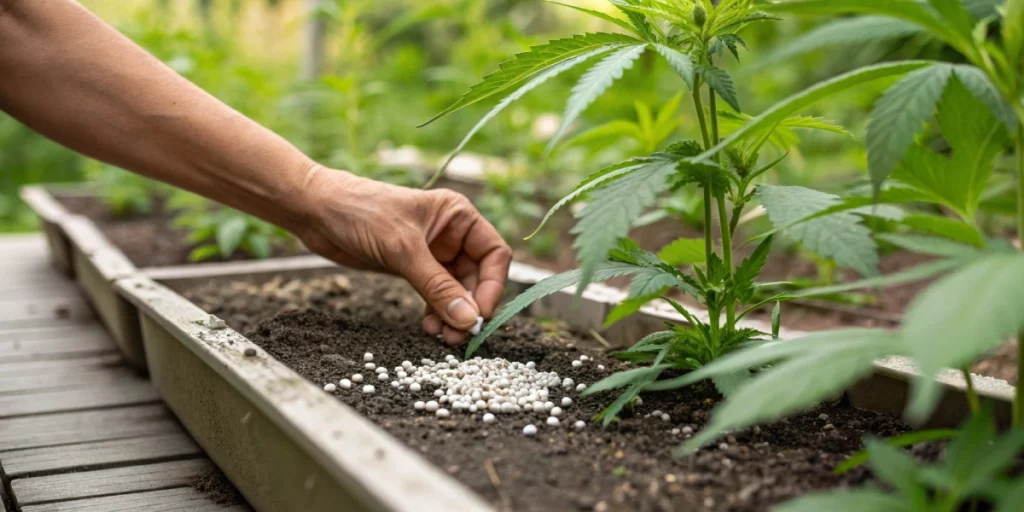
During the vegetative stage, you give plants higher nitrogen levels to fuel leaf and stem growth. Once you see the first white hairs at the nodes, switch to a flowering feed with more phosphorus and potassium. This change supports bud development and resin production. You can choose organic or synthetic fertilizers, but stick to product guidelines. Too much fertilizer at this stage can burn roots and stunt growth.
Furthermore, you should feed smaller amounts more often to avoid nutrient lockout. Test runoff pH to ensure nutrient uptake remains efficient. In smart soil mixes, you may not need extra nutrients until mid-flowering. Always monitor plant color and leaf shape; yellowing or spotting can signal nutrient imbalances. Adjust your schedule accordingly to keep plants in peak health.
Training techniques (LST, topping)
You can use low stress training (LST) to bend stems and create a flat canopy that captures light evenly. Tie branches gently to soft stakes or string, spreading them laterally. This method increases bud sites without cutting the plant. Alternatively, topping involves removing the main shoot tip to encourage two main colas instead of one. Perform topping during early vegetation, when plants display at least three nodes.
Moreover, you should combine LST and topping for maximum yield potential. After topping, allow plants a few days to recover before applying tension for LST. Training helps you maintain canopy height under outdoor restrictions and improves light penetration to lower branches. Always use sanitized tools and gentle materials to prevent damage and infection. With consistent training sessions, you can transform tall, leggy plants into bushy, productive specimens.
Monitoring pests and diseases
You need to inspect plants regularly for signs of pests like aphids, spider mites, and caterpillars. Check both leaf surfaces and stem joints, since insects often hide on undersides. When you spot an infestation, take immediate action with organic controls such as neem oil sprays or insecticidal soaps. You can also introduce beneficial insects like ladybugs to prey on harmful pests.
In addition, you should watch for disease symptoms such as powdery mildew or root rot. Ensure proper airflow by maintaining plant spacing and removing dead leaves promptly. After a rainstorm, gently shake foliage to help leaves dry faster. If you detect mold, prune affected areas and apply a mild fungicide. By staying vigilant, you protect your outdoor patch from setbacks that delay flowering and reduce yield.
Harvesting and Curing Outdoors
Harvest timing indicators
You identify harvest timing by examining the trichomes on your buds. You can use a magnifier to look for clear, cloudy, and amber trichomes. Clear trichomes mean the plant is not ready; cloudy heads offer peak potency; amber trichomes signal more sedative effects. You should also inspect pistils: once about 70 to 90 percent turn dark and curl inward, you know harvest time is near.
Also, you can monitor leaf color to confirm maturity. Fan leaves often yellow as they reallocate nutrients to buds. This natural process indicates that plants have entered final ripening. Avoid waiting too long, since overripe buds may lose potency and develop harsh flavors. When you see the right trichome color, plan your harvest day for dry weather to simplify outdoor processing.
Drying methods
You should hang harvested branches upside down in a dark, well-ventilated space. A shaded barn or tent with mesh racks works well. Ensure temperatures stay between 18 and 22 degrees Celsius and humidity remains near 50 percent. Proper airflow prevents mold growth. Drying takes seven to fourteen days depending on weather conditions and branch thickness.
Alternatively, you can use drying racks to spread individual buds for faster processing. Spread buds evenly and turn them daily for uniform drying. Always keep the area free of dust and pests. You can install a small fan on low speed outside the drying space to move air gently. Avoid direct fans on buds, which can dry buds too quickly and degrade terpenes.
Proper curing process
After initial drying, you transfer buds to airtight jars for curing. Fill each container about 75 percent full to allow gentle air exchange. For the first week, open jars twice daily for a few minutes to release excess moisture and replenish oxygen. This practice prevents mold and promotes slow chemical changes that improve aroma and flavor.
Over the next two to four weeks, reduce jar openings to once every few days. Monitor bud moisture by gently squeezing to test for slight springiness. Curing can last up to eight weeks for maximum smoothness. Always store jars in a cool, dark place to preserve cannabinoids and terpenes. With proper curing, your outdoor harvest develops rich flavor profiles and smooth smoke.
FAQs about how to grow cannabis from seed outdoors
When should I transplant seedlings outside?
You should transplant seedlings outdoors when they have two to three true leaves and strong stems. Aim for consistent daytime temperatures above 15 degrees Celsius and avoid nights below 10 degrees. Also, transplant after hardening off plants for at least seven days. This process prepares them for wind, sun, and cooler temperatures, reducing shock and supporting healthy root expansion for vigorous outdoor growth. Knowing how to grow cannabis from seed outdoors properly is essential to ensure your plants adapt well and thrive in natural conditions.
How often should I water outdoor plants?
You should water young plants daily in the morning, ensuring the top two centimeters of soil stay moist but not waterlogged. As plants mature, shift to deep watering sessions two or three times per week, depending on rainfall and temperature. Always check soil moisture by inserting a finger near the root zone. Adjust frequency when you see drooping leaves or excessive runoff to maintain optimal hydration and healthy root systems.
What pests target outdoor cannabis?
Outdoor cannabis often attracts aphids, spider mites, caterpillars, and whiteflies. These bugs feed on leaves, stems, and buds, causing damage that reduces yield and quality. You should inspect plants weekly, especially the undersides of leaves, to spot early signs. Using organic sprays like neem oil or introducing beneficial insects helps control infestations. Also, maintaining plant health through proper watering and ventilation reduces pest pressure and supports strong outdoor crops.