Indicators of Seed Maturity
Color Changes in Seed Coats
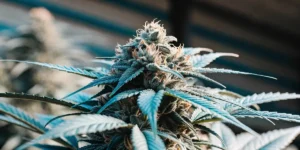
When you inspect seeds closely on your plant, the first hint of readiness appears as a shift in shade. Immature seeds stay pale green or light yellow. As they mature, you will notice deeper browns, tans, or mottled patterns emerging on the coat. These hues signal that the seed has completed nutrient loading from the parent plant and is prepared for drying and storage. Keep observing daily under good light to track these subtle shifts and note exactly which week each change occurs, building a reliable calendar tailored to your strain.
Regular color checks help you avoid harvesting too early or letting seeds overripen. Aim to pick seeds when most have turned solid brown or exhibit flecks of darker pigment, indicating full development. Seeds that turn too dark, black, or show cracks may have aged past peak vitality and can harbor fungal spores. By choosing seeds at their richest hue, you preserve maximum germination potential and ensure vigorous seedlings. Stay consistent with your observations, record dates, and compare results season to season to refine your timing.
Hardness and Texture Tests
You can assess firmness by gently rolling a seed between your thumb and forefinger. Immature seeds feel soft and may dent under slight pressure. In contrast, mature seeds resist gentle squeezing and feel firm yet not brittle. Avoid giving seeds a harsh squeeze; the goal is to check resilience rather than crush them. Regular tests help you establish baseline firmness for your specific strain, empowering you to spot even slight deviations in future harvests.
Texture matters as well as firmness. Run your fingers along the seed’s surface and note if it feels smooth or slightly ridged. Mature seeds develop a lightly ridged surface and a papery sheen that hints at a well-formed protective coat. Seeds still maturing often feel moist, waxy, or sticky from residual plant sap. Combine tactile tests with color assessments for a reliable maturity check. These hands-on methods give you confidence that you harvest at the optimal moment, reducing guesswork and protecting your yield — especially when working with premium genetics like the Medusa F1 Auto strain.
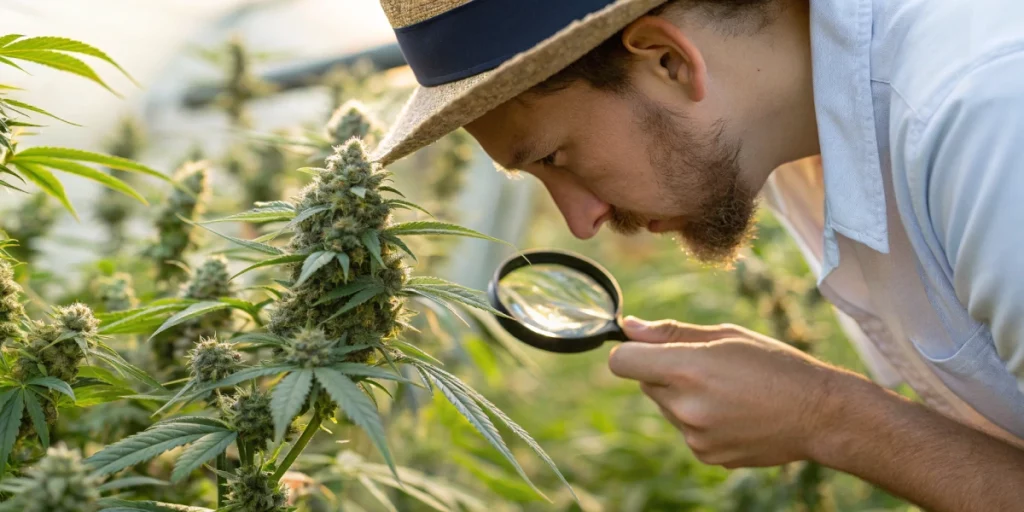
Trichome Observation
You should examine pistils and trichomes on seed-bearing flowers using a magnifier. Clear or milky trichomes suggest the plant still focuses on resin rather than seed development. When you spot amber or brown trichomes, seed maturity often follows soon. These resin glands darken as cannabinoids shift, signaling that the plant’s energy allocation has moved on from bud formation to seed filling. Tracking trichome color guides you in timing your seed harvest precisely.
Focus your magnifier on areas near developing seeds, not on leaves or sugar leaves around buds, to avoid misleading cues. Trichomes on bracts around the seeds show more accurate maturity clues. Clean your lens before each session to get sharp visuals and note the percentage of amber versus cloudy glands. By combining trichome checks with seed coat color and firmness, you build a strong, multi-point signal for peak readiness. That precision ensures you pick seeds that will germinate reliably and produce strong, uniform seedlings.
Ideal Harvest Timeframes
Days from Flowering to Seed Set
You must note the interval between the start of flowering and seed ripeness. Most strains require six to eight weeks of bloom for seeds to mature fully. At week four, pistils may appear, but seeds remain soft and underdeveloped. By week six, expect firm seeds with changing coats, and by week eight, most seeds should reach peak viability. Mark the flowering start date on your calendar to plan seed checks at key milestones and avoid missing crucial windows. Once harvested, consider the best way to store cannabis seeds long term to preserve their viability for future use.
Different genetics shift this timeline slightly. Fast-flowering strains may finish seeds in five weeks, while others take up to nine. Track past harvests to refine your schedule and identify trends in each cultivar’s development. This data helps you predict when to inspect seeds more actively and when to prepare drying spaces. With reliable records, you avoid missing the prime window and reduce waste from seeds that either fall prematurely or overripen on the vine.
Climatic Influences
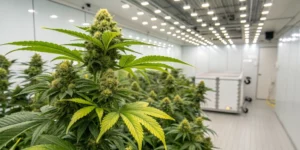
Your local climate plays a strong part in seed development. Warm days and cool nights accelerate ripening by enhancing nutrient translocation to developing seeds. Extreme heat or prolonged humidity delays drying on the plant and can reduce seed viability by promoting mold. Aim for stable temperatures between 20–25 °C (68–77 °F) and relative humidity below 60 percent. If your region varies widely, consider greenhouse or indoor adjustments to maintain ideal conditions.
Rainy or muggy weather may force you to harvest slightly earlier. Prolonged moisture can lead to mold on seed pods and leach nutrients back into the plant. Watch local forecasts daily and adjust your timing accordingly. Even small shifts in temperature or humidity can change seed readiness by a few days. Adapting to weather protects your crop and ensures healthy, viable seeds. Consider using shade cloths or temporary shelters to buffer sudden storms and extend drying time on the plant. If you’re growing Recon Autoflower, this adaptability is especially important, as its rapid life cycle makes timing even more critical.
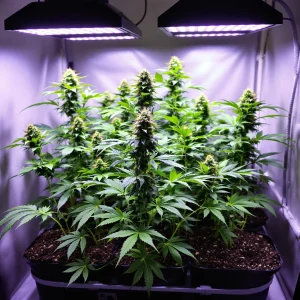
Photoperiod Effects
Most cannabis plants react to light hours, not calendar dates. Under long daylight, female flowers focus on resin, not seed development. When you switch to a shorter cycle—commonly 12 hours light and 12 hours dark—plants allocate energy to maturing seeds. That triggers rapid seed filling over the next several weeks, so maintain the schedule strictly to avoid stress-induced delays or hermaphroditism.
Keep light schedules consistent to avoid stress. Interruptions in darkness can reset trichome and seed maturity, confusing your timing cues. If you grow outdoors, monitor day-length changes and plan supplemental lighting if necessary to maintain uniform cycles. Indoors, use timers for precision and avoid opening grow-room doors during dark periods. Consistent photoperiods ensure seeds reach peak viability without unwanted delays or premature senescence.
Harvesting Techniques
Gentle Extraction Methods
Choose hand-picked harvests to reduce seed damage. Snip mature seed pods individually rather than stripping entire branches. That method gives you control over each seed cluster, allowing you to focus on only those ready. Work slowly and hold the pod at its base to avoid pulling on delicate stems or seeds, minimizing stress on the plant and retaining quality in unripe pods that you can leave in place.
Always handle pods over a clean tray or cloth so you catch any seeds that drop during cutting. Use sharp, sterilized scissors or snips for clean cuts, which help prevent fraying or crushing of seed coats. Minimize shaking or rough handling. A gentle approach guards the shape and protective coat of each seed, boosting germination rates later. With practice, you’ll develop a rhythm that speeds up the process while maintaining high standards.
Minimizing Seed Damage
After clipping, avoid tossing pods into containers. Instead, layer pods gently in breathable baskets or trays where air circulates freely. Avoid stacking too many pods together, as trapped moisture can bruise seeds and create hot spots. Spread them single-layered to keep airflow consistent, promoting even drying and protecting seed integrity.
Wear clean gloves to keep oils off seeds, which can interfere with viability and invite mold growth. Change gloves if they get damp or dirty. Use latex or nitrile rather than cotton to minimize particulate contamination. By keeping seeds dry and untouched, you lower the risk of fungal growth. These simple hygiene steps preserve seed integrity and improve success when you plant, giving you peace of mind that each seed stands its best chance.
Tools and Equipment
Basic gear helps you harvest seeds efficiently. You will need clean scissors, breathable trays, microscopes or magnifiers, and gloves. Collect all tools in a dedicated harvest kit to keep them free from contaminants and ready at hand. Clean and sterilize each item before use, using isopropyl alcohol on metal blades and washing trays in warm, soapy water.
Invest in mesh screens for sorting debris from seeds later, and quality digital hygrometers and thermometers to help you track drying conditions precisely. Good magnification tools let you spot maturity indicators without guesswork. Consider a humidity-controlled cabinet if you harvest in a humid climate. With the right setup, you speed up harvest day and improve seed quality, saving time and boosting your confidence in consistent results.
Post-Harvest Seed Processing
Cleaning and Sorting
Once pods dry slightly for a day or two on the plant, gently open them to release seeds. Do this over a fine mesh screen so chaff and plant material fall away. Shake the screen lightly to separate seeds from debris. Repeat this process a few times for cleaner results, but avoid over-shaking, which can bruise fragile coats and reduce viability.
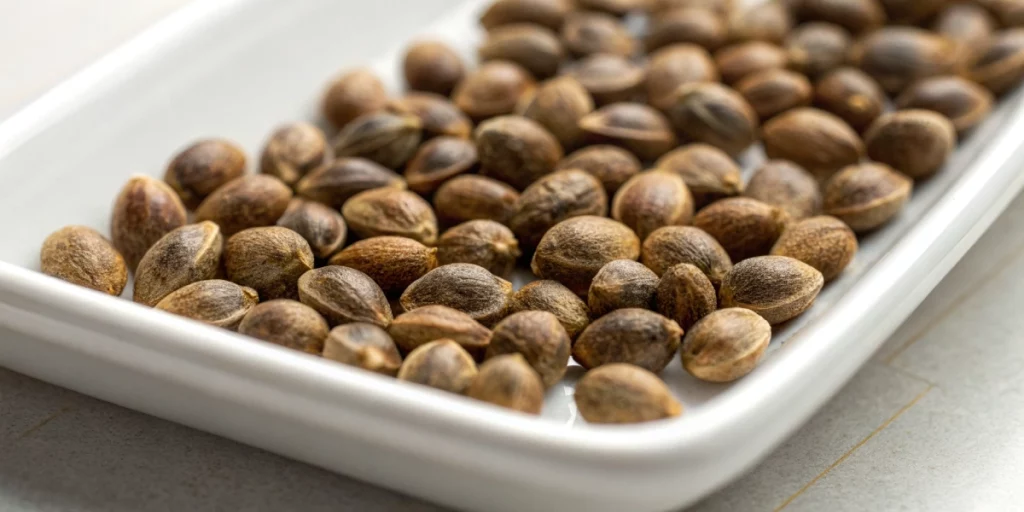
Sort seeds by size and color. Discard any that stay pale or feel soft, as they likely lack fully developed embryos. Healthy seeds look plump, firm, and uniformly colored. Use tweezers for precise handling of individual seeds when sorting small batches. Store sorted seeds in labeled envelopes or glass vials. That organization helps you track strain, harvest date, and germination rates later, making planning your next grow far more efficient.
Drying Protocols
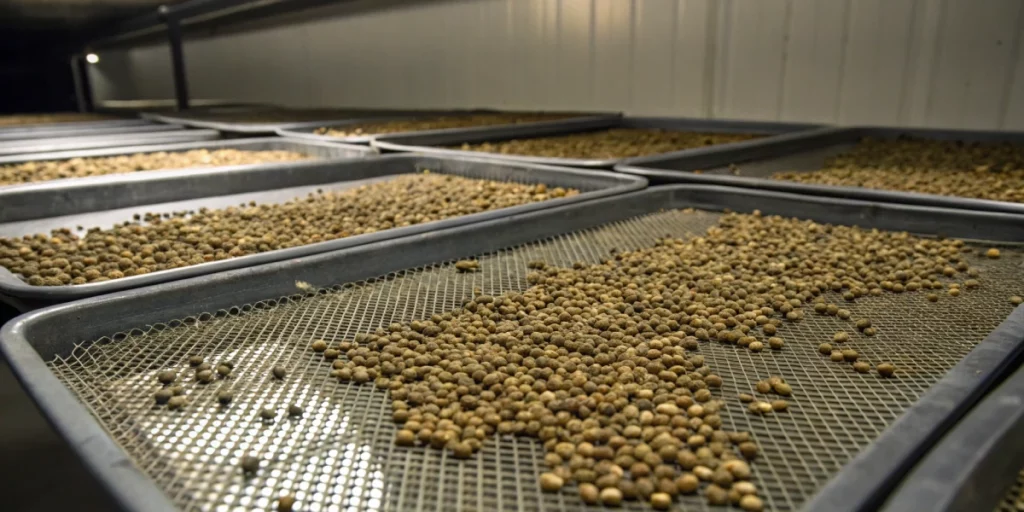
After cleaning, dry seeds at room temperature in a dark, low-humidity space. Spread seeds on parchment paper or breathable trays in a single layer. Keep temperatures steady around 18–22 °C (64–72 °F). This gentle method prevents seed coats from cracking too quickly and protects embryos inside. Avoid fans blowing directly onto seeds, which can overdry shells.
Monitor moisture over several days. Turn seeds daily to ensure even airflow and prevent mold forming on the underside. When seeds feel firm, dry, and emit a faint nutty aroma, they are ready for storage. Avoid direct sunlight or heated air, which can damage delicate internal structures and reduce long-term viability. Proper drying lays the foundation for robust germination rates down the line.
Removing Debris
After initial drying, pass seeds through a finer sieve to catch leftover dust or small chaff bits. Repeat sorting under a bright light source to spot debris that could harbor mold or pests. That extra step ensures you store only clean seeds that remain viable for months or years. Consider using a small vacuum attachment with adjustable suction to remove stubborn particles without touching seeds.
Excess debris can absorb moisture and reduce shelf life by creating micro-environments where mold can thrive. By removing all fragments, you maintain a stable environment during storage. Clean seeds give you peace of mind and boost germination rates when planting season arrives. This attention to detail separates amateur efforts from professional-grade seed preservation.
Ensuring Viability After Harvest
Testing Germination Rates
Before bulk storage, test a small batch of seeds for germination. Place ten seeds on a damp paper towel inside a sealed plastic bag. Keep the bag in a warm spot around 22 °C (72 °F). After three to five days, count how many sprout. That percentage predicts overall viability, helping you decide whether to plant immediately or recondition seeds further.
Record these results alongside your seed lot details in a simple logbook or spreadsheet. If germination falls below 80 percent, consider planting soon or discarding questionable seeds. Regular testing gives you confidence that most seeds will grow into robust plants when you start your next crop. It also reveals storage issues early, so you can adjust humidity controls before they impact every seed in your collection.
Storing Immediately
Once seeds pass testing, move them directly into airtight containers. Use small glass jars or sealed mylar bags with desiccant packs to lock in low humidity. Keep the storage containers in a cool, dark place around 4–8 °C (39–46 °F). That slows metabolic processes and preserves vitality for months or even years without noticeable decline.
Label each container with strain name, harvest date, and germination rate using waterproof markers. Consistent labeling helps you select the best seeds when you begin cultivating again. Store containers in a freezer-safe bin for additional temperature stability if space allows. Fast, organized storage after testing locks in high viability and prevents accidental exposure to moisture or light.
Monitoring Moisture Levels
Check stored seeds monthly for humidity inside containers. Use mini digital hygrometers to measure moisture accurately. If levels rise above 8 percent relative humidity, open containers briefly to air out seeds or replace desiccant packs. Maintain a schedule for checking each seed lot to catch any issues early.
Too much moisture leads to mold growth and embryo damage, silently reducing viable seeds over time. By staying vigilant, you prevent silent losses and keep seeds ready for planting whenever you are. Simple monitoring routines protect your investment and ensure healthy seedlings, letting you focus on growing without worrying about seed quality.
FAQs about when to harvest cannabis seeds
How can I tell seeds are ripe?
You spot ripe seeds by looking for rich brown coat colors and firm texture. Roll seeds gently between fingers; mature ones resist mild pressure and feel smooth and slightly ridged. Using a magnifier to check trichomes on nearby bracts confirms readiness. If most seeds meet these criteria, they are ready for harvest without risking losses from underdevelopment.
Does weather affect harvest timing?
Weather influences timing greatly. Rain or high humidity slows drying and raises mold risk on seed pods. Warm, dry conditions speed seed maturation but can overdry pods if you wait too long. By tracking local forecasts and adjusting harvest dates by a few days, you protect seed health and secure a strong germination rate in any climate.
Can I harvest early without loss?
Harvesting seeds too early leads to low germination rates and weak seedlings. If rain or mold threaten your crop, collect slightly under-ripe seeds and finish drying indoors. Expect reduced viability when you cut the schedule. Aim for the richest coat colors to limit losses and finish seeds gently to preserve as much vigor as possible.