Typical Sprouting Timeframes
Average Range of Days
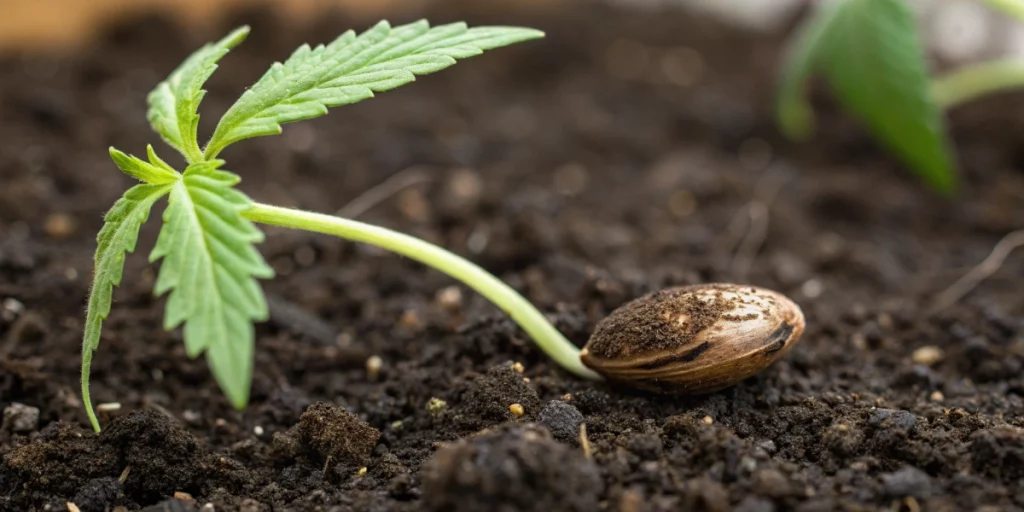
Most cultivators observe cannabis seeds begin to push out a tiny taproot within two to seven days after planting, though many see it closer to the middle of that window when conditions stay stable. You can gently lift a corner of the growing medium, whether soil, coco, or paper towel. to check for a slender white tip without disturbing the seed too much. Keeping temperature and moisture steady helps seeds complete their internal processes at the expected pace, reducing surprises and lengthy stalls.
Even within this span, individual seeds may crack earlier or later based on subtle variations in storage history and moisture distribution. A seed stored properly in a cool, dark place often germinates toward the faster end, while one exposed to fluctuating heat or humidity leans slower. For example, strains like Critical Kush Auto, known for their reliability and fast germination, tend to sprout more consistently under stable conditions. By tracking your average range of days across multiple batches, you build confidence in predicting when most of your seedlings will emerge and can plan lighting and transplant schedules more accurately.
Fastest vs. Slowest Cases
In the fastest scenarios, top-tier seeds in perfect warmth and moisture split open to reveal a taproot in as little as 24 hours after submersion or planting. These standout performers benefit from recent harvest, optimal storage, and pre-soak techniques that soften the shell ahead of time. When you pair a humidity dome with a heated mat set to maintain around 23 °C, you often see roots peeking through in under two days, signaling that your setup hits every mark for rapid sprouting.
On the opposite end, the slowest cases can stretch up to ten or even fourteen days before showing any visible root, especially if seeds face cooler temperatures, inconsistent moisture, or marginal viability. When seeds linger beyond ten days, you must inspect them for mold or rot that can kill the embryo. In these slow cases, tweaking warmth by a few degrees or switching to a fresh, moist paper towel method often reignites the process and brings stubborn seeds into the viable sprout stage.
Environmental Influences
Temperature stands as the dominant environmental influence on seed germination speed. Cannabis seeds germinate best between 21 °C and 25 °C, where internal enzymes convert stored starch into energy most efficiently. Cooler settings below 18 °C drastically slow metabolic reactions, while highs above 27 °C risk evaporating moisture too quickly from the medium. You maintain a stable ambient temperature—ideally with a digital thermostat and heat mat—to keep seeds actively metabolizing and avoid heat or cold stress.
Moisture levels play a close second in shaping germination timelines. Too much water floods air pockets, suffocating seeds, and invites pathogens that cause rot. Too little moisture leaves the shell too dry and tough to crack. Aim for a sponge-like dampness without saturation: mist daily or use a covered tray to trap humidity, and monitor the medium’s weight as a proxy for water content. By balancing warmth and moisture, you neutralize the main environmental influences that otherwise stretch germination times.
Factors That Accelerate Sprouting
Optimal Temperature
Seeds thrive in a temperature range of 21 °C to 25 °C, where cellular activity peaks and roots emerge swiftly. You can use a seedling heat mat beneath your tray, calibrated through a thermostat, to lock in this sweet spot day and night. Consistent warmth activates the seed’s internal enzymes, prompting accelerated cell division and energy conversion from stored nutrients into root growth.
Temperatures outside that range compromise speed. Nights below 18 °C cause enzyme activity to pause, extending sprouting beyond a week, while daytime peaks above 28 °C dry out the surrounding moisture. You avoid these extremes by situating your setup in a climate-controlled room or employing insulated trays. By locking in optimal temperature, you streamline sprouting and maximize your germination success rate.
Humidity Levels
Maintaining humidity around 70 percent keeps seed shells pliable and enables emerging roots to break through without damage. Covering trays with a clear dome or moist paper towels creates a humid microclimate that emulates post-rain soil conditions. This environment speeds up germination by preventing premature drying of the shell.
When relative humidity dips below 50 percent, seed shells can harden and resist penetration, stalling sprouting even if temperature conditions are ideal. You counter this by misting the medium twice daily or using a humidifier nearby. By controlling humidity levels precisely, you help seeds mobilize stored nutrients and sprout more readily, trimming days off your germination schedule.
Pre-Soak Techniques
Pre-soaking seeds in clean, lukewarm water for 12 to 24 hours softens the shell and kick-starts hydration without risking rot if monitored properly. Place seeds in a glass, cover to prevent evaporation, and watch for tiny bubbles on the shell—these indicate active metabolic processes ready to push roots outward. Once bubbles appear, transfer seeds gently to your chosen germination medium.
Some growers add a drop of hydrogen peroxide or a diluted nutrient solution to the soak, reducing pathogens and giving seeds an extra energy boost. You must avoid over-soaking, though; leaving seeds in water beyond 24 hours can drown the embryo. Applying these pre-soak techniques reliably cuts several days off sprouting time by jump-starting hydration and softening hard shells before planting.
Factors That Delay Sprouting
Old or Poor-Quality Seeds
Seeds stored for over a year or exposed to heat, light, or moisture fluctuations lose vigour and germinate more slowly if at all. You might plant these older seeds only to watch them remain dormant beyond two weeks, forcing you to reallocate space and resources. Testing seeds on a paper towel first helps avoid wasted effort in your larger setup.
Seeds from unreliable suppliers often carry physical damage or incomplete development that resists sprouting. You minimize this risk by sourcing from reputable breeders and storing new seeds in airtight containers around 4 °C. By starting with fresh, high-quality seeds and discarding old batches, you eliminate a major barrier to timely germination.
Overly Dry Conditions
When soil, peat, or coco mix dries to a dusty, cracked layer, seeds struggle to penetrate the hardened surface. Lack of moisture halts shell softening, leaving the embryo trapped inside. You maintain medium dampness by covering containers with plastic wrap or lids and spraying lightly twice daily to prevent crust formation.
Dry air also accelerates evaporation at the surface, further depriving seeds of necessary water. Simple fixes like placing a humidity tray beneath your germination setup or using a fine mist nozzle—help maintain an even moisture level. By avoiding overly dry conditions, you ensure seeds remain hydrated and ready to sprout.
Excessive Cold
Temperatures below 18 °C slow enzyme activity inside seeds, causing shells to crack without immediate root emergence. You may observe split seeds but no white taproot until the medium warms up several days later. Cold snaps in unheated rooms can extend sprouting well past the typical seven-day window.
Prevent excessive cold by situating trays near a stable heat source or using seedling heat mats controlled by a digital thermostat. Keeping night and day temperatures within a narrow band prevents cold stress and accelerates consistent root growth. By eliminating cold spots in your setup, you coax seeds into faster, more reliable sprouting.
Monitoring and Encouraging Sprouts
Daily Checks
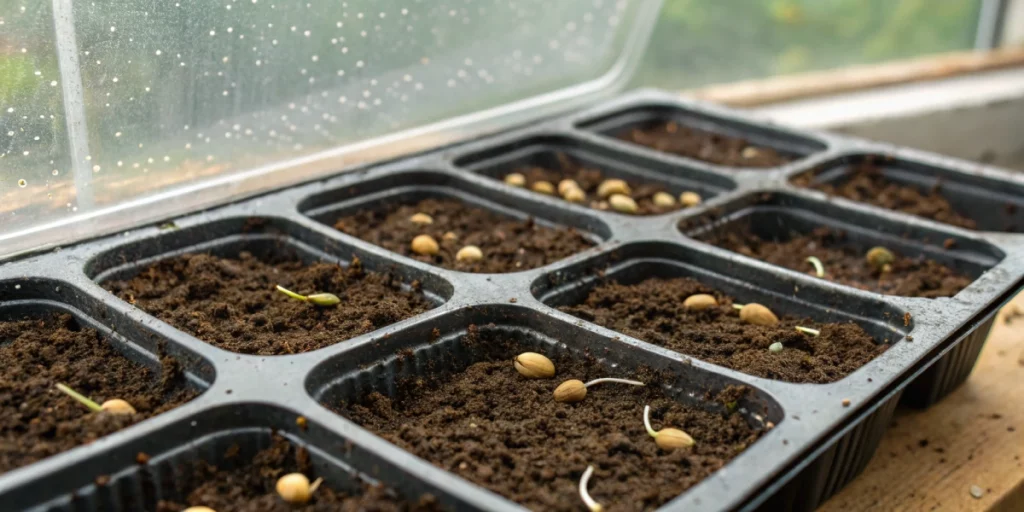
Inspect your germination trays every morning and evening to catch early signs of issues like mold, dry spots, or pests. A quick glance under a humidity dome can reveal developing taproots without disturbing the medium too much. Consistent monitoring lets you adjust moisture or temperature before problems escalate, protecting your entire batch.
Keeping a log of germination progress helps you spot patterns and refine your technique over time. Record which seeds germinate fastest, note any environmental tweaks you make, and track how those adjustments impact sprout rates. By reviewing these notes, you continually improve your setup and predict future germination windows more accurately.
Gentle Agitation
Lightly stirring medium around seeds encourages oxygen flow and prevents stagnant pockets that slow root development. Using a small pipette or your finger wrapped in plastic, you can gently shift the growing mix once per day without displacing seeds. This agitation improves air-to-root contact, supporting metabolic processes crucial to sprouting.
Handle this step with care to avoid uprooting seeds entirely. Minor movements suffice to break compaction and introduce fresh oxygen. By incorporating gentle agitation into your routine, you reduce the chance of low-oxygen zones that often delay or inhibit uniform germination across your batch.
Small Water Changes
Regularly changing standing water in trays prevents bacterial and fungal buildup that can stunt or kill germinating seeds. Drain and refill glass trays or dishes every two days when using water-based germination methods, maintaining pristine conditions. For soil or coco-based germination, top-water lightly with fresh water to replenish moisture without drowning seeds.
When using paper towels, replace them if you notice slimy residue or odor, then re-wrap seeds in fresh, damp towels. Maintaining clean water and fresh medium helps seeds focus energy on root growth instead of fighting off pathogens. By prioritizing small water changes, you boost overall germination success and avoid lengthy delays.
When to Move on Without a Sprout
Identifying Non-Viable Seeds
If a seed shows no taproot after ten to fourteen days, it likely remains non-viable. Carefully inspect such seeds for shell damage, green or grey discoloration, or a foul smell—clear signs of internal decay. Avoid forcing them open, which can introduce pathogens to nearby healthy seeds and compromise your batch.
Mark non-viable seeds and remove them from your setup to prevent mixing with viable ones. By isolating inactive seeds, you reduce disease risk and keep your germination area organized. Focusing on seeds that show promise allows you to allocate space and resources efficiently for the next round.
Secondary Germination Attempts
For seeds that stall but show no signs of decay, try a secondary germination method. Transferring them from soil to a damp paper towel or switching from towel to soil can reignite the process. Fresh medium and renewed moisture often coax out roots in seeds that initially struggled.
Be sure to work in sterile conditions—fresh towels, clean hands, and sanitized containers—to avoid introducing mold. These secondary efforts can rescue seeds that just needed a different environment. By giving delayed seeds a second chance, you maximize your overall germination rate without wasting viable genetics.
Knowing When to Discard
When seeds remain dormant after two weeks in varied germination methods, retire them. Holding onto dead seeds clutters your workspace and wastes time. Composting usable seed shells or sealing them in a bag for disposal prevents accidental planting later on.
Deciding to discard helps you stay focused on seeds that clearly express life. This clarity streamlines your process and removes mental burden over endless waiting. By responsibly discarding final non-viable seeds, you keep your grow area tidy and prepare for more successful future rounds.

FAQs about how long does a cannabis seed take to sprout
What if no sprout by day 7?
By day seven without visible cracking, review your moisture, temperature, and seed quality. Gently lift a corner of your medium or re-wrap seeds in a fresh damp paper towel. Raising the temperature by a couple of degrees or improving humidity with a dome often revives slow seeds. In most cases, simple tweaks rather than full re-soaks coax roots to emerge, saving potentially viable seeds without starting over completely.
Can I plant before sprout?
Planting seeds directly into soil before taproots appear works if you maintain stable warmth and moisture. Place seeds about 1 cm deep, cover lightly, and keep the soil damp but not waterlogged. Soil offers natural buffering against drying and temperature swings. With consistent care daily misting and a steady heat source roots will emerge underground without the need to view them first.
Do different strains vary?
Yes, genetic factors cause slight variation in germination times for cannabis. Fast-growing hybrids often crack within two to three days, while dense Indica varieties sometimes take up to seven days. Seed coat thickness, storage history, and breeder techniques also play roles. Tracking each strain separately in your germination log lets you refine expectations and plan lighting schedules more accurately.