Complete Cannabis Growing Guide for Beginners
Mastering Cannabis Seeds
Your journey begins here. Learn the fundamentals of what makes a great plant.
The Foundation of Every Great Plant
Cannabis seeds are nature’s perfect packages, containing everything needed to grow into magnificent resin-covered plants. These small but mighty seeds hold the root, stem, and first leaves, all protected by a layer called the pericarp. Inside each seed is a tiny embryo waiting for the right conditions to spring to life.
Seeds come in various sizes and colors, and knowing what to look for can save you time and disappointment. Darker seeds with robust shells are usually ready to germinate and will produce strong plants. White or green seeds should be avoided as they’re likely immature and won’t germinate successfully. A simple test: a viable seed will withstand gentle pressure between your fingers without cracking.
Remember, not all seeds are winners, even from the best sources. Genetics, storage conditions, and age all play a role in germination success. That’s why experienced growers always germinate more seeds than they need—some simply won’t make it, and that’s perfectly normal. Handle your seeds with care, as oils from your hands can damage them.
Storage Tip: Keep leftover seeds in a cool, dry, dark place. A sealed container in the refrigerator works perfectly. Properly stored seeds can remain viable for years, maintaining their genetic potential for future grows.
The Gender Game: Males vs. Females
Female Plants
Male Plants
Hermaphrodites
Identifying plant sex can be tricky at first since males and females look identical until they start flowering in late spring or early summer. Male plants bloom faster and release pollen from July to September in the northern hemisphere (opposite in the southern hemisphere). Look for pre-flowers at the junction where stems meet branches—female pre-flowers display distinctive V-shaped white hairs called pistils, while males develop small round balls that eventually open to release pollen.
For hassle-free growing, especially as a beginner, consider feminized seeds which guarantee almost all female plants. This maximizes your yield and simplifies the growing process significantly.
The Big Three Cannabis Families
Knowing these differences helps you choose the right strain for your growing conditions, space, and desired outcomes.
Indica
Sativa
Ruderalis
Why Hybrids Dominate the Market
Hybrid strains take the best traits from each parent: the quick flowering of Ruderalis, the bushy productivity of Indica, and the potent, euphoric high of Sativa. This mixing and matching creates plants that cater to a wide range of preferences, growing conditions, and therapeutic needs. Breeders have spent decades perfecting combinations that deliver specific effects, flavors, and growth characteristics.
Indica Varieties
Sativa Varieties
Ruderalis/Autoflowering
Soil, Water, and Sunlight
Success in cannabis cultivation depends on mastering three fundamental elements: quality soil, proper water, and abundant sunlight. These factors work together as the foundation of plant health, directly impacting growth rate, flower development, and final potency. Recognizing and optimizing each element transforms average grows into exceptional harvests. Let's explore what makes each factor crucial and how to get them right from day one.
Soil: The Foundation of Health
Good soil is absolutely crucial for healthy cannabis plants. The quality and amount of soil directly impacts your plant’s growth, health, and flower development. Your plants absorb everything from the soil—including harmful elements—so checking quality and composition beforehand is essential.
Cannabis thrives in neutral, well-draining soil that’s nutrient-rich, uniform, and not too clayey. The roots need to take hold easily because the plant’s size is directly proportional to its root system. Without strong roots, your plant won’t grow big and strong, no matter what else you do right.
Check your soil’s pH level, which indicates hydrogen ion concentration. Cannabis grows best in neutral or slightly alkaline soil with pH between 6 and 7. Outside this range, plants can’t absorb necessary nutrients and might die if pH is too far off. Raise pH by adding crushed limestone or shells; lower it with sulfur (though this is harder). Avoid soil with pH above 7
Sandy Soil
Clayey Soil
Alluvial Soil
The Perfect Soil Mix Recipe
Combine 1/4 local soil, 1/4 perlite, 1/4 organic fertilizer, and 1/4 black peat.
Prepare your soil at least two months before planting for best results.
Water Quality Matters
Sunlight is Essential
Choosing the Perfect Growing Location
Your chosen spot directly impacts yield quality, plant health, and harvest size. Consider sun exposure, privacy, safety, and access to water.
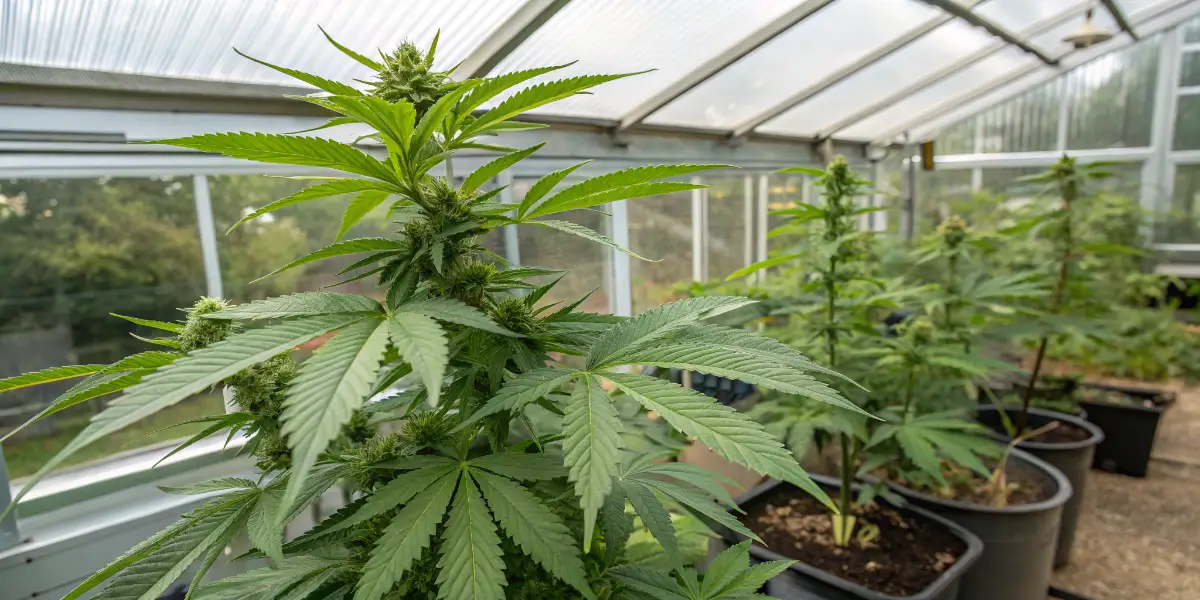
Orchard Gardens & Greenhouses
Gardens, Terraces & Balconies
Guerrilla Growing (Wild Spots)
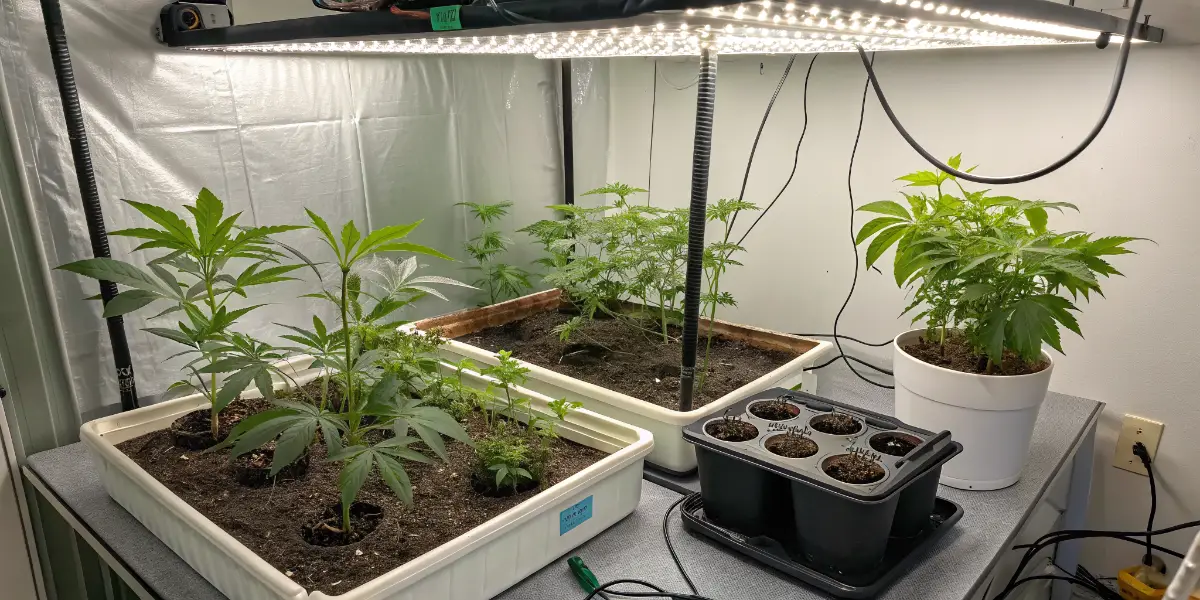
Indoor Growing
Vegetative Growth: From Seed to Plant
This critical phase builds the foundation for exceptional harvests by developing strong roots, stems, and foliage.
Getting Started: Germination
Seeds need moisture to kickstart growth. You can plant directly in soil, or for better success rates, sprout them on wet cotton for a few days until a tiny white root emerges.
Step-by-Step Germination Methods
Unlock your seed’s potential with these proven methods. Choose the one that best fits your setup.
Paper Towel Method
The most popular and reliable method. It allows you to visually track progress and ensures a high success rate.
- Place seeds between two damp (not soaking) paper towels.
- Put the towels inside a plastic bag or between two plates.
- Store in a warm, dark place (e.g., a cupboard).
- Plant once the white taproot is 1-2 cm long.
Glass of Water Method
A simple technique, especially effective for older seeds with hard shells that need extra help to crack open.
- Drop seeds into a glass of lukewarm water (20-25°C).
- Let them soak in a dark place for up to 32 hours.
- Once the taproot appears, carefully transfer to soil.
- If no root shows, move to the paper towel method.
Direct Soil Method
The most natural approach. This method avoids the stress of transplanting delicate sprouts and lets roots establish directly.
- Fill a small pot with quality seedling soil.
- Make a small hole (1-2 cm deep).
- Place the seed inside and cover lightly with soil.
- Water gently and keep the soil consistently moist but not wet.
Clones vs. Seeds: Knowing Your Options
Growing from Seeds
Seeds create plants with strong immune systems and genetic vigor. They can be transplanted once reaching about 12 inches tall. Seeds need consistent light (18+ hours daily) and develop strong root systems. Plants from seeds adapt better to environmental stress.
Working with Clones
Clones are cuttings from female “Mother Plants” that preserve specific genetics without change. They’re adult plants ready for flowering. Take clones from plants at least two months old and 12+ inches tall. Cut stems at 45-degree angles below the third node. Clones root in humid environments (80% humidity, 77°F) under 18 hours of low-intensity light. Downside: clones can carry pests from mother plants and have weaker immune systems than seeds.
Transplanting and Growth Management
Transplanting is crucial for guerrilla farming and optimizing growth. When plants reach about 12 inches tall, move them to final locations on cloudy days or late afternoons, giving them time to adapt before sun exposure. Ensure soil is dry so plants come out of pots easily. Roots should be white and strong—keep them out of sunlight. Place plants in prepared spots with fresh soil, spacing them at least one meter apart. Gently tighten soil around roots and water with pH 6 water plus minimal fertilizer. This is the perfect time to add rooting stimulants and beneficial microbes.
During vegetative growth, plants develop quickly—several inches daily under optimal conditions. They need minimal fertilizer, mainly nitrogen-rich formulas. The ideal nutrient ratio is 4 parts nitrogen to 1 part phosphorus and 2 parts potassium. Monitor leaf color for signs of deficiency or excess. Use root stimulators, enzymes, and mycorrhiza for optimal growth. Maintain irrigation pH at 6. Prevent problems by using phytofortifiers, fungicides, and natural pest remedies. Issues during this phase significantly impact final yield, especially for autoflowering plants.
Growth Timeline
Germination
Soak seeds in water or place on wet cotton until white root appears (2-3 days).
Seedling Stage
Plant sprouted seeds 1-2 inches deep and keep soil moist until true leaves appear.
Early Vegetative
Provide 18+ hours of light daily and begin light feeding with nitrogen-rich fertilizer.
Transplanting
Move to larger containers or final locations when plants reach 12 inches tal
Full Vegetative Growth
Continue feeding, pruning as needed, and monitoring for pests until flowering begins.
Nutrition and Flowering
The flowering stage is when your cannabis plant begins to produce buds. During this phase, the plant shifts its energy from growing leaves to developing flowers covered in resin. Unlike the vegetative stage, flowering requires closer attention to feeding and basic nutrient balance. What you do here has a direct impact on bud size, strength, and overall quality. By providing the right nutrients and keeping conditions stable, you help your plant finish strong and reward your effort with healthy, aromatic flowers.
Feeding Your Plants to Perfection
Nitrogen, phosphorus, and potassium form the foundation of plant nutrition. Nitrogen accelerates growth and creates chlorophyll for that healthy green color. Phosphorus is crucial for resin production, plant strength, and flower development. Potassium is essential for root health and disease resistance. The ratio of these three nutrients (NPK) must change throughout the plant’s lifecycle.
- Rooting/Cuttings: 4-1-2 ratio (nitrogen-phosphorus-potassium)
- Vegetative Growth: 2-1-1 ratio
- Flowering Period: 1-2-2 ratio (reduce nitrogen, increase phosphorus and potassium)
Secondary Nutrients & Micronutrients
Calcium and magnesium are secondary macronutrients necessary for cell production, light absorption, and nutrient uptake. Trace elements include iron, sulfur, manganese, boron, molybdenum, zinc, and copper. All these ensure plants are perfectly fed and functioning optimally.

pH is Critical:
The pH level of water and soil is equally important as nutrients themselves. The correct pH is 6.0. If pH isn’t between 6 and 7, plants stop absorbing nutrients even if they’re present in the soil. Fertilizing without considering pH doesn’t help at all. Most river water and rainwater are perfect in terms of pH. Avoid urban rivers due to pollution and chemical waste. Stagnant water should also be avoided. By controlling nutrients and water pH, your plants will be perfectly fed.
Reading Your Plants: The "Happy Hour" Test
Monitor the greenery of leaves—they should be neither yellow nor overly green. Check the general condition constantly. Petioles (leaf stems) should point upward, reaching for light. If they were a clock face, the two petioles would be at “ten past ten”—the happy hour! If plants lower their petioles, it’s a clear sign of discomfort due to drought or pest attacks.
Flowering Timeline by Week
Week 1-2: Transition
Week 3-5: Flower Development
Week 6-8: Bud Fattening
Final 2 Weeks: Flushing
Late Flowering: The Final Push
As plants mature, the number of leaf fingers goes from 1 to 13, then back to just a single leaflet. From here, the plant begins serious flowering as it reaches full adulthood. At this stage, nutrient needs become superlative, especially for phosphorus, potassium, and micro-elements. Careful measurement is crucial—less is more! It’s easier to add nutrients than deal with excess, which can cause nutrient burn and damage your precious flowers.
Irrigation must increase so plants don’t get thirsty, potentially up to twice daily towards the end of flowering. This depends on plant size, container size, and environmental conditions. During the last 15 days, gradually reduce fertilization so plants release surplus minerals. You can add flavor enhancers like orange juice or increase sugars while lowering manure amounts. In the final week, use only water with correct pH and very low EC (electrical conductivity) to flush excess nitrogen. Don’t worry if leaves turn pale—the buds are what matter!
Boost Your Bloom: Advanced Techniques
Take your harvest to the next level with these proven methods for increasing yield and potency.
Low-Stress Training (LST)
Screen of Green (SCROG)
Strategic Defoliation
Solving Common Flowering Problems
Stay ahead of issues before they impact your harvest. Here’s how to spot and solve common problems.
Harvest, Drying, and Curing
After months of careful cultivation, the harvest represents the culmination of all your hard work. But picking your plants at the right time is just the beginning—proper harvesting, drying, and curing techniques determine the final quality, potency, and flavor of your cannabis. These post-harvest processes are just as important as everything that came before. Rush through them, and you’ll ruin months of effort. Take your time and do them right, and you’ll be rewarded with exceptional cannabis that improves with age.
Timing Your Harvest Perfectly
Harvest your plants when they’re truly ripe—about 75% of the pistils should have turned brown or amber. Harvesting earlier produces more euphoric effects, while waiting longer creates more sedative effects as THC oxidizes into CBN. Daily observation is essential during this phase. Climate significantly influences the end stage, affecting ripening speed.
The most reliable method involves checking trichomes with a magnifying glass or microscope. Trichomes are the tiny mushroom-shaped structures containing THC. They start clear/transparent, turn cloudy/milky when ready, then amber when overripe. Harvest when most trichomes are cloudy with some turning amber. If harvested too late, they turn brown and THC oxidizes, eventually turning black and losing potency.
Clear Trichomes
Cloudy/Milky Trichomes
Amber Trichomes
Slightly overripe. THC is converting to CBN, creating more sedative, couch-lock effects.
Climate in the final flowering days is crucial. Always harvest on a dry day to avoid fungus in the flowers. If rain is coming, harvest early rather than risk mold. A slightly early harvest is better than losing your entire crop to botrytis.
Manicuring & Drying
Manicuring involves removing leaves from the sides and within the buds. Simply cut the plant at the base. Any leaf that isn’t formed naturally covers the bud to maintain moisture, which leads to mold during drying. Manicuring is essential for perfect drying and preventing moisture-related problems. Leaves rich in THC (sugar leaves) can be dried separately and used for making hashish, infusions, or topical creams—don’t throw them away!
Manicuring can be done manually with scissors and gloves. This method is time-consuming but gives you the most control and highest quality results. For large plants or many plants, electric or hand-crank manicuring machines save enormous amounts of time. Always wear safety glasses and gloves when using these machines to protect yourself from plant material and moving parts.
Drying Cannabis Properly
Fresh cannabis buds contain about 80% water. Proper drying determines the taste, smoothness, and conservation of your flowers. This critical process requires a dark, cool place maintained at 60-68°F with 50% humidity and slight ventilation for 15-20 days. Temperature and humidity control are absolutely essential—invest in a thermometer and hygrometer to monitor conditions constantly.
-
Hang Branches Individually
Hang manicured branches without them touching each other. Use dedicated drying racks or lines. Ensure good airflow around all buds to prevent mold. -
Maintain Environment
Keep temperature at 60-68°F and humidity at 50%. Use fans for gentle circulation but don’t blow directly on buds. Keep the space completely dark. -
Monitor for 15-20 Days
Drying should be slow to disperse chlorophyll, improving cannabinoid taste. Fast drying impairs quality, resulting in harsh, tasteless flowers. -
Test for Readiness
Buds are ready when stems snap rather than bend. Flowers should feel slightly spongy and fragrant. Core moisture should be 10-12%.
Curing for Maximum Quality
Once dried, the curing process begins. Store cannabis flowers in boxes or jars without overpacking, in a dark, cool place with low humidity for about 25 days. After this initial cure, transfer them to cedar boxes or vacuum containers for long-term storage. If drying was too fast and buds are overly dry, add orange or lemon peels to reintroduce slight moisture—remove them after 24 hours.
Open containers every 15 days to aerate the flowers and release any accumulated moisture. This “burping” process prevents mold and improves the cure. Inspect flowers carefully and remove any showing signs of mold or deterioration.
Cannabis typically lasts about 10 months before enzymatic browning occurs and quality degrades. For long-term storage, vacuum pack and keep at 41°F to prevent THC degradation for 2-3 years. Never use plastic bags as they can cause condensation and rot. Use vacuum-sealed cans or mason jars for better odorless storage.
Odor Alert: Remember, the drying stage emits the strongest cannabis odor of the entire growing process. Take anti-odor measures like carbon filters to avoid issues with neighbors or family members. The smell can be overwhelming and travel surprisingly far!
Concentrates and Hash Making
Explore the pinnacle of potency and purity by learning about extraction methods, from traditional to modern.
Dry Extraction
Water and Ice Extraction
Gas Extraction (BHO/CO2)
Concentrate Potency
Flower
Dry Sift
Ice Water
BHO/CO2
Pests, Diseases, and Protection
Cannabis plants face constant threats from various pests and diseases that can devastate your crop if left unchecked. Animals, fungi, and insects are the main culprits, each requiring different prevention and treatment strategies. Understanding how to identify problems early and respond effectively can mean the difference between a bountiful harvest and complete crop failure. Prevention is always easier than treatment—establishing good practices from the start keeps most problems at bay. With the right knowledge and vigilance, you can protect your precious plants and ensure they make it safely to harvest.
Defending Against Animal Attacks
Fungal Diseases
Common Insect Pests and Control Methods
Insects range from large visible pests to microscopic threats that multiply rapidly. Early detection and quick action are essential for controlling infestations before they spread throughout your garden.
Large Insects
Grasshoppers
Slugs and Snails
Caterpillars
Leaf Miners
Cochineal Bugs (Scale)
Micro-Insects
Aphids
Thrips
Whiteflies
Spider Mites
Integrated Pest Management Strategy
Monitor Daily
Prevent Problems
Identify Quickly
Treat Appropriately
Follow Through
Ready to Start Growing?
You now have the knowledge to cultivate cannabis from seed to harvest. Remember that growing is both an art and a science—each grow teaches you something new. Good luck, and happy growing!