Grasping 3-4-2 Ratios
What the Numbers Mean
The 3-4-2 sequence describes parts of nitrogen, phosphorus and potassium in a nutrient mix. Nitrogen supports leaf growth, phosphorus boosts roots and early blooms, while potassium helps with water uptake and stress tolerance. When you see “3-4-2,” it means 3% nitrogen, 4% phosphorus and 2% potassium by weight. Knowing this breakdown helps you tailor feeding to match a seedling’s initial needs without overwhelming its delicate roots. By using clear ratios, you keep feeding simple and precise.
At seed stage, too much nitrogen can burn young leaves, while too little phosphorus slows root development. The 4 part phosphorus in this mix encourages robust initial root growth, laying a firm base for later foliage and flower production. Meanwhile, the moderate potassium content aids cell strength and nutrient transport. When you mix properly, seedlings receive balanced support. As a result, you foster healthy roots without overloading fragile tissues, saving plants from early setbacks.
Recommended Strains
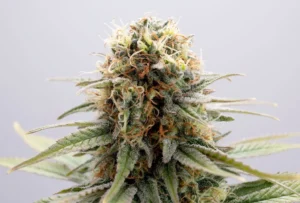
Laughing Buddha
|
|
THC | 22% - 23% (Medium) |
|
|
Lineage | Thai x Jamaican |
|
|
Type | Feminized |
|
|
Height | 4.43 ft | 1.35 m |
|
|
Yield Outdoor | 28.22 oz/plant | 800 g/plant |
|
|
Flowering Time | 9 - 11 weeks |
|
|
Phenotype | 20% Indica / 80% Sativa |
|
|
Effects | Focused, Giggly, Energetic, Creative, Talkative, Euphoric |
|
|
Flavors | Pepper, Pineapple, Lemon, Herbal |
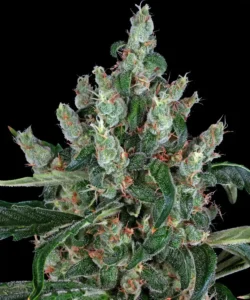
Gypsy Kush
|
|
THC | 16% - 18% (Medium) |
|
|
Lineage | Afghan x Ginger Ale x Black Domina |
|
|
Type | Feminized |
|
|
Height | 4.43 ft | 1.35 m |
|
|
Yield | High |
|
|
Yield Indoor | 1.64 oz/ft² | 500 g/m² |
|
|
Yield Outdoor | 22.93 oz/plant | 650 g/plant |
|
|
Flowering Time | 9 - 10 weeks |
|
|
Phenotype | 50% Indica / 50% Sativa |
|
|
Effects | Balanced |
|
|
Flavors | Sweet, Spicy, Floral |
Macronutrient Breakdown
Nitrogen in a 3-4-2 blend drives chlorophyll production and leaf expansion. During the first days after sprouting, seedlings rely on ample nitrogen to convert light into energy. This fuel lets them produce the sugars needed for root extension. However, this ratio keeps nitrogen lower than phosphorus to prevent leggy, weak stems. The balance steers focus toward solid foundation rather than rapid vertical growth.
Phosphorus forms the backbone of DNA and energy transfer molecules. Its higher proportion in a 3-4-2 mix supports root cell division and strengthens seed leaves. Potassium, though present at 2 parts, remains vital. It regulates stomata opening and helps the plant manage water efficiently. Together, these three macros ensure that every drop of solution counts, delivering the exact nutrients a tiny seed needs on day one.
Function in Early Growth
A 3-4-2 solution works wonders in the first two weeks after germination. At this point, roots spread rapidly and young leaves open wide. The extra phosphorus fuels root elongation, helping seedlings anchor firmly in their medium. As roots explore more space, they access oxygen and water more effectively, setting the stage for vigorous above-ground growth.
In practice, you’ll notice faster taproot development and healthy leaf color when using this ratio. Leaves stay bright green without yellow tips or burned edges. Healthy roots mean better nutrient uptake later, so seedlings roll into the vegetative stage ready to thrive. By applying a precise 3-4-2 formula, you guide each plant through a stress-free start, reducing the risk of transplant shock or nutrient lockout.
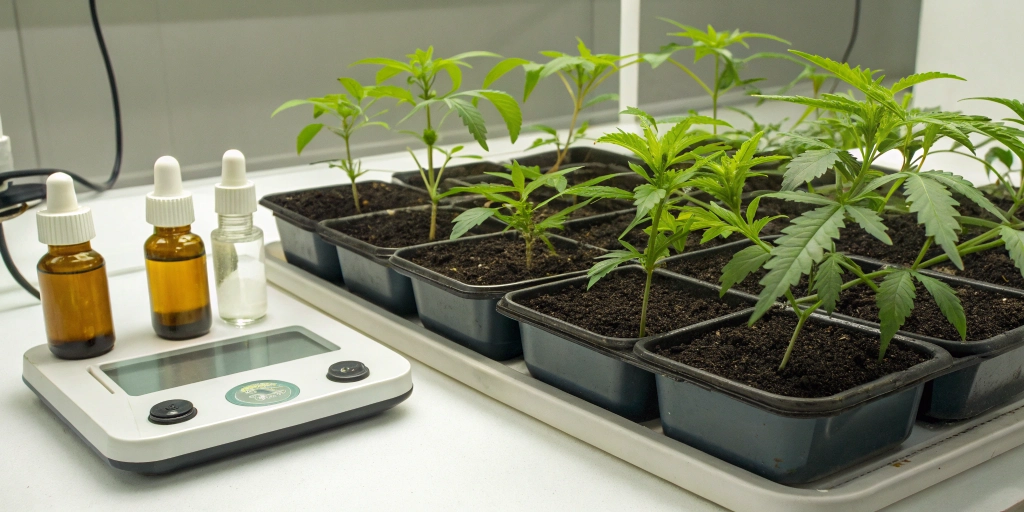
Mixing Nutrient Solutions
Measuring Techniques
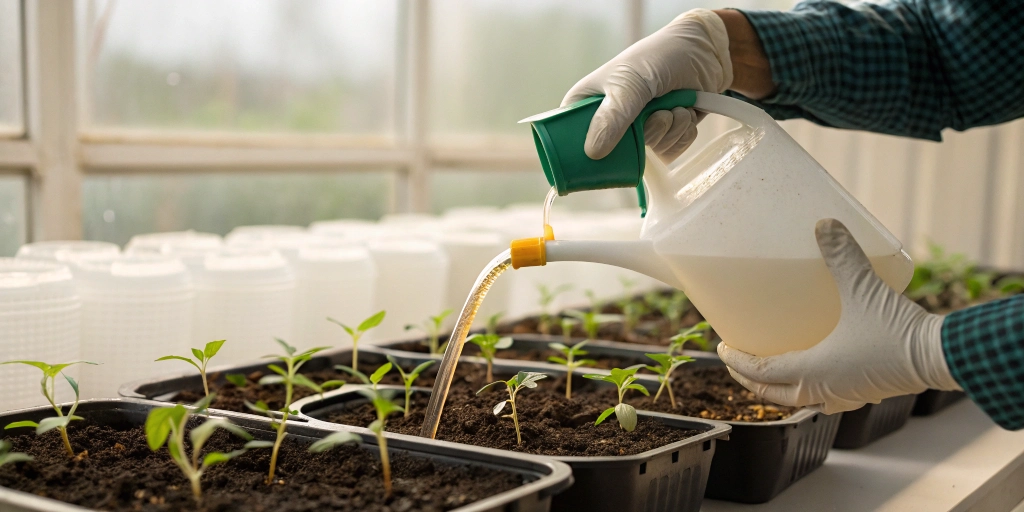
Accurate measurements form the backbone of any nutrient mix. First, weigh dry fertilizer on a digital scale to the nearest tenth of a gram. Then use graduated cylinders or measuring spoons when working with concentrates. Keeping precise records helps you reproduce successful mixes every time. In addition, a simple logbook ensures you don’t over- or under-dose, which keeps plants safe from nutrient burn or deficiency. This is especially important when growing sensitive, high-yield varieties like the Royal Gorilla Auto strain, which benefit from well-balanced and consistent feeding routines.
Secondly, always calibrate your scale and measuring tools before each session. A quick zero check eliminates errors caused by residue or drift. If you rely on volume measures, shake bottles well and level off each spoonful. By committing to exact techniques, you gain consistency. As a result, plants develop uniformly and you avoid troubleshooting vague issues later in growth.
Water Quality
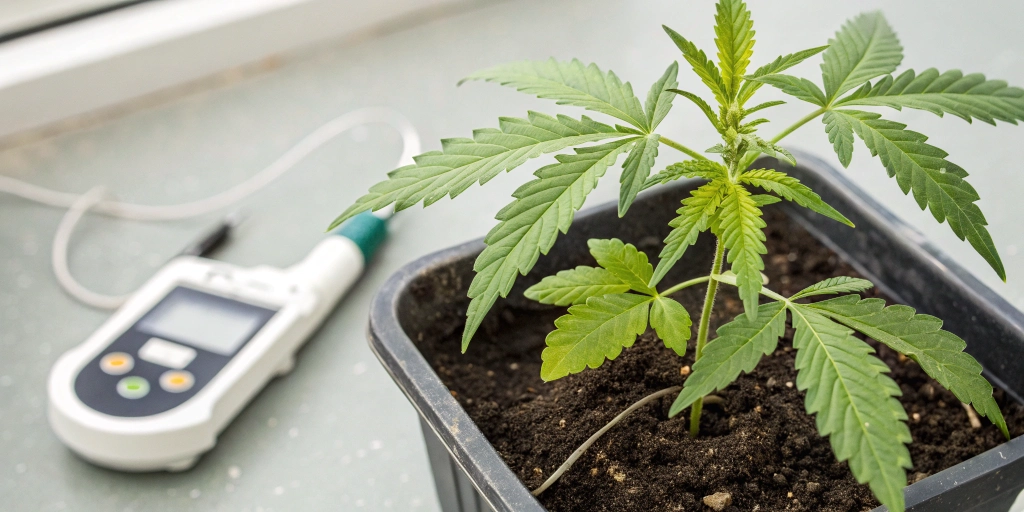
Water quality can make or break your feeding efforts. Tap water often holds chlorine or hard minerals that interfere with nutrient uptake. For best results, let tap water sit uncovered for 24 hours to off-gas chlorine. Alternatively, use a carbon filter or reverse osmosis filter to remove unwanted compounds. Cleaner water lets nutrients dissolve properly, reducing the risk of pH swings or salt buildup.
Moreover, check total dissolved solids (TDS) with a meter before mixing. If TDS reads too high, dilute with distilled or filtered water until you reach a stable baseline. Healthy water helps nutrients remain available to seedlings. By prioritizing water quality, you cut down on pH fluctuations and protect roots from chemical imbalances. In turn, seedlings maintain steady growth and vibrant coloration.
pH Adjustments
Maintaining the right pH is crucial for nutrient uptake. Seedlings prefer a slightly acidic range between 5.8 and 6.2 in soilless media. At this level, roots absorb nitrogen, phosphorus and potassium most effectively. When pH drifts outside that window, nutrients lock out and cause deficiency symptoms even if levels remain correct.
To adjust pH, use pH up or down solutions drop by drop. Stir gently and wait several minutes before retesting. Keep a chart showing how many drops adjust one liter of water by 0.1 units. This record speeds future mixing and prevents wild swings. Consistent pH control keeps every nutrient in the right balance for early development.
Feeding Schedule
First Three Weeks
During the initial three weeks, start with half-strength solutions to avoid shocking seedlings. A gentle feed gives roots time to explore without overwhelming them with nutrients. Water first, then add your diluted 3-4-2 mix once per week, while plain water fills remaining sessions. This pattern builds trust between roots and fertilizer.
After two weeks, you can gradually increase to three-quarters strength. Monitor leaf tips for any signs of burn. If edges brown or yellow, dial back to half strength again. By pacing the ramp up, you ensure seedlings adapt smoothly. Steady progression helps them reach full vegetative feeding levels without stress.
Mid-veg Adjustments
Around week four or five, seedlings enter true vegetative growth. At this stage, most growers shift to a balanced ratio, but you can still rely on 3-4-2 for a week or two. Increase solution strength to full concentration if plants show robust root and leaf development. Maintain a schedule of two feeds per week with one plain water session between.
Watch for faster internode spacing and lush foliage. If growth stalls, add a gentle micronutrient supplement. However, avoid boosting macros prematurely. Too much nitrogen now can create stretchy, weak stems. By keeping your ratio steady, you foster compact, healthy plants that will transition smoothly later.
Transition to Flower
When you spot the first pistils or pre-flower nodes, it’s time to adjust your mix. Reduce nitrogen content and shift toward a bloom-specific ratio with higher phosphorus and potassium. This change signals plants to focus energy on bud development rather than leaf production. At that point, the 3-4-2 formula has served its purpose.
Continue using plain water flushes every third week to prevent salt buildup. After flushing, resume the new bloom feed. Monitor leaf color closely during transition. If you notice yellowing or tip burn, adjust pH and check TDS again. Smooth transitions minimize stress and promote abundant flower formation.
Monitoring Plant Response
Leaf Color Indicators
Leaf color tells you volumes about nutrient status. Deep, vibrant green means nitrogen uptake works. If leaves pale or yellow at the edges, nitrogen deficiency may be lurking. Spotting rusty brown or purple hues suggests phosphorus shortage, while burnt tips point to excess salts. By scanning top and bottom leaves regularly, you catch issues early. Just as monitoring leaves is key for healthy growth, knowing how long do cannabis seeds last is crucial for planning successful germination and future harvests.
In addition, pay attention to new leaves versus old leaves. Problems showing on young growth often signal pH imbalance, while older leaves suffer from nutrient exhaustion. Take notes and compare to your feeding log. As you adjust mixes, watch for color improvements within days. Healthy leaves reflect precise nutrition management.
Growth Rate Checks
Measuring plant height and leaf spread helps track development. Mark stem height each week with a ruler at the same node. A steady increase of about one inch per week in seedling stage indicates healthy progress. If growth lags, review your nutrient mix and environmental factors before changing ratios.
Besides height, observe internode spacing. Compact nodes mean plants use energy efficiently. Longer spacing can occur from high nitrogen or inadequate light. Document these readings in your grow journal. Comparing data from one cycle to the next helps you fine-tune your program and maintain consistent, predictable results.
Adjusting Ratios
No two grows ever match exactly, so you’ll tweak ratios based on real-time feedback. If leaves yellow mid-cycle, add a bit more nitrogen next feed. Should leaf tips brown, reduce overall strength or flush with plain water. Small, incremental changes prevent overcorrection and damage.
Keep detailed records of every adjustment and its effects. Charts or simple tables can show you exactly how plants responded to a 0.1 increase in nitrogen or a pH tweak. Regular reviews of this data sharpen your instincts. Over time, you learn exactly when to push and when to hold back.
Frequent Errors to Avoid
Over-fertilization
Too much fertilizer overwhelms roots and leads to nutrient burn. You’ll spot brown, crispy leaf tips and stunted growth. In severe cases, plants droop and fail to recover. Beginner growers often think more is better, but that approach backfires quickly.
To fix overfeeding, flush the medium with plain, pH-balanced water. Repeat until runoff shows low TDS readings. After flushing, resume feeding at half strength and increase slowly. By catching over-fertilization early, you save roots and restore healthy growth patterns.
Under-feeding Signs
Under-feeding shows up as pale, spindly plants with slow internode growth. Leaves may yellow from lack of nitrogen or show purple stems from phosphorus scarcity. When growth stalls, seedlings risk becoming weak and vulnerable to pests or disease.
To correct under-feeding, increase nutrient strength by 10–20% at the next feed. Watch for improvements in leaf color and growth rate within days. Avoid jumping to full strength immediately. Gradual increases give roots time to adapt without shocking the system.
Flushing Practices
Regular flushing prevents salt and nutrient buildup in the medium. At least once every two weeks, run plain water through soil or coco until runoff shows low TDS. This practice cleans away excess minerals that lock out nutrients and impair root health.
After flushing, wait 24 hours before the next feeding. This rest period lets roots absorb water and recover from any residual salt stress. Consistent flushing keeps your nutrient program on track and ensures seedlings always access fresh, balanced solutions.
FAQs about 3 4 2 for cannabis seeds
Is 3-4-2 best for all strains?
Not every strain reacts identically to the same mix. While many seed varieties thrive on a 3-4-2 formula during early growth, some landrace or hybrid seeds may prefer slightly different ratios. Use 3-4-2 as a starting baseline. Then watch plant response and adjust slightly up or down based on leaf color and root development.
How often should I feed?
For seedlings, feeding once per week with a half-strength 3-4-2 solution works well. In between feeds, give plain pH-balanced water to keep roots moist. As plants grow, you can feed twice per week. Always monitor leaf tips and adjust frequency if you see burn or deficiency signs before tweaking ratios. If you’re cultivating strains like Royal Runtz RQS, maintaining this feeding schedule will support healthy development and maximize yield potential.
Can I mix with other ratios?
Yes, you can combine a 3-4-2 base with other nutrient formulas as plants transition stages. For instance, blend in a higher-nitrogen mix during mid-vegetative growth or a bloom booster when pre-flowers appear. Keep detailed records so you know exactly how each ratio blend affects your plants.