Optimal Storage Conditions
Storing healthy cannabis seeds starts by building a stable environment that protects their natural vitality. Before you dive into temperature, humidity, and light, take a moment to set up a dedicated space free from fluctuations. This means choosing a clean area without strong odors, chemicals, or pests. It also means planning for easy access so you can inspect seeds without disturbing their microclimate. By preparing this foundation, you ensure every seed stays as close as possible to its peak potential until you decide to sprout it.
Temperature Ranges
Seeds remain viable when you keep them at steady temperatures. Aim for a cool setting between 2 °C and 6 °C (36 °F to 43 °F). This narrow band slows metabolism inside the seed, preventing premature aging and preserving oils. Consistent cold storage in a refrigerator works well. Moreover, avoid storing seeds near frost or heat vents, since sudden shifts can damage crucial membranes and reduce germination rates by up to 20 percent.
Maintaining stable cold conditions also means you guard against repeated warm–cold cycles. Every time you open the fridge, internal temperatures bounce slightly upward. To limit this, store seeds in a secondary insulated container inside the fridge. Consequently, the seed environment remains more steady. Additionally, label containers with dates so you rotate older batches first and ensure you always plant the freshest seeds possible.
Humidity Control
Cannabis seeds thrive at relative humidity levels between 45 percent and 55 percent. Too much moisture triggers mold growth and rot, while too little draws oils out of the seed coat, causing cracks. Use a reliable hygrometer inside the storage container to track the moisture level. As a result, you can adjust your desiccant packs or introduce a tiny water source to fine-tune the balance.
If humidity climbs above 60 percent, remove the seeds and let them air-dry briefly before resealing. Conversely, if levels dip below 40 percent, add fresh silica gel or clay desiccant packs rated for seed storage. These packs absorb excess water without exposing seeds to harsh chemicals. In this way, you preserve both the seed’s hard exterior and the living embryo inside.
Light Exclusion
Seeds contain light-sensitive compounds that break down under UV and visible light. Even brief exposure to bright bulbs or sunlight can reduce germination rates. Store containers in complete darkness or use opaque, non-reactive jars. This preventative step blocks destructive wavelengths and maintains seed integrity over months or years.
When you retrieve seeds for planting, work under dim or red light to minimize exposure. Then close the container immediately. Additionally, avoid transparent plastic bags that allow light penetration. Instead, choose dark glass vials or metal tins to create a shielded environment. Consequently, you safeguard each seed until you’re ready to sprout it.
Packaging Materials and Methods
Choosing packaging with the right characteristics keeps seeds safe and organized. Before you test different containers and sealing methods, gather materials that resist moisture, light, and air. Work in a clean space to prevent dust or debris from entering the packaging. Label each container clearly with strain, date, and any special notes. This upfront effort streamlines your workflow and avoids mix-ups later on.
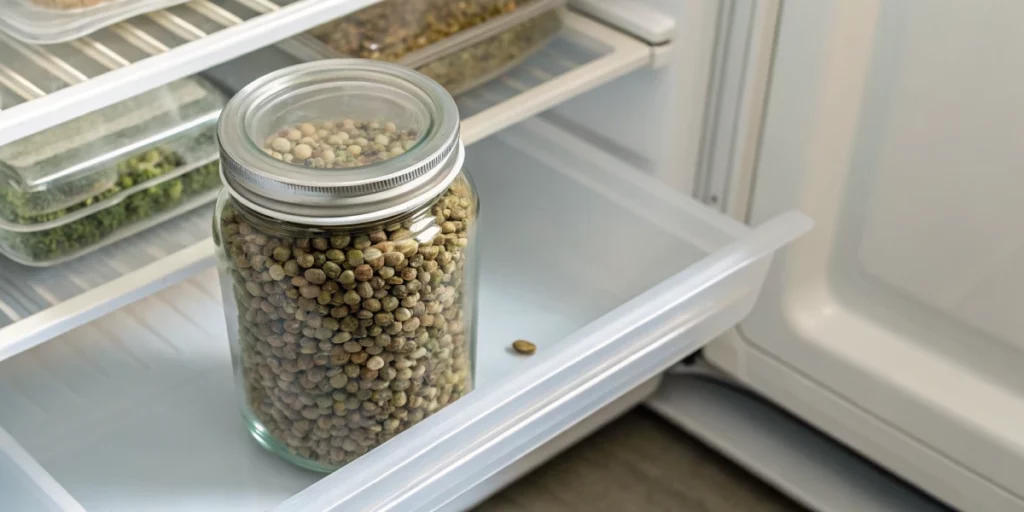
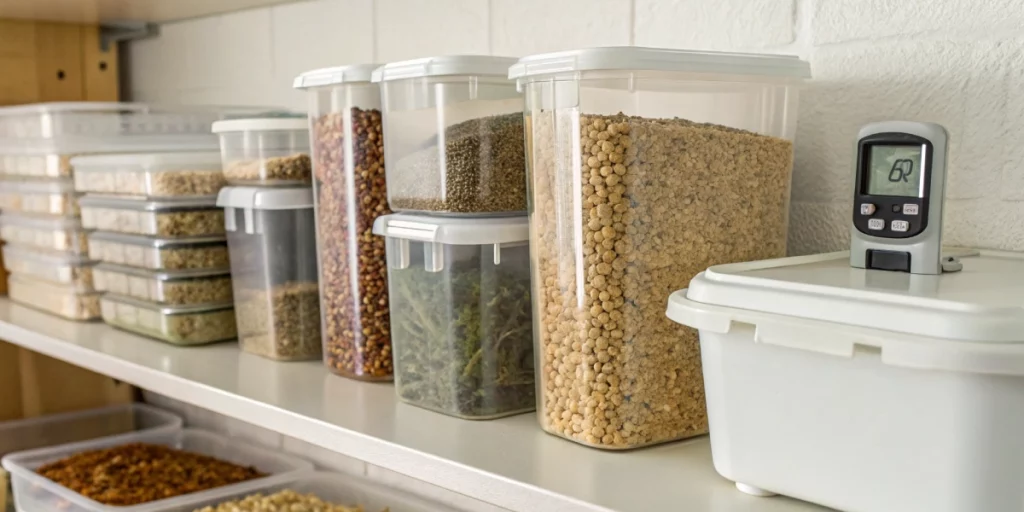
Airtight Containers
Airtight glass jars with silicone seals offer an excellent storage environment. Glass does not off-gas over time and resists scratches that could harbor mold. Make sure the seal locks tight; if you hear creaking or feel resistance, test it first with a tissue inside—no air should enter when you squeeze the jar.
Alternatively, high-grade metal tins with rubber gaskets also perform well. These tins fit into refrigerators and seed banks neatly, and they resist light leakage. Label each tin on its exterior rather than inside, so you avoid exposure when you check inventory. In this way, you store seeds securely and keep them organized for future planting seasons.
Desiccant Use
Silica gel and clay desiccant packs maintain the target humidity inside your container. Choose indicator packs that change color when saturated. As a result, you know exactly when to replace them. Place one pack per 100 mL of container volume to balance moisture without over-drying the seeds.
After each use, recharge silica gel by heating it gently in an oven at low temperature. Clay packets sometimes recharge more slowly but last longer. Store the desiccant separately if you plan to reuse it for non-seed storage. This keeps cross-contamination at bay. Overall, consistent desiccant use protects seeds from humidity swings.
Vacuum-Sealed Options
Vacuum sealing removes nearly all air from the package, slowing oxidation and metabolic activity. You can use a compact vacuum sealer with resealable pouches designed for food storage. Choose thick, puncture-resistant bags to avoid tears that compromise the seal.
Once vacuumed, label the pouch with the seed strain and storage date. Store pouches flat or upright, depending on your space. Vacuum sealing works well for long-term seed banking—seeds can remain viable for up to a decade when stored this way at the right temperature. Additionally, seal fragile paper labels in the pouch’s exterior pocket to prevent ink smears.

Location Choices for Storage
Deciding where to place your seeds affects how often you need to check them. Evaluate your available spaces for consistent temperature and humidity. Consider proximity to power sources, ease of access, and potential vibration or disturbances. Keep records of the room’s average conditions to compare against ideal ranges. With this information, you choose a spot that requires minimal adjustment.
Refrigerators vs. Freezers
Refrigerators hold seeds at moderate cold, which slows aging but retains slight metabolic activity. Freezers push temperatures below −18 °C (0 °F), halting metabolism almost entirely. Use a freezer only when you plan to store seeds beyond five years. Otherwise, refrigeration balances convenience and seed health.
Be cautious of moisture in freezers. Ice crystals can form inside poorly sealed packages and puncture seed coats. To avoid this, freeze seeds in double-bagged vacuum pouches. Also, let pouches reach ambient temperature before opening to prevent condensation. This procedure maintains a dry, cold microclimate.
Dark, Cool Closets
If you lack fridge space, a closet away from heating and ventilation can work. Select an interior section of your home where temperatures stay between 10 °C and 18 °C (50 °F to 64 °F). Keep containers on low shelves to reduce temperature fluctuations from opening doors.
Make sure the closet stays dark, as even small LED indicator lights can expose seeds over time. Avoid spots near windows or heat sources. Additionally, check humidity monthly and adjust with small desiccant packs. This method suits small seed collections and offers easy access.
Seed Banks at Home
Many growers use dedicated seed banks—lockable boxes with multiple compartments. Label each section by strain and storage date to track viability. Use removable trays or drawers so you access seeds without disturbing other batches.
Invest in a basic digital hygrometer to monitor each compartment’s humidity. Logging the data weekly helps you spot trends before they risk seed health. By keeping a clear record, you maintain control over seed age and plan future plantings with confidence.
Monitoring Seed Health Over Time
Regular checks help you catch issues before they ruin your entire collection. Whether you’re storing classic strains or newer ones like Milky Way F1 Auto, set reminders to test and inspect seeds on a schedule. Use digital logs or a simple spreadsheet to note dates, results, and any anomalies. This consistent tracking builds a clear picture of how storage choices impact seed longevity.
Periodic Germination Tests
Test a small sample—five to ten seeds—once per year to confirm viability. Place them on damp paper towels inside a sealed plastic bag at room temperature. Check for sprouting within seven days. Record the germination rate to spot declines early.
If rates drop below 80 percent, consider planting older seeds soon and buying fresh stock for backup. This proactive step prevents surprises on planting day. Moreover, adjust your storage methods based on these results to preserve seed health longer.
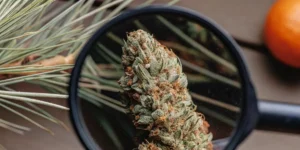
Visual Inspections
Inspect seeds every three to six months for signs of mold, discoloration, or shell damage. Healthy seeds appear firm, smooth, and have a tan or dark brown hue depending on strain. Soft spots or white fuzzy patches indicate fungus invasion.
If you find any compromised seeds, remove them immediately to protect the rest. Clean the container with isopropyl alcohol before resealing. This habit prevents contamination and preserves the bulk of your collection for future use.
Moisture Checks
Place a small digital hygrometer or humidity indicator card inside each container. Check readings monthly. If levels stray outside the 45 percent to 55 percent window, act quickly by adding fresh desiccant or introducing a tiny damp sponge outside the seed compartment.
After adjustments, re-test in 24 hours to confirm stability. Keeping moisture in check prevents both mold and over-drying, ensuring seeds remain robust until you’re ready to germinate.
Reviving Long-Stored Seeds
Older seeds can recover their sprouting potential with extra care. Before you sow them, plan a gentle awakening routine. Gather clean tools and media, and work in a controlled space to avoid shocks. By focusing on revival techniques, you give aged seeds the boost they need.
Pre-Soak Techniques
Begin by soaking seeds in room-temperature, oxygenated water for 12 to 24 hours. Change the water halfway through to remove inhibition chemicals released from the seed coat. After soaking, gently blot seeds on sterile paper towels to remove excess moisture.
This process softens the exterior shell and kick-starts the internal processes needed for sprouting. Additionally, you can add a drop of hydrogen peroxide at low concentration to reduce surface bacteria. Always handle seeds with clean, gloved hands to avoid introducing contaminants.
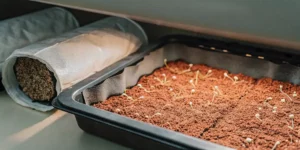
Controlled Environment Germination
Set up a germination chamber using a sealed plastic box with damp paper towels. Place seeds on the towels, then close the lid to maintain high humidity. Keep the chamber at around 22 °C (72 °F) under low, indirect light.
Check daily and mist towels lightly to prevent drying. Once the taproot appears, plant seeds gently in starter medium. A warm, stable environment accelerates growth and maximizes success, especially for seeds stored beyond their typical shelf life.
Patience and Documentation
Maintain a logbook that records storage conditions, test dates, and germination outcomes. Note any changes you make—new desiccant packs, temperature shifts, or relocation. Reviewing these notes helps you refine your approach over time.
Patience matters. Older seeds may take longer to sprout. By tracking each variable, you learn what works best for each strain. Consequently, you improve your overall storage strategy and boost future germination success.
FAQs about best way to store cannabis seeds long term
How long can seeds last refrigerated?
Seeds stored under stable cold and dry conditions often remain viable for up to five years. Regularly test a small sample to confirm germination rates above 80 percent. Proper labeling and humidity control further extend shelf life without risking quality or potency.
Do desiccants damage seeds?
When you use food-grade silica gel or clay desiccants correctly, they do not harm seeds. Indicator packs ensure you replace them before they over-dry the container. Always avoid desiccants treated with toxic chemicals; stick to products labeled safe for food or seed storage.
Can I re-dry seeds after opening?
Yes, you can re-dry seeds if you expose them to air too long. Gently pat them dry on sterile paper towels, then return them to an airtight jar with fresh desiccant packs. Monitor humidity for 24 hours to confirm you restored ideal conditions before long-term storage.