Standard Germination Window
Typical 24–72 Hour Range
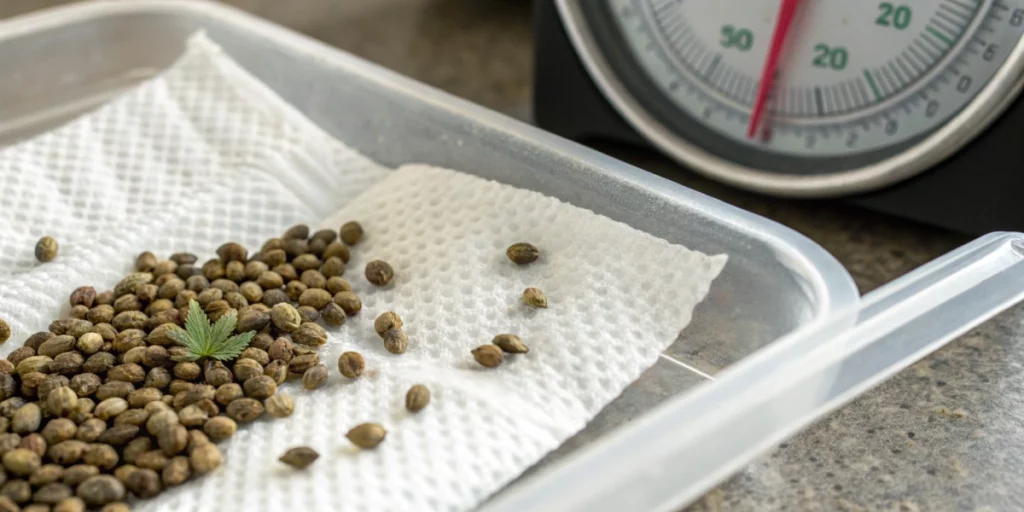
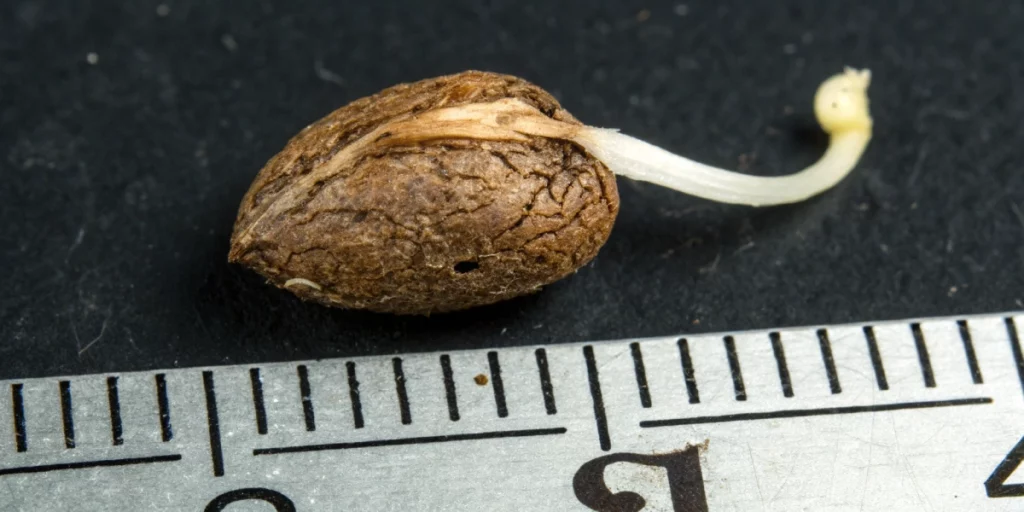
Most cannabis seeds sprout within twenty-four to seventy-two hours when kept in a stable environment. Growers often ask how long do cannabis seeds take to germinate, and the answer lies in consistent warmth and moisture. During this window, the seed coat softens and the embryo pushes out a tiny root. If you keep heat around twenty-two to twenty-five degrees Celsius and maintain humidity near ninety percent, you should see white taproots appear fast.
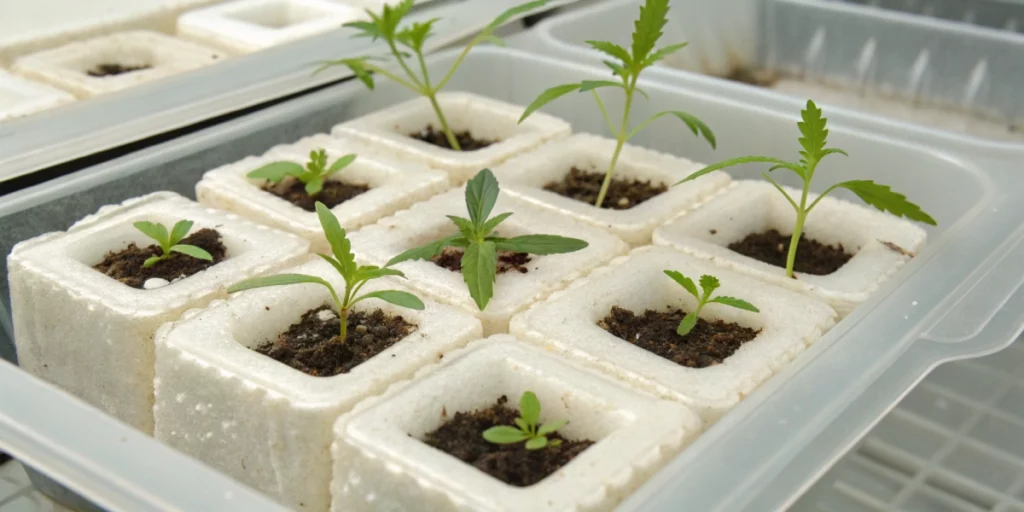
Seeds in this time frame reveal their potential health and vigor. You can move them to a growing medium once the taproot measures about two to three millimeters. At that point, you handle sprouts carefully to avoid damage. Use tweezers or your clean hands to place each seedling in a moist starter cube or soil. This method gives young plants a head start and lowers risks of root stress in early growth.
Extended Germination Cases
Some seeds need more than three days to sprout under less optimal conditions. A thicker seed coat or deeper dormancy often slows emergence. In rare cases, seeds may stay dormant up to one week. If you meet them with slight stress, they react slowly. Delays might result from lower temperatures around eighteen degrees or erratic moisture levels. Keep trays covered with breathable material to retain moisture and heat. This approach gives extra chance for slow seeds to wake.
Extended cases still hold potential if you maintain stable conditions. Patience pays off when you see the taproot break free. Avoid moving seeds around in this phase or they might stall. Offer fresh moisture by lightly misting without flooding. Maintain ambient warmth in a gentle range between twenty and twenty-three degrees. Once you spot a white tip, transfer to your selected medium and support delicate roots with minimal disturbance.
Strain Variations
Different strains show varied germination speeds. Indica lines often sprout a bit faster thanks to thinner seed shells. Meanwhile, sativa descendants sometimes take longer because their genetics favor robust outer coats. Hybrids tend to fall in the middle, combining traits from both parents. Growers notice slight variations even within the same family. For example, the Royal Cheese Auto strain may germinate more quickly due to its balanced autoflowering genetics. Testing a small batch first helps you gauge timing for your chosen variety and adjust care optimally.
Environmental factors amplify genetic tendencies. For example, a speedy indica seed under cool conditions might stall. Conversely, a hardy sativa can surprise when you boost warmth. Hybrids respond well to consistent treatment, making them ideal for less experienced cultivators. Keep notes on each strain’s germination timeline. That data helps you refine heat, moisture, and handling for every variety you start in the future.
Conditions That Speed Germination
Warmth and Humidity
Heat accelerates germination by boosting metabolic processes inside the seed. Aim for a range between twenty-two and twenty-six degrees Celsius. High humidity keeps the seed coat soft and prevents the embryo from drying out. Use a humidity dome or sealed container lined with damp paper towels. Moreover, warm misting supports constant moisture. These conditions push seeds to expand and crack faster than in cooler, drier setups every time at the outset.
Inconsistent warmth can stall embryos and cause uneven sprouting. Therefore, monitor temperature with a thermometer. You can place a small heat mat beneath trays to keep levels stable. Combine that with a digital hygrometer to track humidity. Balanced warmth and moisture cut germination time drastically. Additionally, maintain air circulation to prevent mold growth. Gentle airflow around seeds preserves surface conditions without drying the paper towels or starter plugs in your trays.
Soak Pre-Treatment
Pre-soaking seeds in water or a mild solution softens the outer shell and speeds emergence. Place seeds in room-temperature water for twelve to twenty-four hours. Some growers add a drop of hydrogen peroxide to reduce bacteria. Once the seed sinks, transfer it immediately to damp paper towels or starter cubes. Avoid soaking beyond one day to prevent oxygen deprivation. This gentle prep pushes the embryo toward growth faster than dry methods.
Soaking also gives you insight into seed health. Viable seeds typically sink within six to twelve hours. Floaters may hatch slowly or fail. Remove poor seeds to focus resources on strong ones. After soaking, rinse seeds to remove residues. Then blot them gently on a paper towel before placing back in the germination setup. This step-by-step approach ensures that you only work with seeds that show good vitality and response.
Consistent Monitoring
Active observation prevents surprises and gives seeds the care they need. Check moisture and temperature twice daily. Note any changes in paper towel texture or color. If towels dry out, mist them lightly to restore dampness. When trays develop mold spots, improve airflow immediately. Monitoring habits let you catch issues early and fix them before seeds weaken. A simple log of time, temperature, and dampness keeps you on track. Revisit trays morning and evening.
Consistent checks also build data for future batches. Use a notebook or app to track intervals. Record when you start each batch and note germination milestones. That practice reveals patterns you can adjust in real time. For example, if seeds always stall after thirty hours, you might tweak moisture or heat. Over time, this habit helps you create reliable germination schedules. You end up saving effort and boosting overall success.
Conditions That Slow Germination
Cool Temperatures
Low heat levels can drag out germination times significantly. When temperatures drop below eighteen degrees Celsius, metabolic activity inside the seed slows. You might see seeds stall without any sign of growth. In that state, the embryo waits for better conditions. Avoid placing trays near open windows or cold floors. Instead, use a reliable heat source set to safe levels. That step maintains warmth and keeps roots on schedule. Steadily.
Cold spots can also encourage mold growth on seeds. When moisture lingers on cool surfaces, fungi can take hold. That risk further delays sprouting and harms seed health. Keep trays elevated above any chilly surface to block cold drafts. Use insulation under trays or move them to warmer areas. Small adjustments prevent temperature dips. In turn, seeds resume normal growth and benefit from consistent conditions with minimal effort every day.
Dry Environments
Insufficient moisture can stall germination quickly. Dry air or paper towels that dry out break the embryo’s access to water. When seeds lose contact with moisture, they pause growth and may die. Keep a mist spray bottle on hand and rewet towels at the first sign of dryness. Seal trays with clear plastic wrap or use a humidity dome. Those methods lock in moisture and prevent seeds from drying prematurely.
In overly damp setups, however, roots can drown in soggy towels. Find a balance by measuring moisture levels. Your paper towels should feel damp but not saturated. Check at least every eight hours. Adjust misting intervals to keep moisture consistent. That approach avoids both dryness and overwatering. With a balanced environment, seeds activate metabolic processes and open precisely when they have the water they need and speed overall success.
Old or Poor-Storage Seeds
Seeds stored for years or exposed to heat can lose viability and slow or fail to sprout. Aging breaks down nutrients inside the embryo. When older seeds take water, damaging processes can begin before sprouting. Store fresh seeds in a cool, dark place in airtight containers. Adding silica packs keeps humidity low. That method protects seeds for months or even years. Using fresh stock raises your germination rates noticeably significantly.
Poor storage also invites fungal or bacterial attacks on seeds. When humidity fluctuates, mold can invade older seeds quickly. That threat further reduces sprouting chances. Inspect your seed bank regularly and discard any that show spots or smell off. Rotate stock by using first-in, first-out to keep seeds fresh. Always label storage dates clearly. Following these steps, you keep seeds healthy and preserve quick germination for every batch without exception.
Tracking Germination Progress
Daily Root Checks
Examining seeds daily helps you spot taproot emergence precisely. Gently lift the paper towel to glance below without disturbing the seed too much. If you see a white root tip, that seed is ready for transplant. Clean hands reduce contamination risks at this stage. Write down the day and any observations for each seed. That record prevents guesswork and gives clarity on germination pace for consistent scheduling and future planning.
Those daily checks also highlight trends across your entire batch. You might find most seeds sprout on day two or three. If one variety lags behind, you can adjust conditions specifically for that group. Consistency in checks builds a detailed germination calendar. Over several batches, you learn exact timings by strain. That insight saves time on future grows and boosts uniformity when moving seedlings to the next stage with precision.
Photographic Journaling
Taking photos at each stage gives visual proof of germination progress. Place a consistent background and include a date stamp or label in every shot. With clear images, you can compare taproot size and seed coat changes over time. That visual log helps when planning improvements. Plus, sharing photos with other growers sparks useful feedback. Capture images every twelve to twenty-four hours until all seeds break open for best results.
Over time, your photo archive becomes a reference guide. When you test new strains, compare germination visuals to past records. That method can reveal if environmental tweaks produced faster sprouts. Annotate each image with notes on temperature and moisture. Combined data and visuals give a complete picture of what works. This practice also sharpens your observational skills and boosts confidence when handling future seeds because you know exactly how they reacted accurately.
Adjusting Environment
After tracking, refine your germination setup based on observations. If taproots appear unevenly, adjust moisture levels or temperature. Increase humidity or add slight heat if many seeds lag. If mold appears, reduce moisture and boost airflow. Make small changes and monitor results. That process keeps you from overcorrecting. Gradual tweaks lead to consistent germination and healthy roots. Stay flexible and ready to adapt to seed needs for each batch cycle.
Consistent testing and data-driven adjustments sharpen your germination skills. Keep a log of every tweak and outcome. Compare weekly or monthly records to spot long-term trends. That habit clarifies which settings work best for each strain. It also prepares you for unexpected issues and ensures swift corrections. By fine-tuning conditions this way, you support stronger taproots and uniform emergence. Each improvement builds confidence and makes future germination runs more predictable.
Maximizing Success Rates
Using Quality Medium
Choosing a clean, nutrient-free starter medium helps seedlings establish strong roots. Many growers use rock wool cubes, peat pellets, or coconut coir as starting points. Those options hold moisture well and drain excess water. Ensure your medium remains sterile before planting to avoid pathogens. Gently press the sprouted seed into a small opening. That step places the taproot in direct contact with the medium for rapid growth initiation and stability.
High-quality potting mix also supports early root branching. Look for mixes free of compost or fertilizer at this stage. Those additions can burn tender roots. You want a neutral pH and fine texture. If you prefer soil, choose a light blend with perlite or vermiculite to improve aeration. That mix lets roots access oxygen easily. By starting in the right medium, young plants face fewer obstacles in their root development.
Maintaining Sterility
Preventing contamination at the germination stage keeps seeds safe and supports healthy sprouts. Always wash hands and sterilize any tools before handling seeds. Use boiled and cooled water or filtered water in your setup. Replace paper towels and trays with clean materials for each batch. If you spot mold, remove affected seeds immediately. These practices minimize disease risk and let your seeds focus on developing strong taproots without competition. They also avoid unwanted issues.
Sterile conditions also speed growth by reducing resource waste. Pathogens consume energy and moisture that seeds need to germinate. With a clean setup, every drop of water supports the embryo. Keep workspace free of soil spills or debris. Use separate containers for each seed or small groups. That precaution stops cross-contamination. By staying vigilant, you ensure your germination success rests on quality care instead of battling harmful microbes and daily routine.
Gentle Handling
Rough handling can damage delicate taproots and delay growth. Use clean tweezers or moist fingertips to lift seeds and seedlings. Avoid pinching the root itself or twisting the seed plug. When transferring sprouts to soil or medium, make a small hole and let the seedling slide in naturally. That gentle method reduces stress and cuts transplant shock. Handling seeds softly supports faster, healthier development right from the start and consistency.
Practicing gentle handling also boosts confidence when you move tiny sprouts. Take your time and work near eye level to see the taproot clearly. If you struggle, practice on extra seeds to refine your technique. That extra step pays off when you avoid damaging embryonic tissue. Always handle one seed at a time and return unused seeds to storage quickly. By refining your touch, you improve germination outcomes and overall yields.
FAQs about how long do cannabis seeds take to germinate
Is 7 days without sprout normal?
Seeds can take up to a week to show a taproot under less-than-ideal conditions. If you hit low temperatures or dry surroundings, sprouting may stall for seven days or more. However, most viable seeds crack by day three or four. At day seven, you might dunk seeds again briefly or adjust warmth and humidity. But avoid over-soaking, which risks rotting before sprouting. Monitor seed health while you wait.
Can I speed it up artificially?
Yes, you can shorten germination by using controlled methods like heating mats and soaked incubation. Heat mats set to twenty-four degrees Celsius speed metabolic processes. Pre-soaking seeds in a peroxide solution softens shells quickly. You can also use seed primers sold by horticultural suppliers. Use these aids sparingly and monitor seeds to avoid damage. With careful treatment, you may see taproots in less than thirty-six hours.
Does seed depth affect timing?
Yes, placing seeds too deep can delay emergence. Shallow planting at five millimeters or less gives sprouts quick access to the surface. If you bury seeds deeper than ten millimeters, seedlings need more energy to push through the medium. That extra effort extends germination time by a day or more. Always follow breeder guidelines for depth. Proper placement balances moisture retention with minimal resistance for the taproot.