Preparing Your Setup
Gathering Materials
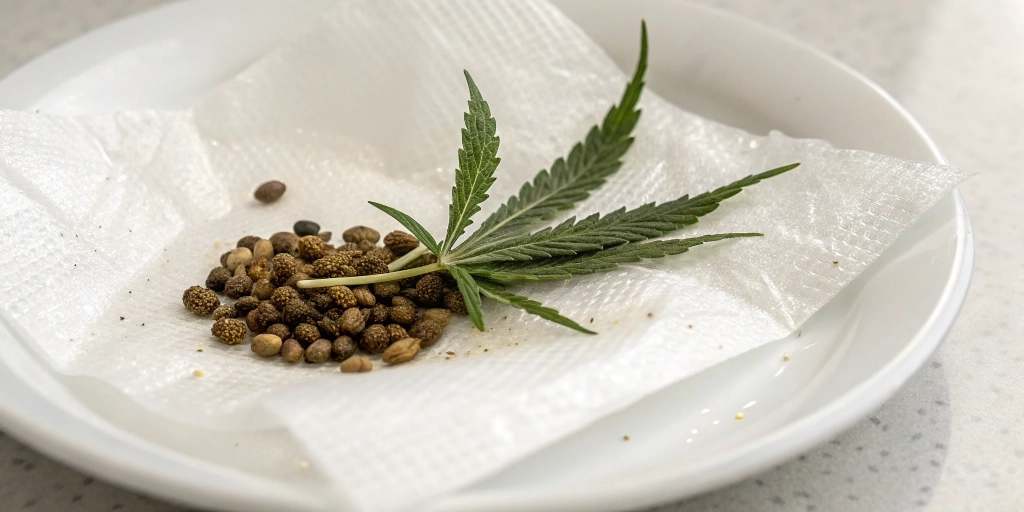
First, collect clean items you need for germination. You will need small containers, pH-neutral water, and either paper towels or a gentle aeration system. Also, pick your growing medium soil, rockwool, or starter plugs. Make sure you have a reliable thermometer and hygrometer to track conditions. By gathering everything in advance, you avoid interruptions that can stress seeds and delay germination.
Next, arrange your tools in a dedicated space. Group items by function: watering tools, containers, and labels. Clear clutter to keep the workspace safe and hygienic. Label each container with the date you start soaking your seeds to monitor progress. This small step prevents mix-ups and gives you clear records. With materials at hand, you prepare a smooth workflow that helps each seed thrive.
Recommended Strains
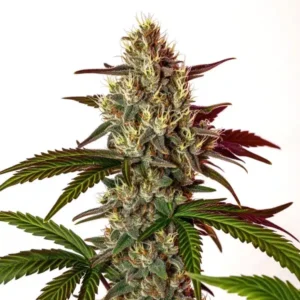
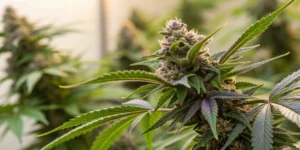
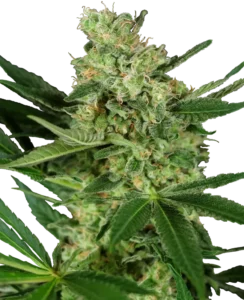
Gorilla Purple Auto
|
|
THC | 20% - 24% (Medium) |
|
|
Lineage | GG4 x Purple Punch |
|
|
Type | Autoflowering |
|
|
Height | 4.92 ft | 1.5 m |
|
|
Yield | High |
|
|
Yield Indoor | 1.8 - 1.97 oz/ft² | 550 - 600 g/m² |
|
|
Yield Outdoor | 4.23 - 7.05 oz/plant | 120 - 200 g/plant |
|
|
Life Cycle | 9 - 11 weeks |
|
|
Phenotype | 50% Indica / 50% Sativa |
|
|
Medical | Arthritis, Insomnia, Pain |
|
|
Effects | Creative, Euphoric, Relaxed |
|
|
Flavors | Citrus, Earthy, Sweet |
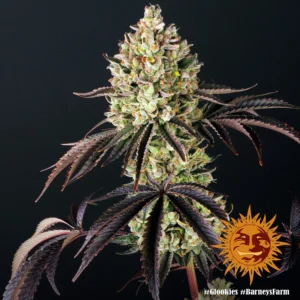
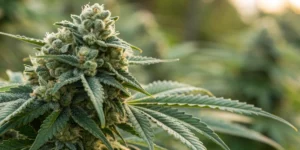
Pumpkin Spice Strain
|
|
THC | 21% - 23% (Medium) |
|
|
Lineage | Sour Apple x Animal Cookies |
|
|
Type | Feminized |
|
|
Height | 5.74 ft | 1.75 m |
|
|
Yield | Medium |
|
|
Yield Indoor | 1.31 - 1.8 oz/ft² | 400 - 550 g/m² |
|
|
Flowering Time | 9 - 10 weeks |
|
|
Phenotype | 50% Indica / 50% Sativa |
|
|
Effects | Creative, Uplifted, Happy |
|
|
Flavors | Apple, Earthy, Citrus, Pine |
Sterilizing Containers
Start by cleaning all containers with warm, soapy water. Scrub gently to remove any dirt or residue. Then rinse thoroughly to eliminate soap traces. Soap residue can harm tiny roots, so confirm each container feels completely free of slickness. Clean tools help you avoid pathogens that might stunt seed growth.
After rinsing, soak containers in a mild bleach solution (one part bleach to ten parts water) for ten minutes. Rinse again with fresh water until no bleach scent remains. Finally, air-dry your containers in a sterile area. Dry surfaces discourage mold, giving seeds a safe spot to begin their sprouting journey.
Temperature and Humidity Prep
Aim for a temperature range between 20°C and 25°C (68°F to 77°F). Use a digital thermometer to check your space. If it feels cool, add a gentle heat mat under your containers. Heat mats help maintain consistent warmth, so seeds wake promptly. Avoid direct heat sources that may overheat localized areas.
Maintain relative humidity at around 70%. To boost humidity, cover containers with a clear dome or plastic wrap. Ensure slight airflow by adding small vent holes. This balance keeps seeds moist without drowning them. Consistent warmth and humidity create an ideal climate for early root development.
Soaking Techniques
Choosing the Right Water
Always use pH-balanced water between 6.0 and 6.5. Tap water often contains chlorine and minerals that hinder sprouting. If your water source varies, let it sit for 24 hours to off-gas chlorine. Alternatively, use filtered or bottled spring water. These options deliver more stable pH levels without harmful additives.
Transitioning seeds from dry to wet requires gentle water. Warm your water to room temperature before pouring. High-temperature shifts can shock seeds and slow root emergence. By matching the seed’s internal temperature, you help it activate enzymes that trigger sprouting processes naturally.
Soak Duration Guidelines
Begin by soaking seeds for 12 to 24 hours. Check them periodically to ensure they haven’t oversoaked. Overextended soak times can drown seeds and reduce oxygen uptake. If a seed sinks and remains swollen, proceed to the next germination step. Shriveled seeds or those that stay closed may need a slight tap to settle in the water.
Never leave seeds soaking longer than 32 hours. At that point, you risk fungal growth and seed rot. If you notice water clouding or odor, drain and rinse seeds immediately. Refresh water and monitor closely. Clear water signals a healthy soak and encourages prompt root sprouting.
Adding Gentle Aeration
Place seeds in a mesh basket submerged in water. Use an aquarium air pump on low airflow to circulate water gently. This trick boosts oxygen levels around the seed coat, speeding root emergence. Continuous, mild agitation prevents stagnation without stressing delicate seeds.
Alternatively, swirl seeds by hand several times a day. Stirring for a few seconds renews oxygen and prevents bacterial buildup. Always handle seeds with tweezers or clean fingers to avoid contamination. By combining minimal movement and clean practices, you create an oxygen-rich environment where roots can break free.
Germination Methods
Paper Towel Approach
Lay two damp paper towels on a flat surface and spread your seeds evenly. Fold one towel over the seeds and gently press to secure. Place the bundle inside a sealed plastic bag or between two plates. Keep it in a warm spot at 22°C to 24°C (72°F to 75°F). Check twice daily to keep towels moist.
After 2 to 5 days, look for tiny white roots emerging from seed cracks. Handle sprouts by their shell once roots reach 1 to 2 cm to avoid damage. Transfer each to a starter plug or small pot with light soil. This simple system lets you observe progress and manage conditions precisely.
Direct Soil Germination
Fill small pots with a light, fast-draining mix. Plant seeds about 1 cm deep, pointing the softened end downward. Cover gently and mist soil to settle particles. Place pots under a humidity dome or cover loosely with plastic. Keep soil moist but not wet, ensuring it never dries out completely.
Within 3 to 7 days, seedlings break through the soil surface. Adjust dome vents to reduce humidity gradually as leaves unfold. This method limits transplant shock by letting roots grow directly into their final medium. You eliminate extra handling, giving fragile sprouts stable growing conditions from day one.
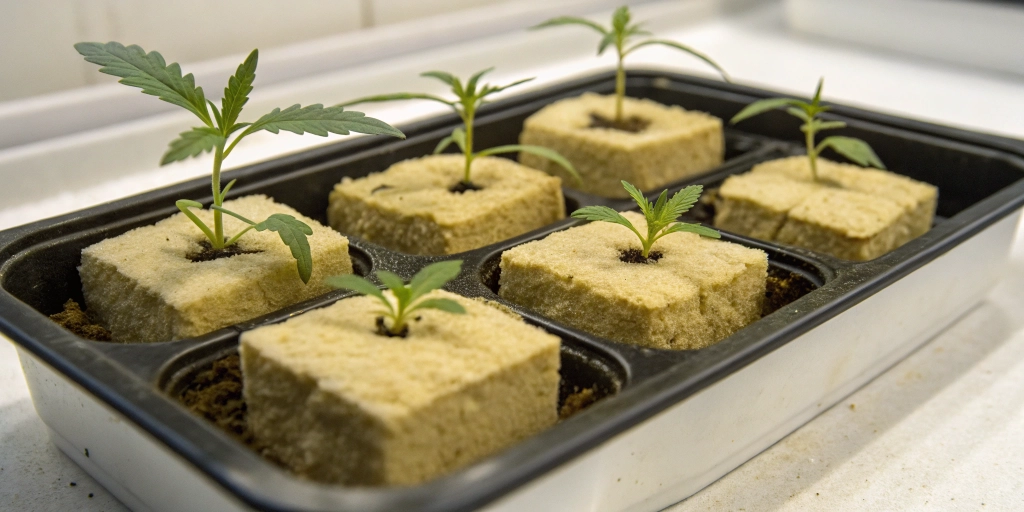
Rockwool Cubes
Soak rockwool cubes in pH-adjusted water (pH 5.5 to 6.0) for at least an hour. Squeeze gently to remove air pockets. Place one seed in each cube, pushing it about 0.5 cm below the surface. Then mist the top and cover with a humidity dome. Keep cubes on a heating mat if ambient temperature dips below 22°C.
Check cubes daily for moisture. Add water sparingly to keep the cube damp without soaking. Once the sprout’s root tip appears at the cube’s base, move cubes under gentle light. Rockwool offers excellent aeration and moisture retention, giving roots the space they need to expand freely.
Monitoring Sprouts
Checking for Radicles
Inspect seeds twice daily. A healthy radicle (primary root) appears as a bright white tip emerging from the seed shell. Use tweezers to remove shell fragments carefully once the root reaches 2 cm. Shell bits can trap moisture and invite mold if left on the radicle.
Record the date when you see each radicle. Tracking times lets you compare different strains or methods. If seeds vary widely in timing, isolate slower sprouters in separate trays. Consistent monitoring helps you fine-tune your technique and improve success rates over multiple attempts.
Maintaining Moisture
Aim to keep your medium consistently damp but not waterlogged. Misting daily ensures even moisture without drenching sprouts. If using domes, ventilate briefly each morning to refresh air and reduce condensation. This prevents water droplets from pooling on leaves, which can cause rot.
As roots grow, watch for drying at the medium’s edges. If cubes or soil start to feel dry, increase mist frequency or add a small amount of pH-balanced water. Balanced hydration supports nutrient uptake and prevents stress signals that can delay leaf development.
Avoiding Mold
Maintain airflow around your containers by cracking domes open slightly. Use a small fan on low speed to circulate air without disturbing sprouts. Airflow discourages mold spores from settling and colonizing damp surfaces. Always wipe condensation from dome surfaces to reduce humidity pockets.
If you spot fuzzy white or gray patches on containers or medium, remove affected areas immediately. Increase ventilation and lower humidity until you control mold growth. By catching mold early, you protect tender roots and leaves from damage that can hinder growth.
Transplanting Seedlings
Choosing Potting Mix
Select a light, nutrient-rich mix designed for seedlings. A blend of peat moss, perlite, and vermiculite works well. Ensure your mix drains freely to prevent root rot. Avoid heavy soils that compact around young roots and slow growth.
Fill new pots leaving 2 cm of space at the top for watering. Gently create a hole just deep enough for each root ball. Place the seedling, ensuring its first leaves sit above the soil line. Backfill gently, firm the soil lightly, and water to settle the mix. This careful handling encourages roots to spread into fresh medium.
Handling Delicate Roots
When transplanting, hold seedlings by their leaves, not stems. Leaves can withstand light pressure, while stems easily bruise. Lift seedlings with a small spoon or spatula to support the root mass. Work quickly to minimize exposure to air, which can dry out roots.
Once in new pots, water immediately with pH-balanced solution. Keep soil moist for the first 24 hours to help roots reestablish. Avoid direct light on the transplanted seedlings until they show new growth. This recovery period reduces transplant shock and promotes steady development.
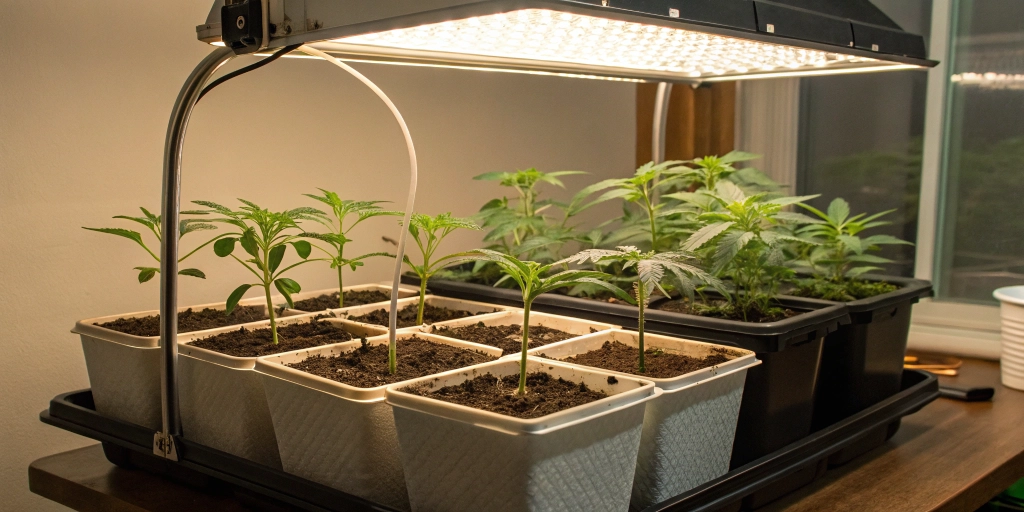
Initial Light Exposure
Introduce seedlings to gentle light for 16 to 18 hours daily. Use a fluorescent or LED grow light at a distance of 20 to 30 cm. Too much intensity can scorch young leaves. Monitor leaf color and stem stretch to adjust height and duration.
After one week, gradually increase light intensity or move lights closer. Observe seedlings for signs of stress or bleaching. Balanced light exposure encourages compact, strong stems and lush leaves. With proper lighting, seedlings flourish and prepare for the vegetative stage.