Selecting Planting Medium
Soil Mix Components
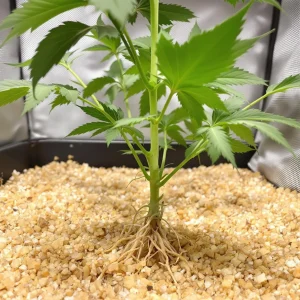
Choosing the right planting medium sets the stage for vigorous sprout growth. Begin with a light soil mix that drains well while retaining moisture. A blend of peat moss, perlite, and organic compost often works best. This combination promotes air circulation around emerging roots and prevents waterlogging. By keeping the mix loose, young roots explore easily and access nutrients without compaction hindering their stretch.
Next, ensure each component remains free of contaminants. Sterilized peat moss prevents pathogenic build-up while horticultural perlite adds essential porosity. Meanwhile, well-decomposed compost delivers natural minerals. Together, they form a balanced environment that supports steady early development without chemical overload. Moreover, this approach reduces the need for heavy feeding later and focuses on gentle, steady root establishment.
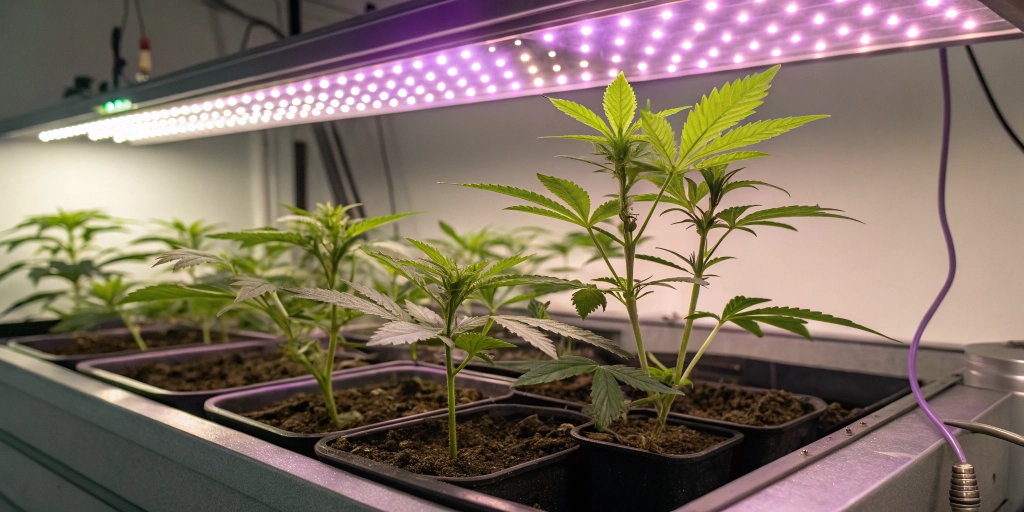
Recommended Strains

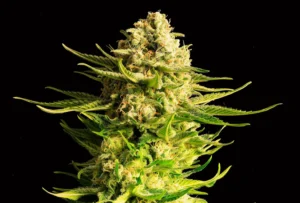
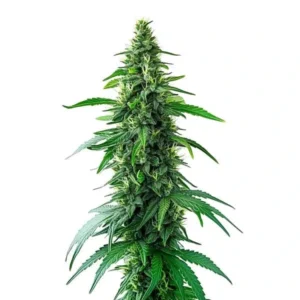
Granddaddy Purple
|
|
THC | 25% (High) |
|
|
Lineage | Purple Urkle X Big Bud |
|
|
Type | Feminized |
|
|
Height | 4.92 ft | 1.5 m |
|
|
Yield | Medium |
|
|
Yield Indoor | 1.47 - 1.64 oz/ft² | 450 - 500 g/m² |
|
|
Yield Outdoor | 21.16 - 24.69 oz/plant | 600 - 700 g/plant |
|
|
Flowering Time | 8 - 10 weeks |
|
|
Phenotype | 70% Indica / 30% Sativa |
|
|
Medical | Arthritis, Insomnia, Pain |
|
|
Effects | Happy, Relaxed, Talkative |
|
|
Flavors | Berry, Fruity |
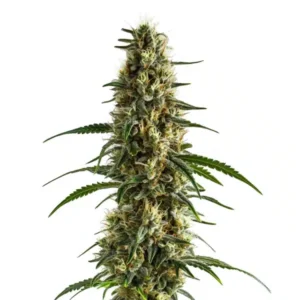
Charlottes Web
|
|
Lineage | Secret |
|
|
Type | CBD Feminized |
|
|
Height | 4.92 ft | 1.5 m |
|
|
Yield | Low |
|
|
Yield Indoor | 1.15 - 1.31 oz/ft² | 350 - 400 g/m² |
|
|
Yield Outdoor | 19.4 - 21.16 oz/plant | 550 - 600 g/plant |
|
|
Flowering Time | 10 - 12 weeks |
|
|
Phenotype | 30% Indica / 70% Sativa |
|
|
Medical | Depression, Insomnia, Muscle Spasms |
|
|
Effects | Happy, Hungry, Relaxed |
|
|
Flavors | Earthy, Pine, Woody |
Soilless Options
Soilless alternatives offer a clean start beyond traditional earth-based media. Popular choices include coco coir, rockwool cubes, and peat pellets. Coco coir holds water effectively, while ensuring good aeration around emerging radicles. Rockwool provides a sterile, uniform block that simplifies moisture control. Pellets expand quickly, creating a ready-to-use plug for each seed. These options help beginners avoid soil-borne issues and simplify the transition into larger pots.
Furthermore, soilless media grant predictable water retention rates. In particular, coco coir buffers pH swings better than plain soil. Rockwool remains neutral until adjusted, giving the grower full control. Meanwhile, expanded peat pellets reduce transplant shock by avoiding root disturbance. By using these tools, you maintain consistency across all seedlings and limit surprises in water demand or fungal growth.
pH Adjustment
Maintaining correct pH ensures nutrient availability at the earliest stage. Cannabis seedlings thrive in a slightly acidic range, around 5.8 to 6.2. Test water and planting medium with reliable pH strips or a meter. If pH drifts too high or low, adjust using mild buffer solutions. Always mix adjustment products in water before applying to the soil or soilless medium to avoid direct root burn.
Moreover, recalibrate your tools frequently to keep readings accurate. Check pH after mixing any nutrient solution but before watering the medium. This practice prevents unexpected shifts that could stunt root hair growth. As roots develop, stable pH conditions encourage efficient nutrient uptake and reduce stress, giving each seed the best start possible.
Depth and Spacing
Ideal Planting Depth
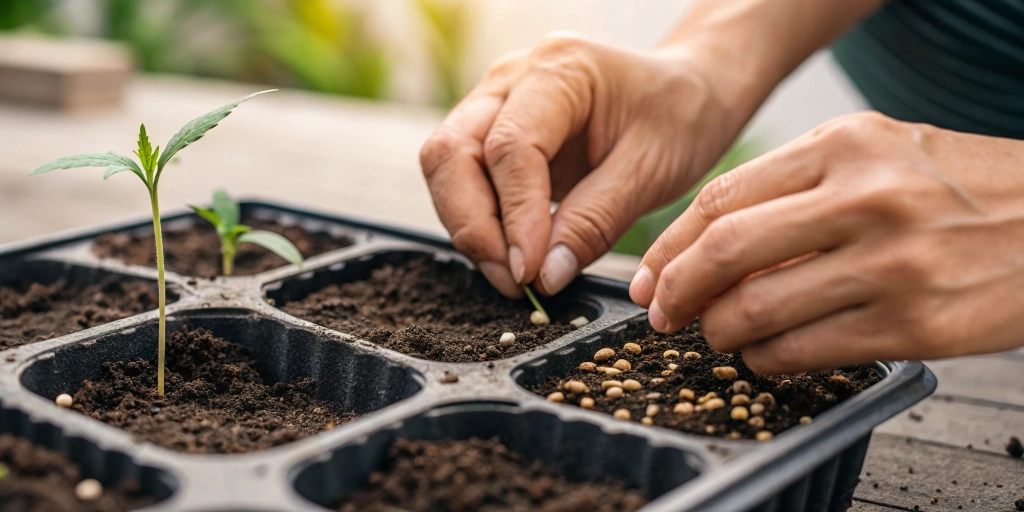
Planting depth determines how easily seedlings like Granddaddy Purple Auto break through the surface. Generally, place seeds at a depth equal to twice their diameter. This guideline ensures they remain moist without suffocating. If planted too deep, sprouts struggle to reach light, leading to weak stems. Conversely, too shallow placement risks drying out and uneven germination.
In practice, press each seed gently into the medium and cover with a thin layer of soil or pellet fragment. Lightly firm the top to maintain moisture contact. This method enhances consistent emergence across all trays. By following this simple measure, you support uniform growth and reduce early losses that can occur from poor depth choices.
Seed Spacing in Trays
Providing adequate room between seeds prevents overcrowding and competition. In standard germination trays, place each seed plug or seed at least two inches apart. This spacing gives roots room to expand and leaves enough surface area for individual watering. Crowded seeds can entangle roots and block airflow, leading to weak, leggy sprouts.
Moreover, proper spacing simplifies transplanting later. When roots fill each cell without crossing into neighbors, you avoid shock and root damage. Each plant then transitions smoothly into larger containers. With clear separation, you also gain visual access to monitor seedling health and spot issues early without disturbing adjacent plants.
Room for Root Development
After germination, seedlings need space for root expansion. Ensure your chosen medium allows several inches of depth before transplanting. Shallow trays limit growth and force early potting up, which can stress young plants. Instead, start in cells at least three inches deep. This volume gives tiny roots freedom to branch and access oxygen.
Furthermore, deeper cells buffer moisture fluctuations, reducing daily watering needs. Roots that grow into a larger volume secure a stable environment, making seedlings more resilient against drought or overwatering. By giving roots headroom to spread, you encourage thicker, denser root systems that support robust plant development later.
Moisture Management
Initial Watering Techniques
Watering at the start needs a gentle touch. Use a fine mist spray or a low-pressure watering can to moisten the medium evenly. Avoid drenching, which can displace seeds or compact soil. Aim for surface dampness that retains moisture but still allows air pockets to remain intact. This balance prevents seed rot and gives young roots the oxygen they need.
Next, check trays frequently during the first days. If the surface dries, mist again quickly to maintain steady hydration. However, keep water levels below an inch from the tray bottom to avoid drowning cells. In this manner, you support consistent moisture without risking root suffocation or fungal issues often triggered by overly wet conditions.
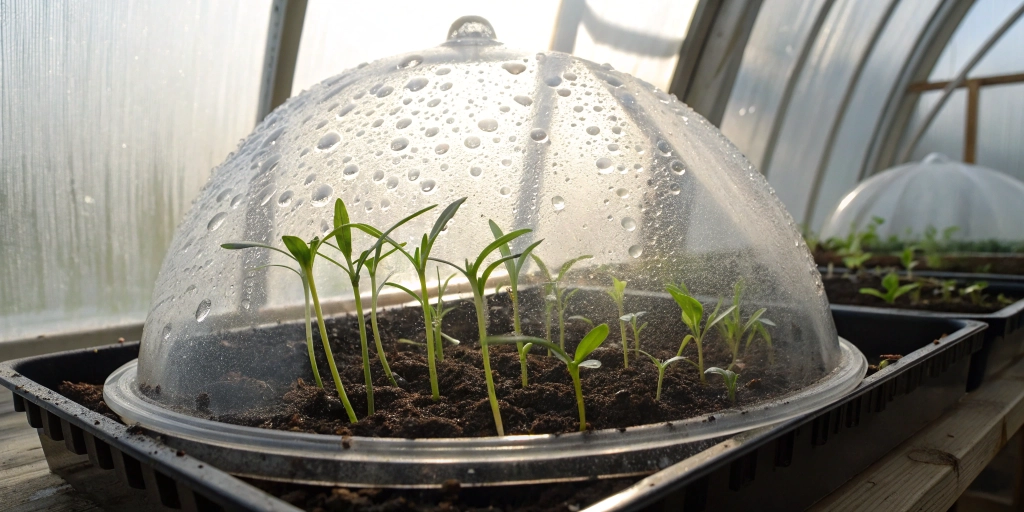
Humidity Dome Use
Covering trays with a humidity dome creates a mini greenhouse that stabilizes moisture. Place a clear lid over the tray after watering to trap humidity and reduce evaporation. Within this microclimate, seeds germinate more reliably since they remain in consistent conditions. Check daily to prevent mold build-up and wipe any condensation away when heavy droplets form.
Furthermore, gradually ventilate the dome as seedlings emerge. Open small vents or remove the cover for a few hours each day. This process acclimates sprouts to lower humidity and strengthens their outer tissues. By controlling humidity in stages, you reduce shock and help plants adjust smoothly to typical room conditions.
Avoiding Overwatering
Overwatering ranks among the most common setbacks for new growers. Excess moisture suffocates roots and invites pathogens. To prevent this, water only when the top quarter inch of medium feels dry. Use a finger test or small moisture meter to guide your decisions. If the tray remains damp, hold off on adding more water.
Moreover, ensure proper drainage beneath each tray. Remove any standing water daily and elevate trays on small risers. This setup lets excess moisture escape and air circulate below. By maintaining a balance, roots access both water and oxygen. Ultimately, careful moisture management leads to strong, healthy seedlings primed for the next phase.
Light and Temperature
Light Intensity for Sprouts
Young cannabis shoots need bright, indirect light to develop sturdy stems. Place fluorescent or LED grow lights four to six inches above seedlings. This height delivers sufficient light without burning delicate leaves. Keep lights on for 18 hours each day, with a six-hour dark period to support natural growth cycles.
In addition, adjust light distance as sprouts grow. Raise or lower fixtures to maintain consistent intensity at the canopy. Too little light causes stretching, while too much can bleach leaves. By monitoring height and brightness, you foster compact, vigorous growth ideal for later transplantation.
Heat Mat Benefits
Using a heat mat helps maintain soil temperatures between 21–24 °C (70–75 °F), which speeds up germination. Place trays directly on the mat and monitor temperature with a reliable probe. Consistent warmth encourages faster metabolic activity and earlier sprout emergence, giving you a head start on the grow cycle.
Moreover, mats reduce temperature swings overnight. Without supplemental heat, room temps can drop, slowing germination or causing uneven sprout times. By keeping a steady bottom heat, you increase overall germination rates and synchronize seedling development. This uniformity saves time and promotes a healthier crop down the line.
Nighttime Temperature Control
While warmth helps sprouting, cooler nights strengthen young plants. Aim for a nighttime range around 18 °C (65 °F). This drop mimics natural conditions and encourages stronger stem and root growth. Use a thermostat or simple thermometer to track temperatures and adjust heating or ventilation accordingly.
Furthermore, avoid sudden temperature shifts that can shock seedlings. Implement slow changes by setting timers on heaters and fans. This method ensures gradual transitions between day and night settings. As a result, plants develop a robust foundation that supports vigorous growth in later stages.
Early Nutrient Introduction
Gentle Starter Fertilizers
Introducing nutrients too early can harm delicate seedlings. Instead, begin with a mild, well-balanced starter fertilizer once true leaves appear. Use a quarter-strength solution, ensuring each seedling receives essential nitrogen, phosphorus, and potassium without overload. This light feeding supports early leaf growth and prepares roots for heavier feeding later.
Moreover, apply fertilizer by misting the surface or running a small volume through the tray bottom. This dual approach ensures nutrients reach both roots and foliage without saturating the medium. By maintaining a cautious feeding schedule, you avoid fertilizer burn while promoting steady, healthy development.
Organic vs. Synthetic
Choosing between organic and synthetic nutrients depends on grow style and goals. Organic feeds derive from natural sources, like worm castings or seaweed extract. They release nutrients slowly and improve soil structure over time. Synthetic options deliver precise ratios of minerals instantly, allowing for tighter control of each element.
In practice, organic blends suit growers aiming for sustainable, long-term soil health. Conversely, synthetic formulas fit those who prefer rapid adjustments and clear metrics. Both methods work effectively when used correctly. The key lies in matching your feeding plan to your skill level and desired end product.
Dosage and Frequency
Feeding frequency hinges on medium type and drainage rate. In soilless setups, flush a quarter-strength nutrient solution every watering cycle. For soil mixes, feed every two to three waterings to prevent salt build-up. Always start with lower concentrations, then gradually increase as plants grow larger.
Additionally, monitor seedlings closely for signs of nutrient stress. Yellowing or spotting can signal overfeeding, while pale leaves may point to underfeeding. Adjust dosage accordingly, and keep feeding logs for reference. By balancing concentration and timing, you help seedlings flourish without exposing them to nutrient shocks.
FAQs about planting cannabis seeds
Can I plant seeds directly outdoors?
Yes, you can sow seeds outside once soil warms above 15 °C (60 °F). Choose a sheltered spot with partial shade at first. This approach mimics natural germination in spring. Make sure to monitor moisture levels and protect emerging sprouts from heavy rain or pests.
How soon do they emerge?
Seeds typically sprout within three to seven days under ideal warmth and moisture. Use a humidity dome and heat mat to maintain consistent conditions. If emergence takes longer, check for overwatering or low temperatures, which can slow the process.
What if soil dries out too quickly?
If the medium loses moisture rapidly, consider adding a layer of vermiculite on top or using a humidity dome longer. You can also switch to a soil mix with higher water retention, such as one containing more peat or coco coir. Ensure proper drainage to avoid waterlogging while retaining needed moisture.