Autoflower week 6 is a crucial stage where flowering is fully underway and bud development becomes the main focus. At this point, a 6 week old autoflower requires specific adjustments in nutrients, lighting, and environmental conditions to avoid stress and maximize yield. Understanding what to expect during week 6 flowering helps growers support healthy buds and prevent common issues before harvest.
Autoflower week 6 is a pivotal moment. Your plants are no longer in their early stages, and the focus shifts from growth to maximizing the flower potential. As the flowering stage progresses, it’s essential to tailor your care routine to suit these evolving needs. Small adjustments can make a significant difference in the quality and quantity of your yield.
Recommended Strains

Corkscrew Auto - Tyson S
|
|
THC | 18% - 19% (Medium) |
|
|
Lineage | Cherry Pie Auto x Tangie |
|
|
Type | Autoflowering |
|
|
Height | 2.79 ft | 0.85 m |
|
|
Yield | Medium |
|
|
Yield Indoor | 1.47 - 1.64 oz/ft² | 450 - 500 g/m² |
|
|
Yield Outdoor | 3.17 - 6.17 oz/plant | 90 - 175 g/plant |
|
|
Life Cycle | 8 - 10 weeks |
|
|
Phenotype | 40% Indica / 55% Sativa / 5% Ruderalis |
|
|
Effects | Focused, Uplifted |
|
|
Flavors | Candy, Citrus, Pineapple |
Break-Up Cake Auto
|
|
THC | 21% - 22% (Medium) |
|
|
Lineage | Girl Scout Cookies x Cherry Pie |
|
|
Type | Autoflowering |
|
|
Height | 3.94 ft | 1.2 m |
|
|
Yield | High |
|
|
Yield Indoor | 1.64 - 1.97 oz/ft² | 500 - 600 g/m² |
|
|
Yield Outdoor | 17.64 - 21.16 oz/plant | 500 - 600 g/plant |
|
|
Life Cycle | 7 - 8 weeks |
|
|
Phenotype | 60% Indica / 40% Sativa |
|
|
Effects | Balanced |
|
|
Flavors | Fruity, Citrus |
Knowing the intricacies of this week can help you optimize your plant’s potential. From nutrient adjustments to light cycle modifications, every detail counts. Let’s dive into practical tips and insights that can guide you through this exciting phase.
Autoflower Week 6 Flowering Stage
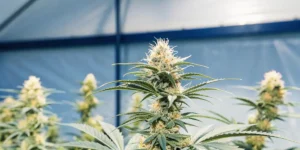
Autoflowers week 6 is typically when plants show their true flowering potential. The flowering stage is in full gear, and you can expect to see significant bud development. This is the time when the plant channels most of its energy into flower production.
During this period, your plants might also start to show signs of stress if they’re not getting what they need. Monitoring and adjusting conditions can prevent common issues. Look for signs like yellowing leaves or stunted growth, which can indicate nutrient deficiencies or other problems.
In autoflower week 6 flowering stage, the plant’s energy is primarily directed towards bud formation, and you might observe an increase in the plant’s overall aroma and resin production. This is a critical phase where even minor environmental changes can impact the final outcome, so maintaining stable conditions is paramount.
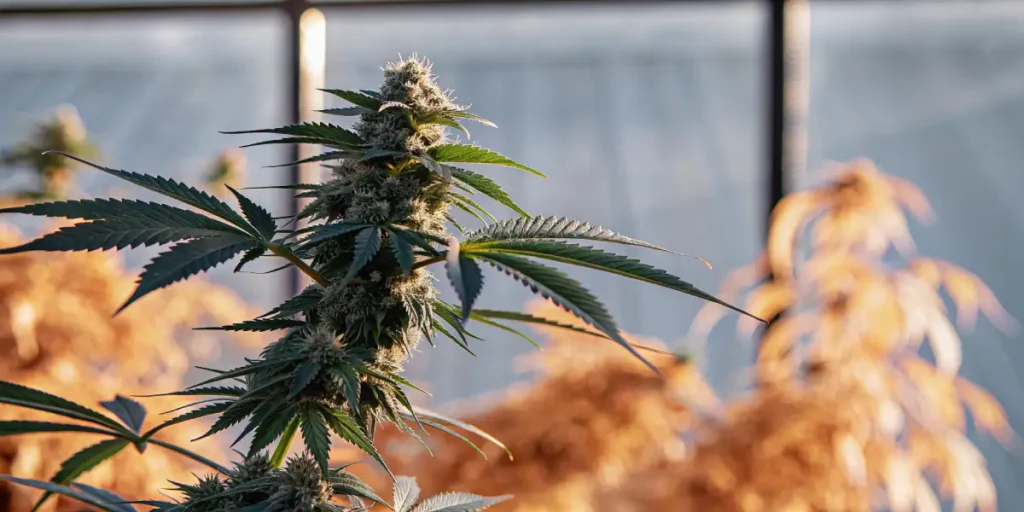
To make the most of autoflower week 6, ensure your environment is optimized for humidity and temperature levels. Too much humidity can invite mold, while temperatures that are too high or low can stunt growth. Keeping these factors in balance will support the plant in reaching its full flowering potential.
Adjusting the Nutrient Schedule
In autoflower week 6, the nutrient schedule is crucial. At this stage, your plants need more phosphorus and potassium to fuel bud growth. These nutrients help support the development of dense, resinous flowers.
Consider tweaking your nutrient solution to include a higher percentage of these key elements. However, avoid overfeeding, as this can lead to nutrient burn. It’s a fine balance, and experience will guide you in finding the right mix.
When adjusting the autoflower week 6 nutrient schedule, it’s beneficial to incorporate organic options where possible, as they can provide a gentler nutrient release. Products like compost tea or worm castings can complement your feeding regimen, promoting healthier soil and plant development.
It’s also important to monitor the pH levels of your nutrient solution, as incorrect pH can lock out essential nutrients, leading to deficiencies. A pH range between 6.0 and 7.0 is generally recommended for soil grows, ensuring that your plants absorb what they need effectively.
Light Cycle Tips for Week 6
Light plays a significant role in the flowering stage. While autoflowers are less sensitive to light cycles than photoperiod plants, providing the right conditions can enhance growth.
During autoflower week 6, maintaining a light cycle of about 18 hours on and 6 hours off is typically recommended. This cycle maximizes photosynthesis without stressing the plants.
Exploring autoflower week 6 light cycle tips can lead to discovering what works best for your specific grow environment. Some growers find success with a 20/4 cycle, which can accelerate growth slightly, but it’s crucial to balance this with the risk of light stress.
Another consideration is the quality of light. Full-spectrum LED or HID lights can mimic natural sunlight and support robust growth during this critical phase. Ensure your lights are positioned correctly to avoid burning the plants while maximizing coverage.
Plant Care Guide for Week 6
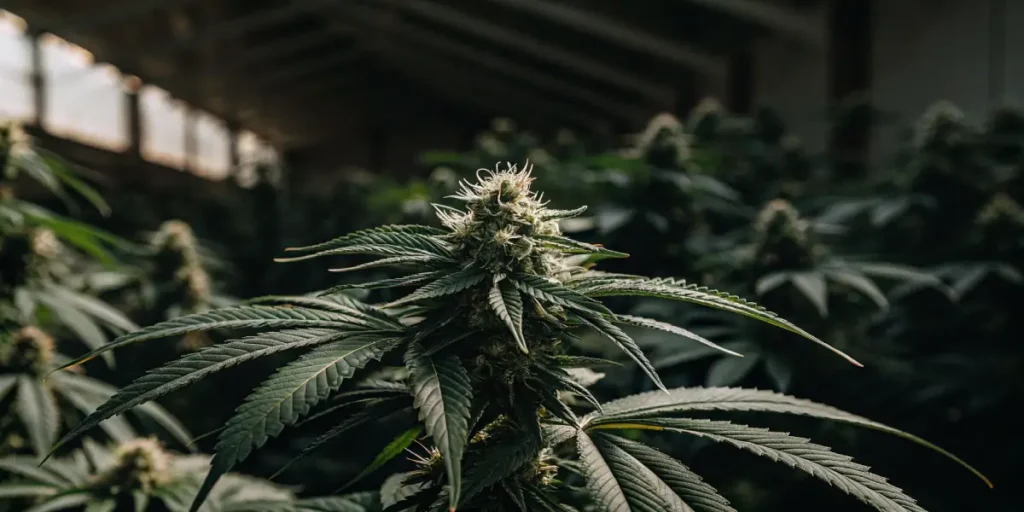
Proper care during autoflower week 6 can set the stage for a bountiful harvest. This is when your efforts in earlier weeks start to pay off, but it also requires continued vigilance.
Watering becomes particularly important now. The plants are thirstier as they put energy into bud production. Ensure the soil is moist but not waterlogged to avoid root issues.
As part of the autoflower week 6 plant care guide, it’s essential to maintain a clean growing environment. Regularly check for fallen leaves or debris, as these can harbor pests or diseases that could jeopardize your crop.
Pruning lower leaves that do not receive adequate light can also be beneficial. This allows the plant to focus its energy on the upper bud sites, promoting better air circulation and reducing the risk of mold. However, take care not to over-prune, as this can stress the plant.
Growth Expectations in Week 6
By now, you should see a noticeable increase in bud size. The flowers will continue to swell, and the plant’s aroma becomes more pronounced. This is a promising sign that you’re on track for a successful harvest.
Keep an eye out for any signs of mold or pests, which can become problematic as the buds become denser. Regularly inspecting your plants can help catch any issues early.
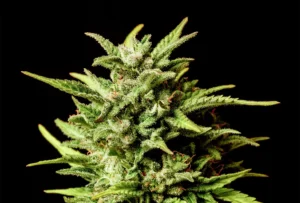
Autoflower week 6 growth expectations include an increase in trichome production, which gives the plant its frosty appearance and is a good indicator of potency. The plant’s color may also start to change, with some strains developing purples or reds as they mature.
It’s also a crucial time to support the plant’s structural integrity. As the buds gain weight, they can cause branches to sag or break. Using stakes or trellises can help support the plant and prevent damage, ensuring a healthy and productive finish to the flowering stage.
Autoflower Week 6: Key Indicators and Care Focus
| Aspect | What to Expect in Week 6 Autoflower | Recommended Action |
|---|---|---|
| Bud development | Rapid swelling and denser flowers | Support branches if needed |
| Nutrient needs | Higher phosphorus and potassium | Reduce nitrogen gradually |
| Aroma & resin | Strong smell and visible trichomes | Improve airflow and odor control |
| Humidity | Increased mold risk | Keep RH between 40–50% |
| Light cycle | Peak photosynthesis stage | Maintain 18/6 or 20/4 schedule |
- Monitor soil moisture levels to prevent over or under-watering.
- Adjust nutrients focusing on phosphorus and potassium.
- Maintain a consistent light cycle between 18/6 or 20/4.
- Inspect plants regularly for signs of pests or disease.
- Consider strain-specific needs; some may require unique care.
Strain Recommendations
Choosing the right strain can make a significant difference during autoflower week 6. Some strains are known for their ease of growth and robust yields.
Blueberry Auto from Global Green Genetics is a fantastic option. It’s renowned for its sweet flavor and high resilience, making it perfect for growers looking to minimize complications.
When considering strain recommendations for autoflower week 6, it’s beneficial to choose strains that are known for quick flowering and resistance to environmental stresses. Strains like Northern Lights Auto are popular for their hardiness and adaptability.
For growers seeking unique flavors, the Amnesia Haze Auto provides not only a citrusy aroma but also a robust growth pattern that handles minor fluctuations in care with ease, making it ideal for week 6 conditions.
FAQs: Common Questions About Autoflower Week 6
What kind of care adjustments are necessary in autoflower week 6?
During autoflower week 6, your care routine should focus on supporting the flowering process. This includes adjusting your nutrient schedule to increase phosphorus and potassium, essential for bud development. Regularly check your plants for signs of nutrient deficiencies or excess, such as yellowing leaves or nutrient burn.
Additionally, maintaining proper light cycles and ensuring adequate watering are crucial. Your plants will likely require more water as they bulk up the buds. Watch your plants closely and make small adjustments as needed to keep them healthy and thriving.
Another aspect of care adjustments involves keeping an eye on environmental conditions. Humidity levels should be kept in check to prevent mold, especially as the buds begin to thicken. Using dehumidifiers or fans can help maintain optimal conditions.
It’s also vital to continue monitoring for any signs of pests. Implementing integrated pest management strategies, such as introducing beneficial insects or using organic sprays, can help keep your plants healthy without resorting to harsh chemicals.
How do I manage the light cycle for optimal growth during week 6?
The light cycle can significantly impact growth during autoflower week 6. While autoflowers are not as dependent on light cycles as photoperiod strains, providing around 18 hours of light and 6 hours of darkness is a standard approach. This schedule supports photosynthesis and encourages robust bud development.
Some growers opt for a 20/4 schedule to push growth a bit further. However, be cautious and monitor your plants for any signs of stress, adjusting the cycle if necessary to ensure your plants remain healthy.
Managing the light cycle effectively during autoflower week 6 also involves considering the light intensity. Too much intensity can cause light burn, while too little may not support optimal growth. Adjusting the height and intensity of your lights can help find the sweet spot.
Incorporating a timer can ensure consistency in your light schedule, which is crucial for maintaining a stress-free environment for your plants. This consistency helps to reinforce the plant’s natural rhythm and maximize its growth potential.
What should I expect in terms of growth during autoflower week 6?
In autoflower week 6, you can expect significant progress in bud development. The plants will begin to focus their energy on producing flowers, leading to noticeable increases in size and density. The aroma will also become more pronounced as the plants mature.
It’s essential to keep a close eye on your plants for any signs of issues, such as mold or pests, which can become problematic as the buds swell. Regular inspections can help catch problems early and ensure a successful harvest.
Growth during autoflower week 6 is often marked by an increase in resin production, giving the buds a sticky, frosty appearance. This is a sign that the plant is nearing its peak in potency and flavor profile.
Monitoring for changes in leaf coloration can also provide insights into the plant’s health. Healthy green leaves indicate good nutrient uptake, whereas yellowing or spotting can highlight nutrient imbalances or deficiencies that need addressing.
Which strains perform best during autoflower week 6?
Strain selection can heavily influence your outcomes during autoflower week 6. Northern Lights Auto from Global Green Genetics is a great choice, known for its robust yields and ease of growth. This strain is forgiving, making it ideal for both beginners and seasoned growers.
Blueberry Auto is another excellent option due to its sweet flavor profile and durability. It requires minimal intervention, allowing you to focus on enjoying the growth process rather than troubleshooting issues. These strains are designed to thrive in various conditions, making week 6 more manageable.
Other strains like Critical Auto are valued for their fast flowering times and large yields, making them ideal for growers looking to maximize their harvests during autoflower week 6. Their robust nature allows them to withstand fluctuations in care better than more sensitive strains.
Amnesia Haze Auto, with its invigorating aroma and vigorous growth, is also favored among growers who aim for a high-yielding, flavorful harvest. Its resilience to environmental challenges makes it a top contender for those looking to minimize stress during the flowering stage.
How can I prevent common problems during week 6?
Preventing issues in autoflower week 6 involves careful monitoring and timely interventions. Regularly inspect your plants for signs of nutrient deficiencies, such as leaf discoloration, and adjust your nutrient schedule accordingly. Avoid overfeeding, as this can lead to nutrient burn.
Ensure your plants receive consistent lighting and adequate water. Overwatering can lead to root problems, while underwatering can stress the plants and impede growth. By maintaining a balanced environment and addressing issues as they arise, you can minimize potential problems and support healthy development.
In addition to nutrient and watering practices, maintaining proper airflow within your grow space can help prevent mold and mildew, especially as the buds continue to thicken. Using oscillating fans can promote air circulation and maintain a healthy growing environment.
Regularly cleaning your grow area can also prevent pest infestations and disease outbreaks. Remove any dead foliage or debris promptly, and consider using preventative measures like neem oil or beneficial insects to protect your plants naturally.