Selecting the Right Outdoor Site
Sunlight and shade patterns
You want at least six to eight hours of direct sun daily to boost plant growth. First, walk the site at dawn, noon, and dusk to see how light moves. Notice spots that receive long sun stretches. Also track where trees or walls cast shade. Next, mark areas with too much heat in midday. Too much heat can burn leaves and stress plants. Meanwhile, morning sun fuels early leaf growth. In addition, gentle afternoon shade can protect plants from scorching. You can sketch a diagram to log light angles over spring and summer. Then pick the sunniest spot with slight afternoon relief.
After you choose the best plot, consider adding shade cloth or screens when heat spikes threaten plants. Use portable panels to ease midday sun. Also prune nearby branches that block beneficial morning rays. Keep records of daily highs and lows using a basic thermometer or weather app. Moreover, low fences can offer wind breaks and reduce moisture loss. Finally, aim for a mix of sun and shade that keeps soil temperature stable and promotes even growth throughout the season.
Soil testing basics
Healthy soil starts with proper pH and nutrients. First, collect soil samples from several spots across your site. Mix them to create a composite sample. Then use a home test kit to check pH. Aim for slightly acidic soil between 6.0 and 7.0. If levels stray, add lime to raise pH or sulfur to lower it. Also measure basic nutrient levels of nitrogen, phosphorus, and potassium.
Next, send a sample to a local lab for a detailed analysis. You’ll learn organic matter content and trace minerals like calcium, magnesium, and iron. With these results, you can blend compost, bone meal, or worm castings to enhance fertility. Moreover, topping the soil with organic mulch helps retain moisture and feed microbes. Over time, this creates a living soil that nurtures strong roots and healthy plants.
Privacy and security considerations
Growing cannabis outdoors can attract unwanted attention. First, review local laws and regulations governing outdoor grows. Some areas require privacy fencing or hidden plots. Always respect property lines and neighbor concerns. Also, avoid planting strains with strong aromas that drift on breezes.
Next, install natural barriers like hedges or bamboo screens to shield crops. You can train vines or tall shrubs to block sightlines. Keep gates locked and consider motion-activated lights to deter intruders. If odour remains an issue, use carbon filters or odor-neutralizing sprays near plants. By taking these steps, you protect your harvest and maintain a low profile.
Choosing Seeds and Germination
Feminized vs. regular seeds
Feminized seeds deliver nearly all female plants, which produce the resinous flowers you want to harvest. This choice streamlines your grow and avoids wasted space on males you would remove. For home growers and first-timers, feminized seeds offer a higher chance of a bud-bearing crop.
In contrast, regular seeds yield both male and female plants. Breeders and hobbyists who plan to create new strains often pick regular seeds. However, managing males adds extra work. If you aim for consistent yields without breeding, feminized seeds supply an easier path and steady results.
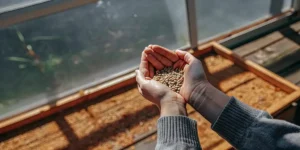
Germination methods
One reliable technique places seeds between moist, unbleached paper towels inside a sealed container. Keep the setup warm around 21–25 °C and check daily. As soon as the taproot appears at 1–2 cm, gently transfer sprouts to small starter pots with light soil.
Alternatively, use peat or coco starter plugs that hold moisture evenly. Simply nest seeds into pre-soaked cubes, then cover with a humidity dome and place under gentle light. Both methods succeed when you prevent drowning seeds and maintain a stable temperature. Quick germination sets the stage for vigorous seedlings.
Transplant timing
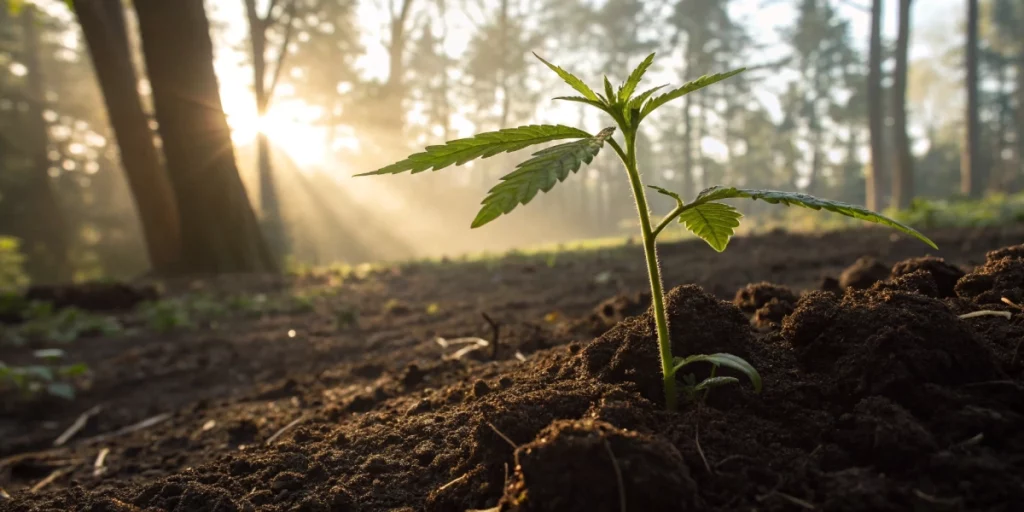
Move seedlings outdoors only after night temperatures stay above 10 °C. Cold soil can stunt roots and hamper growth. Also, wait until after the last spring frost date in your region. Monitor forecasts closely and plan accordingly.
Seedlings typically show two to four true leaves before transplant. At that point, roots fill starter pots enough to avoid root binding. Transplanting too late locks roots inside cramped containers, slowing uptake. Aim for calm, overcast days to cut stress. Transplants thrive when they face mild light and gentle breezes at first.
Transplanting and Early Care
Hardening off seedlings
Gradual exposure prepares seedlings for outdoor conditions. Start by placing pots in shade for a few hours on day one. Each day, increase sun exposure by one hour until plants handle full light.
Also introduce gentle wind and cooler nights to toughen stems. By day seven or eight, seedlings should tolerate bright sun, breeze, and nighttime temps above 10 °C. Hardening off reduces shock and supports vigorous growth once plants hit the ground.
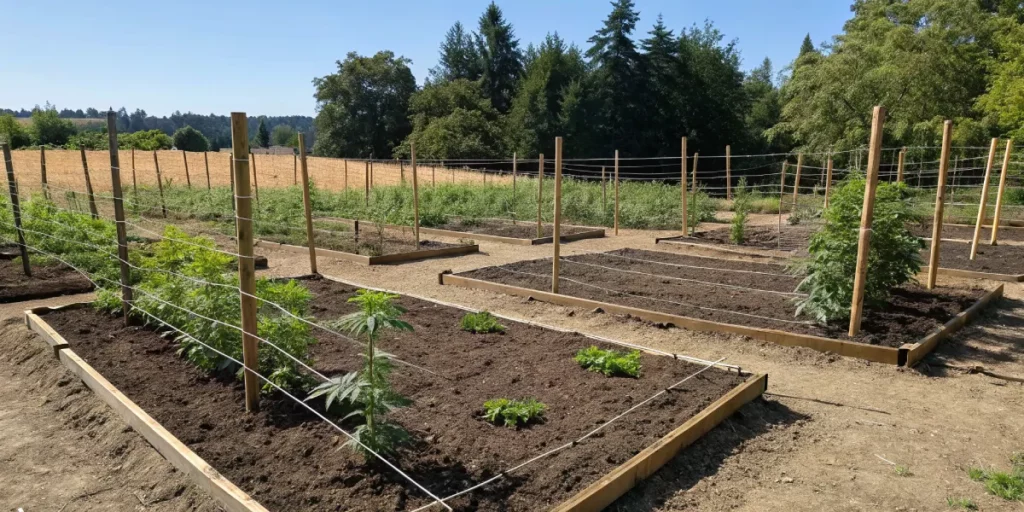
Spacing and planting depth
Give plants room to breathe by spacing them at least 60 to 90 cm apart. Good airflow cuts disease risk and boosts bud development. For bushy strains, allow wider spacing. For compact varieties, you can tighten rows slightly.
Dig holes twice the width of each root ball and just deep enough to set the top node at ground level. Planting too deep can smother stems and slow leaves from emerging. Once you backfill, firm soil gently and water lightly to settle roots.
Watering schedule
During the first week after transplant, water lightly every second day. This helps roots settle without drowning them. Keep soil evenly moist but never soggy. Overwatering risks oxygen deprivation, while underwatering stresses plants and slows growth.
After the first week, shift to deep watering twice per week. Adjust schedule based on rainfall, soil type, and heat spikes. Morning watering gives leaves time to dry and reduces mold risks. Using drip lines or soaker hoses delivers moisture straight to roots without wetting foliage.
Vegetative to Flowering Transition
Nutrient adjustments
As plants move into bloom, they need more phosphorus and potassium to fuel flower production. Begin reducing nitrogen levels gradually to prevent excessive leaf growth at the flower’s expense. Switch to a bloom-focused fertilizer or organic alternatives like bat guano.
Also supplement with calcium and magnesium during the transition. Watch for yellowing or spotting on lower leaves it often signals a magnesium shortfall. Correct deficiencies quickly to protect bud set and maintain plant health. Timely feeding supports fuller, denser flowers with richer aromas.
Training techniques (LST, topping)
Low-stress training (LST) spreads the canopy for even light distribution. Gently bend main stems and secure them with soft ties. This method boosts side branch growth and opens bud sites to more sun.
Topping cuts the main shoot above a node once plants reach four to six nodes. This redirects growth into multiple colas and promotes a bushier form. Always use sterilized scissors and perform topping early in the vegetative stage. Both techniques can work together to maximize yield without heavy stress.
Monitoring pests and diseases
Check plants every day for tiny bugs, webbing, or chewed leaves. Spider mites leave fine webs, while caterpillars cause larger holes. Remove pests by hand or apply insecticidal soap at dusk to avoid leaf burn.
Prevent fungal issues like powdery mildew by trimming lower leaves and improving airflow. Planting on gentle slopes or raised beds helps water drain away from roots. Organic neem oil sprays offer protection against both insects and fungi when applied correctly and sparingly.
Harvesting and Curing Outdoors
Harvest timing indicators
Use a handheld loupe to inspect trichomes on buds. Clear trichomes mean immaturity, while milky trichomes mark peak THC levels. Amber trichomes indicate a shift toward CBN, which creates more sedative effects.
Also observe pistils, the hairlike growths on flowers. When about 70–90 percent darken and curl inward, you’re approaching ideal harvest time. Aim to harvest on a dry, clear morning after dew evaporates to reduce mold risk during trimming. While focusing on harvesting, don’t forget that cannabis seed storage is equally important to preserve genetics for future grows under optimal conditions.
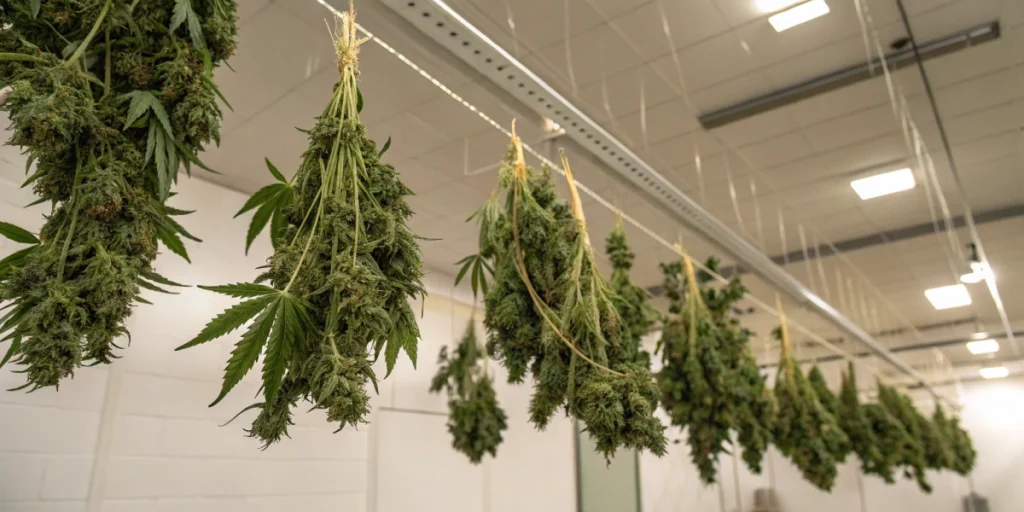
Drying methods
Hang trimmed branches upside down in a dark room with good ventilation. Keep temperatures between 18 and 21 °C and humidity around 50 percent. Proper air movement prevents mold and preserves terpenes.
Check branches after five days. If stems snap cleanly, buds have dried enough for curing. If stems still bend, let them hang another day or two. Controlled drying protects flavor and potency, setting the stage for lasting quality.
Proper curing process
Place dried buds loosely inside wide-mouth glass jars, filling only three-quarters full. Store jars in a cool, dark spot. Open lids, “burp” jars, daily for the first two weeks to release moisture and replenish oxygen.
After two weeks, reduce burping to once weekly. Aim for a final moisture content near 62 percent. Well-cured buds develop richer aromas, smoother smoke, and prolonged shelf life. With patience and care, you’ll achieve top-shelf results.
FAQs about how to grow cannabis from seed outdoors
When should I transplant seedlings outside?
You should transplant once nighttime lows stay above 10 °C and seedlings show two to four true leaves. First harden them off for at least seven days to build strength. Choose a calm, overcast day to move plants, which cuts shock and gives roots time to adjust.
How often should I water outdoor plants?
Water new transplants lightly every two days during week one. After that, switch to deep watering twice weekly. Always adapt your schedule to local rain, soil type, and high temperatures. Aim for moist but never waterlogged soil to support healthy roots.
What pests target outdoor cannabis?
Common threats include spider mites that spin fine webs, aphids that cluster on new growth, caterpillars that chew leaves, and thrips that leave silvery trails. Early detection and removal by hand, paired with targeted organic sprays, keep pest problems under control.