Summary of Paper Towel Germination
Setup and Moisture Control
First, you lay two clean paper towels on a flat tray or plate and moisten them with room-temperature water until they feel damp but not dripping. Then you place cannabis seeds evenly spaced on one towel and cover them with the second. You cover the setup with a lid or plastic bag to trap humidity. You check the towels twice a day, gently spraying water if you sense any dryness. That steady moisture level helps seeds break their shells without rotting.
Next, you pick a warm spot on a shelf or inside a closed cabinet where temperature stays between 70°F and 85°F. You avoid direct sunlight, which can dry towels too quickly or overheat seeds. Keep towels in a semi-dark environment, which mimics the soil’s filtered light underground. You replace towels if they feel slimy or develop mold, which you can spot early thanks to the open view. Consistent warmth and moisture let seeds sprout reliably.
Observing Roots Easily
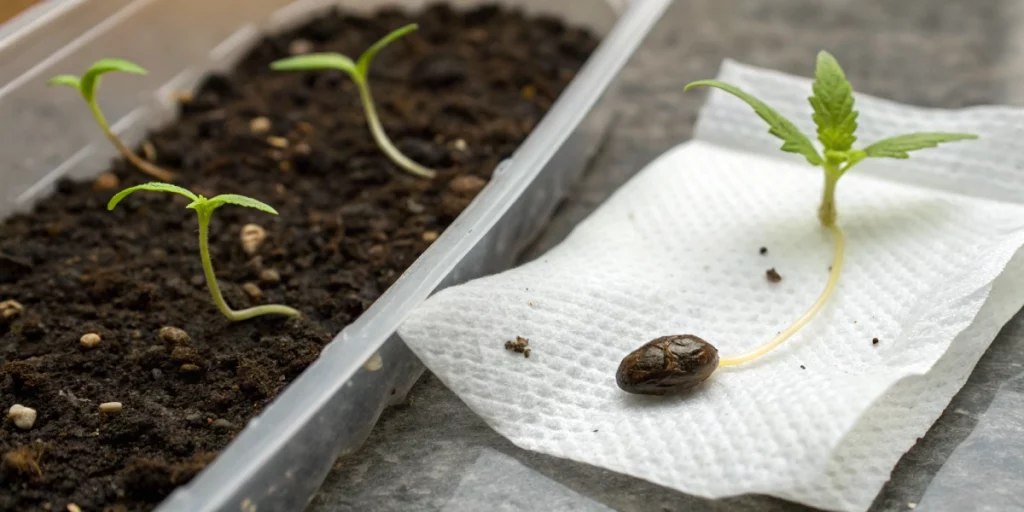
A clear benefit of the towel method lies in visibility: you can watch tiny taproots emerge through the thin paper. Once you spot a white root about a quarter-inch long, you know germination worked. You lift the top towel carefully and inspect the radicle without disturbing other seeds. This is also a great technique for those wondering how to tell if a cannabis seed is good, as viable seeds typically sprout within 24 to 72 hours. You document sprouting times in a log, noting that most seeds pop between that window. This monitoring offers insights you rarely get when seeds stay hidden under soil.
Also, you spot any seeds that fail to germinate or that sprout abnormally, letting you remove them before they risk contaminating others. You can sort healthy sprouts from weak ones in real time and plan how many to transplant. This clear view also helps you gauge overall seed viability quickly. You gain confidence when you see crisp white roots rather than guessing if soil seeds have emerged on schedule.
Transplant Timing
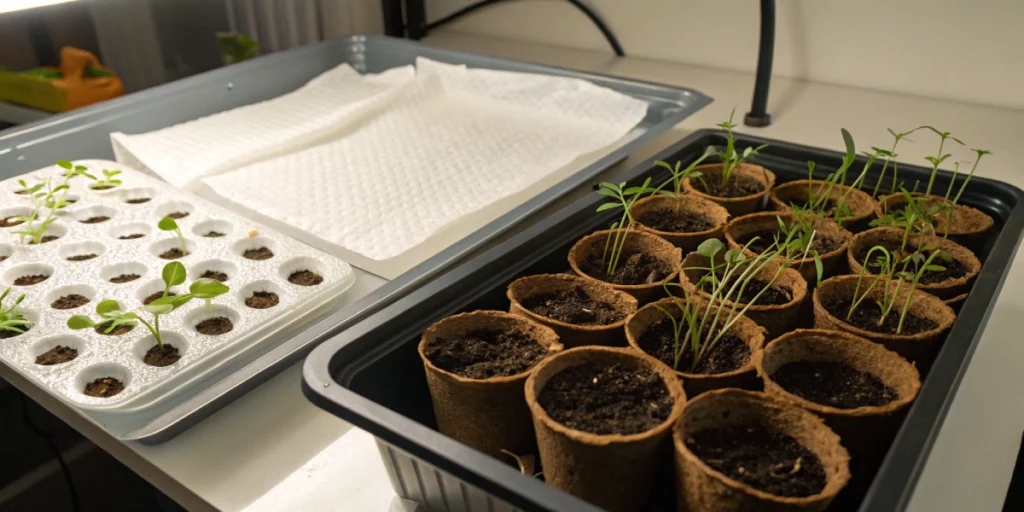
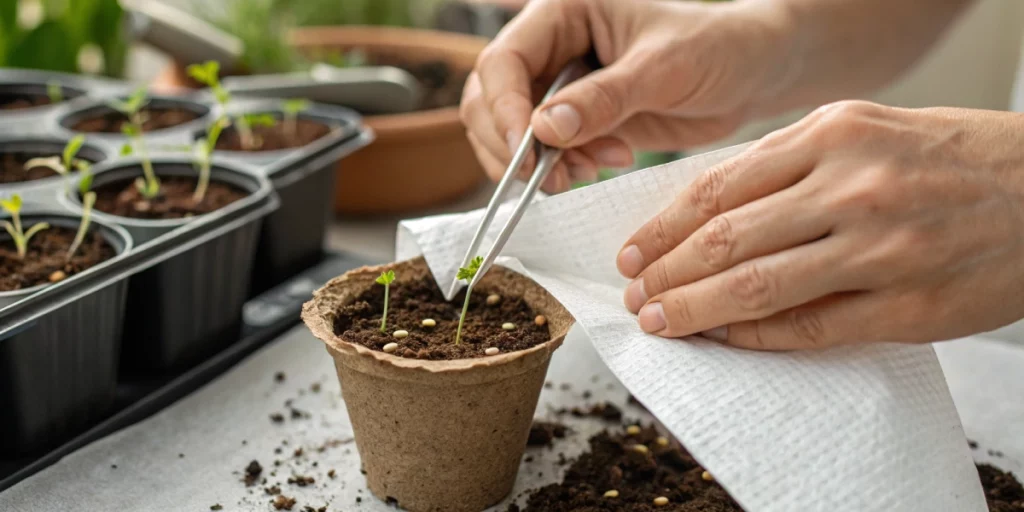
Once roots reach about half an inch, you prepare small pots filled with a moist seedling mix. You poke a shallow hole, place the root tip down, and cover lightly without compacting soil. Transplant seedlings within a maximum of five days after sprouting, because you avoid stressing longer-exposed roots. You water gently after setting seeds, ensuring soil makes contact with the radicle and no air pockets remain.
To reduce shock, you harden seedlings by setting them under gentle light for a few hours before moving to full grow lights. You check soil moisture daily and watch for secure anchoring. Prompt transplanting keeps roots fresh and reduces stretch, helping you start a strong vegetative stage. You transplant one seed at a time, working swiftly to avoid root desiccation and maintain overall vigor.
Summary of Soil Germination
Seed Depth and Medium Choice
When you germinate directly in soil, you select a light, airy medium such as a seedling-specific mix or a blend of peat and perlite. You fill small containers to within half an inch of the top, then poke holes about a quarter-inch deep. Place seeds point-down into each hole, cover them gently, and water to settle the soil without washing seeds away. You mark each location on a tray so you avoid accidental digging later.
Avoid dense potting soil, which can retain too much moisture and choke tender roots. You choose a sterile mix to reduce fungal risks. You use pH-balanced soil around 6.0 to 6.5 to match cannabis preferences. That range promotes enzyme activity and nutrient uptake once the seed breaks through. You water lightly, then cover trays with plastic wrap or humidity domes to hold moisture and warmth.
Nutrient Availability
Soil provides a natural reservoir of nutrients that supports seedlings immediately after sprouting. As roots grow, they tap into organic matter and starter fertilizers you mixed into the medium. This arrangement eliminates the need to feed for the first week, freeing you from dosing young plants. Healthy soil buffers pH swings, keeping nutrients available and reducing the risk of early nutrient burn from overfertilizing.
However, you must monitor nutrient levels closely: excess salts can build up in enclosed pots. You flush lightly if runoff shows high electrical conductivity, measured with a simple meter. You maintain gentle, balanced fertilization once seedlings develop true leaves. This approach encourages strong root branching and supports vigorous early growth without overwhelming fragile roots.
Environmental Control
You position trays under gentle grow lights set on a timer for 18 hours on and 6 off, which simulates spring conditions. Maintain ambient temperature between 70°F and 80°F and humidity around 70%. You use a spray bottle or misting tool to raise humidity in the first few days. Avoid direct air currents that can dry soil and stress seeds.
You check soil daily, watering only when the top inch feels almost dry. You slide a toothpick beside seeds to gauge moisture below the surface. This prevents waterlogging and keeps oxygen available to roots. You adjust your humidifier or fan speed to stabilize the microclimate inside your grow tent, ensuring consistent germination conditions without root suffocation.
Success Rates and Speed
Paper Towel Germination Speed
Seeds in a towel often sprout faster because the thin paper warms quickly and moisture stays evenly distributed. Most growers see roots within 24 to 48 hours under optimal conditions. You track each seed’s timing in a simple log to compare varieties. Quick sprouting lets you plan your next steps and estimate transplant schedules precisely.
That speed can vary slightly by genetics and seed age. Older seeds sometimes require up to 72 hours before the radicle appears. You can increase water temperature slightly, to around 80°F, to help stubborn seeds. You avoid soaking above 85°F to reduce thermal shock. This speed advantage streamlines your workflow and shortens the time between ordering seeds and starting vegetative growth.
Soil Germination Reliability
Germination in soil might take a bit longer—often three to seven days—but it offers reliable outcomes when done properly. You cover seeds just enough to simulate their natural environment. Soil retains warmth and moisture in a buffer around each seed, giving roots a stable zone to breach. You find that over 90% of fresh seeds sprout if planted correctly.
You avoid disturbing seeds after planting. Frequent digging to check progress can harm delicate sprouts or introduce disease. Instead, you trust your initial moisture setup and ambient controls. You record germination rates and adjust soil blends or humidity if you notice slow or uneven sprouting. With practice, soil germination matches paper towel reliability, especially with high-quality seeds.
Factors Affecting Both
Temperature, moisture, and seed quality remain the top factors for any germination method. You use fresh seeds stored in a cool, dark place to maximize viability. You avoid extremes: too cold delays sprouting, too warm risks rot or fungal growth. Use distilled or filtered water to avoid chlorine or heavy minerals, which can impair root development.
Light does not reach seeds underground, but you still control light cycles to prevent algae growth on towel surfaces or soil. You sterilize trays and tools between batches to minimize pathogens. Rotate trays if uneven warmth affects sprouting. You track humidity and temperature in a log, so you can replicate success or troubleshoot failures quickly.
Handling and Transplant Shock
Removing from Paper Towel
When roots reach half an inch, you gently peel back one towel layer until you see each radicle. Pick up the seed by holding the shell, not the root, using tweezers sterilized with alcohol. You avoid touching the radicle directly, which you can damage easily. This step often follows the Cannabis Seed in Water method, where seeds are soaked before germination. You work swiftly but carefully, doing one seed at a time to minimize drying.
Prepare your transplant cups first, ensuring soil is moist. You poke a small hole and drop in the root tip, then cover very lightly. You hold the seed shell between your fingers until the seed lodges in soil, then release it. Mist the soil surface lightly to settle it around roots. You cover cups with a humidity dome for the first 24 hours to reduce transplant stress.
Direct Soil Seedlings
For soil-germinated seeds, you remove any covering once you see the seed shell push through the soil. You open humidity domes gradually over a span of two days to help seedlings adapt. You lift the dome an inch the first day, then remove it entirely on day two to avoid sudden humidity drops that stunt growth.
Water seedlings at the soil edge rather than directly over the sprout. That keeps cotyledons dry and reduces fungal risk. You maintain consistent warmth and avoid temperature swings by placing trays under a controlled-heat mat. This steady environment helps roots remain stable as they expand into surrounding soil.
Minimizing Root Damage
You never tug on roots or seedlings. You always work on soft, moist soil or paper towels. Schedule transplanting at times when roots remain turgid, such as early morning, to reduce fragility. Keep paper towels damp throughout the process so roots don’t dry out while you work.
You handle all tools in a sterilized tray to contain loose soil or towel fragments. Clean tweezers and trays between seeds or batches to avoid cross-contamination. You perform transplanting under gentle light to calm seedlings, avoiding intense beams that can stress new roots. This careful handling lets seedlings bounce back quickly.
Best Practices for Each Method
Maintaining Cleanliness
You sanitize all surfaces, tools, and containers before each germination cycle. Use a mild bleach solution or 70% isopropyl alcohol on trays, tweezers, and humidity domes. You change towels and soil between batches to prevent mold or bacteria buildup. A clean setup reduces losses and ensures you can germinate multiple varieties safely.
Also, you wash hands or wear nitrile gloves when handling seeds to avoid transferring oils or contaminants. You label each container clearly so you avoid mix-ups. You keep your workspace tidy, removing debris and old towel fragments as soon as you finish. This organized method builds confidence and helps you repeat success consistently.
Controlling Temperature
You use a digital thermostat-controlled heat mat under trays to maintain steady warmth around seeds. You monitor air temperature with a small digital probe placed near seedlings or towels. Avoid placing trays near windows or vents that introduce cold drafts or hot spots. By keeping temperatures between 70°F and 80°F, you create a reliable germination environment.
Adjust your grow-room thermostat or space heater if ambient temperatures drift too far from the target. You avoid overshooting, since temperatures above 85°F can kill tender embryos. You check your mat daily and remove it once seedlings show true leaves, preventing leggy growth from excessive bottom heat.
Humidity Tips
You maintain relative humidity around 70% during the first few days for both methods. You use humidity domes or plastic wrap over soil cups, removing them gradually. For towel germination, you seal towels inside a plastic bag but open it once sprouting begins to prevent mold. You mist towels or soil surface lightly rather than soaking, which avoids waterlogging.
Use a hygrometer in your grow area to gauge humidity trends. You adjust with a small humidifier or dehumidifier to stay within range. You avoid fans blowing directly on towels or soil, which can dry them unevenly. Proper humidity control accelerates germination and yields robust seedlings.
FAQs about germinating cannabis seeds in paper towel vs soil
Which method yields faster sprouts?
Paper towel germination usually shows roots within 24 to 48 hours, while soil can take three to seven days. You see sprouting faster on towels because moisture and warmth reach seeds more quickly. Soil buffers temperature and moisture, so it takes longer for seeds to access ideal conditions. Both methods prove effective, but towel setups let you plan transplanting sooner and track progress more closely.
How do I avoid root damage?
Always handle radicles by touching the seed shell, not the root. Use sterilized tweezers or your fingertips on the shell to lower sprouts into soil. Keep towels and soil moist during transfer to avoid drying. Work on a clean, flat surface and move one seed at a time. Gentle lighting after transplant helps seeds adjust. These steps preserve delicate roots and support strong early root branching.
Can I start in paper then switch to soil?
Yes, you can begin with a towel setup and move sprouts to soil once radicles reach half an inch. Prepare soil cups ahead of time, then transfer each root gently into a pre-moistened hole. Cover lightly and mist the surface. Keep humidity high for 24 hours to minimize shock. This hybrid approach gives you fast germination visibility and the nutritional benefits of soil.