Visual Inspection Techniques
Color and Pattern Check
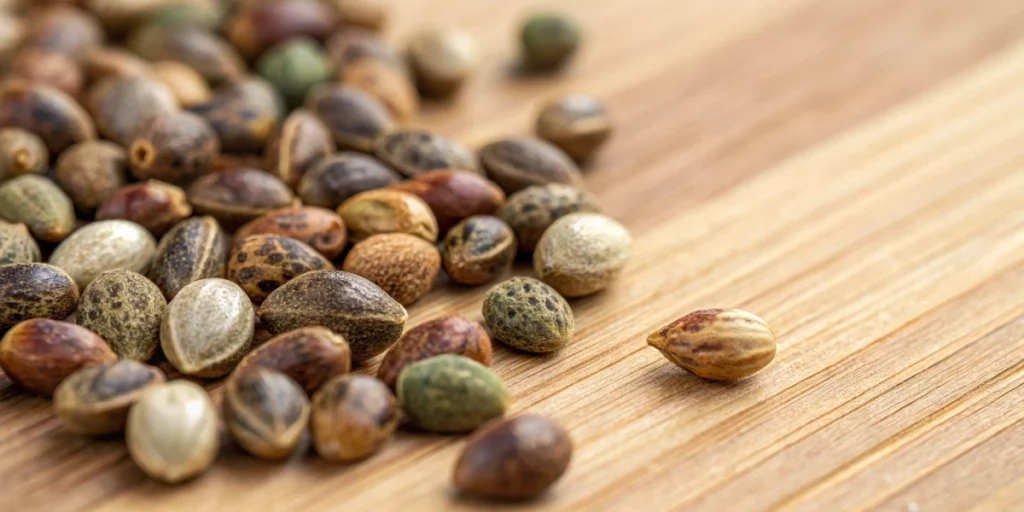
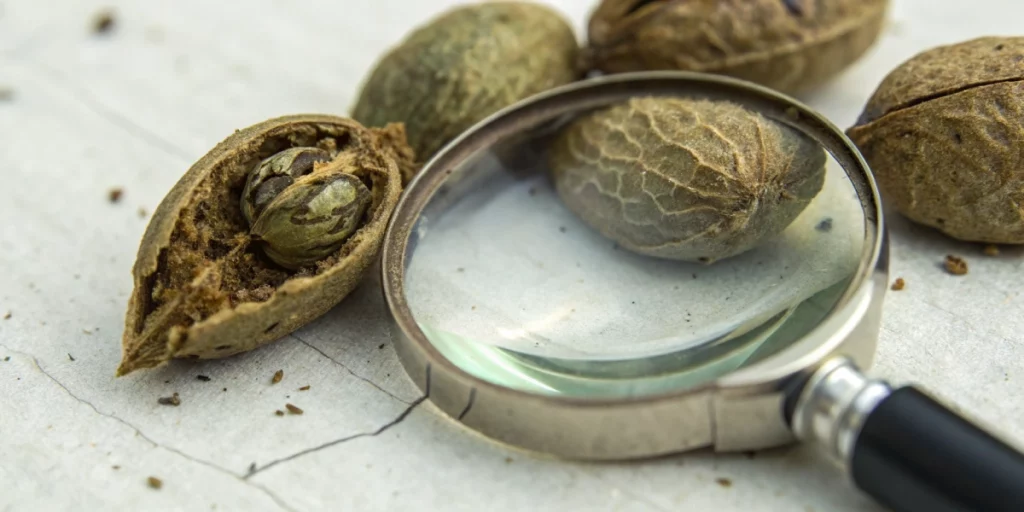
First, examine seed color and pattern carefully. Healthy seeds often display rich brown hues with darker stripes and speckles. These patterns form naturally on mature shells. Moreover, consistent markings can hint at genetic stability and seed quality. Avoid pale or greenish seeds, as they often indicate immaturity. Therefore, focus on contrasting bands and a firm shell to assess age and maturity quickly and effectively.
Next, look for surface texture and sheen during inspection. A glossy finish suggests a robust protective coating that guards the embryo inside. Also, subtle variations in tone reveal shell thickness and integrity. When learning how to tell if a cannabis seed is good, pay attention to uniformity in pattern distribution. Consistent speckling without blemishes often correlates with higher germination rates. Consequently, invest time in visual assessment to weed out weak candidates before any tests.
Hardness Test
Begin by applying gentle pressure between thumb and forefinger. Good seeds resist light squeezing and retain their shape. If a seed yields too easily, it may harbor a weak embryo or low moisture content. Always handle seeds delicately to avoid damaging healthy ones. This quick tactile check complements color and pattern inspection, helping you refine your selection and boost your success rate before planting.
Next, employ a soft yet firm pinch to compare multiple seeds. Differences in resistance reveal variations in shell thickness and embryo protection. Make mental notes of seeds that feel resilient and dismiss those that crack or collapse under minimal force. This hands-on approach adds a practical dimension to visual cues. Moreover, you sharpen your ability to spot potential winners by coupling feel with color observations. These techniques are useful whether you’re germinating cannabis seeds in paper towel vs soil, helping you refine choices early in the process.
Size and Shape Indicators
Assess seed size and symmetry to gauge maturity levels. Vigorous seeds often measure around 2 to 3 millimeters in width and display a well-rounded profile. Irregularly shaped seeds may house malformed embryos or lack vital nutrients. Therefore, favor plump, symmetrical specimens for pre-planting tests and eventual cultivation. This simple screen saves you effort by narrowing the field to the most promising candidates.
Furthermore, compare seeds side-by-side to detect notable outliers. Larger seeds generally store more energy reserves, which aids initial root development. Conversely, tiny seeds may struggle during germination, leading to uneven sprouting. By evaluating size differences early on, you set realistic expectations and plan for contingencies. This proactive review empowers you to maximize germination rates and minimize resource waste.
Float Test Method
Soaking in Water
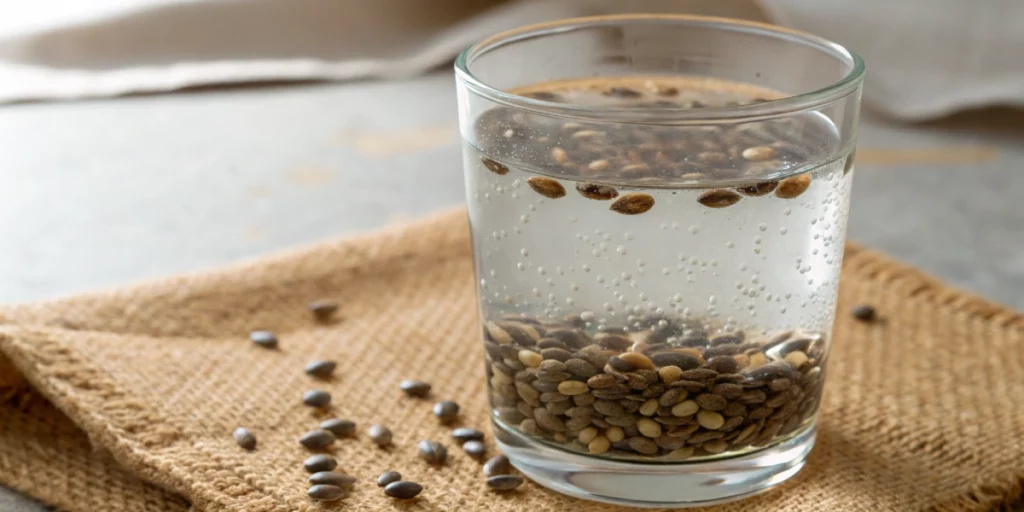
Start by placing seeds in a glass of room-temperature water. Allow them to soak for six to twelve hours. As seeds absorb moisture, viable ones often sink due to internal density. Floaters might lack sufficient reserves or contain air pockets that compromise embryo health. However, soaking also removes dust or debris, improving visibility for subsequent checks.
Meanwhile, monitor water conditions for temperature consistency. Avoid sudden changes that could stress seeds and skew results. Stir gently after a few hours to dislodge any particles clinging to shells. Then observe which seeds rest at the bottom. Keep a log of how long each seed takes to sink or remain afloat. This record helps refine your assessment and informs your next steps accurately.
Interpreting Sink vs. Float
Receivers at the bottom typically indicate healthy internal structure. Dense seeds contain developed embryos ready to sprout roots. Conversely, floaters often represent underdeveloped or dehydrated specimens. Yet, some full seeds may float initially before absorbing enough water to submerge. Therefore, avoid instant judgments. Instead, note initial floaters for retesting after extended soak periods.
Also, recognize that float test results depend on several variables. Water temperature, seed age, and shell condition all influence buoyancy. Always cross-reference float observations with visual inspection and hardness data. By combining these methods, you build confidence in your selections. Ultimately, integrating multiple criteria yields more reliable forecasts for germination success.
Limitations of Float Test
Keep in mind that float testing alone cannot guarantee viability. While sinking often correlates with healthy seeds, exceptions exist. Some mature seeds possess air pockets, causing them to float despite full embryos inside. Similarly, overly dry seeds might sink but lack the moisture needed for consistent germination. Therefore, treat float results as one piece of a larger puzzle when deciding which seeds to plant.
Moreover, test results can vary between seed batches and strains. Genetics play a significant part in shell density and moisture retention. Consequently, rely on multiple components of your selection strategy. If seeds sink yet fail to germinate, revisit hardness and crack tests. This iterative approach helps you learn strain-specific traits and adjust techniques accordingly over time.
Crack Test for Viability
Applying Gentle Pressure
To perform a crack test, use your fingernail to apply light pressure on the seed coat. Crack it just enough to reveal the inner contents. This procedure demands care, as excessive force can damage the embryo irreparably. Aim to split the shell along its natural seam without crushing the embryo inside. By doing so, you gain direct insight into embryo health.
Next, work over a clean surface to catch any fragments. After cracking, remove shell pieces carefully to expose the inner tissue. If you see a firm, white embryo center, the seed likely holds a viable sprout. Alternatively, a dark or mushy core signals decay or disease. With this method, you confirm or rule out candidates that passed earlier screens and focus on the healthiest specimens for germination.
Observing Inner Color
Inspect the embryo color immediately after cracking the shell. A bright white or cream tone indicates a robust embryo full of life. This hue signals that the seed carries active cells ready to divide and form roots. Conversely, grayish or brownish discoloration points to fungal infection or rot inside. By recognizing these color cues, you avoid planting seeds doomed to fail and save time for high-potential specimens. If you’re also wondering how long do cannabis seeds take to germinate, healthy seeds typically sprout within 1 to 7 days under optimal conditions.
Furthermore, inspect multiple cracked seeds to establish a baseline for healthy embryos. General consistency in color and texture reinforces confidence in your overall batch quality. If too many seeds show unhealthy tones, consider sourcing fresh stock or adjusting storage conditions. This hands-on approach helps you refine seed selection and informs adjustments to your procurement strategy.
Ethical Considerations
Keep in mind that crack testing destroys the seed. Use this method only when you have extra seeds available or when other tests produce inconclusive results. Never apply it to seeds you plan to plant immediately. Instead, reserve cracking for quality control on a small subset before committing the rest to soil or germination trays.
Moreover, apply crack testing responsibly and avoid waste. If resources run low, prioritize non-destructive tests first. Then, only crack shells of clearly questionable candidates. By balancing ethical use with your need for accuracy, you protect valuable genetic material and maintain a sustainable cultivation practice over the long run.
Germination Trials
Small Batch Pre-Test
Before committing your entire collection, conduct a small batch trial of five to ten seeds. Place them in controlled conditions and record germination rates across tests. This step helps you evaluate overall seed lot quality without risking all resources. Additionally, pay attention to timing, root vigor, and any abnormalities in sprouting.
Next, analyze your trial data to guide large-scale planting. If you observe a high success rate, you can proceed with confidence. However, if germination stalls or yields weak seedlings, rethink storage methods, seed sourcing, or testing techniques. By starting small, you minimize potential losses and refine your process through practical feedback loops.
Paper Towel Method
Begin by moistening paper towels with clean water. Lay seeds between two moist sheets and fold them gently. Then, seal the bundle inside a plastic bag to maintain humidity. Keep the bag in a warm, dark spot around 21–24°C to encourage sprout development. Check daily for root emergence and replenish moisture as needed.
Furthermore, transfer seeds to soil cups immediately after roots reach 1–2 cm. Delaying transfer can damage delicate radicles. Use a small tool to lift seedlings carefully and plant with roots pointing downward. This method offers clear visibility of sprouting and helps you observe early growth patterns, making it easier to identify viable seeds quickly.
Soil Starter Cups
Fill biodegradable cups with a light, well-draining mix. Make a small hole about 1 cm deep and gently insert the sprouted seed with its root facing down. Cover lightly with soil and mist the surface to settle the mix around the seed. Cups allow for easy monitoring and transplantation without disturbing root systems.
Also, label each cup clearly to track strain, date, and seed number. Maintaining precise records helps you compare germination speed and seedling vigor across trials. Once seedlings develop true leaves, consider feeding them with a light nutrient solution. At this stage, robust seedlings indicate that your selection methods accurately predicted viability.
When to Discard a Seed
Mold or Rot Signs
Discard any seed showing fuzzy or slimy growth on the shell. Mold often appears as white, green, or black patches that spread rapidly in humid environments. Rot signals internal decay and increases the risk of contaminating other seeds. If you notice these warning signs, isolate and dispose of affected seeds immediately to protect the rest of your collection.
Moreover, inspect stored seeds regularly for humidity control. Adjust desiccant packs or storage conditions if mold emerges frequently. Preventative measures can reduce waste and maintain batch quality. By eliminating diseased seeds early, you safeguard viable specimens and ensure healthier germination trials down the line.
Persistent Floaters
Seeds that float consistently after repeated soak tests rarely sprout. Even if they later sink, internal structures often remain underdeveloped. Rather than investing time and effort in floating seeds, remove them from your germination lineup. This decisive action frees up resources for seeds with higher success probabilities and minimizes frustration in the growing process.
Furthermore, document float test outcomes over multiple batches. Patterns of persistent floaters could indicate poor seed stock or improper handling. Use this information to refine sourcing decisions and improve storage techniques. By tracking long-term trends, you build a more reliable cultivation strategy and focus on seeds that perform reliably.
Cracked or Damaged Coats
Avoid planting any seed with a broken or eroded shell. Cracks expose the embryo to pathogens, reduce moisture retention, and compromise germination potential. Even minor shell damage can disrupt root emergence. Inspect each seed carefully during earlier tests and discard any with visible structural defects.
Additionally, record the frequency of damaged seeds to identify problem sources. Consistent shell damage across a batch suggests issues during harvesting or packaging. Address these factors by choosing reputable suppliers and requesting better handling. By discarding damaged seeds, you preserve optimal growing conditions and boost overall success rates.
FAQs about how to tell if a cannabis seed is good
Can I trust the float test alone?
The float test offers quick insights but cannot guarantee sprouting success. Always pair it with visual inspection and tactile checks for a more accurate assessment. Combining methods reduces false positives and helps you invest in seeds most likely to germinate.
Do older seeds work?
Older seeds may lose moisture and vigor over time, leading to lower germination rates. Store seeds in cool, dry conditions to extend viability. Conduct small batch trials to measure success rates before large-scale planting.
How many seeds should I test?
Test at least five to ten seeds in a small batch trial to gauge overall quality. This sample size provides reliable data on germination rates and helps you decide whether to proceed with larger plantings.